Background
This document describes processes and best practices for an
end-to-end continuous integration and deployment of an Angular Application.
Assumptions:
- Node.js, npm and angular-cli are
installed on dev computer
- Angular is installed on your
computer: npm install -g @angular/cli
- GIT is installed on the dev
computer
- Developer has access to an
account on Azure DevOps at http://dev.azure.com.
- Developer has an account on
Azure (http://portal.azure.com)
Note: It is best if both your DevOps & Azure accounts
use the same Microsoft account credentials.
Creating a simple Angular CLI app on dev computer:
Create an angular app using angular-cli:
ng new ngware
cd ngware
ng serve
Web.config file
For Angular’s routing to work smoothly on Azure, it is
necessary to have a web.config
file. Therefore, stop the server and create a web.config
file in the src directory and
add to it the following markup:
<?xml
version="1.0"?>
<configuration>
<system.webServer>
<rewrite>
<rules>
<rule name="Angular
Routes" stopProcessing="true">
<match url=".*" />
<conditions
logicalGrouping="MatchAll">
<add
input="{REQUEST_FILENAME}" matchType="IsFile"
negate="true" />
<add
input="{REQUEST_FILENAME}" matchType="IsDirectory"
negate="true" />
<add
input="{REQUEST_URI}" pattern="^/(api)"
negate="true" />
</conditions>
<action type="Rewrite"
url="/" />
</rule>
</rules>
</rewrite>
</system.webServer>
</configuration>
To enable the web.config
file to be packaged with production code, edit the angular.json file and add ‘web.config’ to assets, as
follows:
. . . . .
"assets": [
"src/assets",
"src/favicon.ico",
"src/web.config"
],
. . . . .
Build app
Build the app using the following command:
ng build --prod
This produces the production version of the application in
the dist/ngware
folder. To test the trans-piled version of the app, start the server then point
your browser to http://localhost:4200/dist/ngware. You should see
the same app as before, this time it is being served from production code.
Azure DevOps
Azure-DevOps is Microsoft’s DevOps platform. Login into Azure-DevOps
and create a new project. In my case I created a new project named
ngware.
Once the project is created in Azure-DevOps, it is time for
us to push our code using Git. Copy the address of the Git repo so that we can
use it to sync our code. Click on
Repos
on the left-side then note the Git commands.
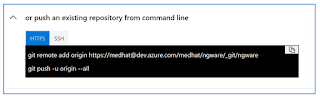
Back at your computer, stop the server and run the following
commands from your command prompt to push the code into your projects Azure-DevOps
git repository:
git init
git add .
git commit -m
"first commit"
git remote add
origin {your-git-url-here}
git push -u
origin master
You may be asked to login into Azure-DevOps.
Once your code has uploaded to Azure-DevOps,
Click on Repos on the left-side in Azure-DevOps
to verify that your code has indeed uploaded to Azure-DevOps:
The code will look like this:

Building the code in Azure-DevOps
The same steps that we carried out to build our app in the
development computer will be translated into tasks in Azure-DevOps. To build
our app, choose: Pipelines >>
Builds on the left side:
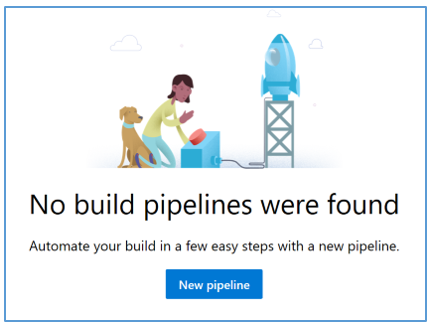
Click on the blue
“New
pipeline” button:

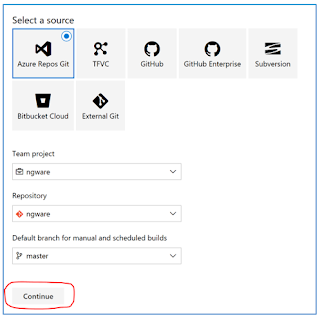
On the “
Select a source”
dialog, accept the defaults and click on the
Continue button at the bottom:
On the “Select a template” dialog, scroll to the very bottom
and click on “Empty pipeline” then click on the blue
Apply button.
Give the build a proper name (like: Build Angular App) then
select “Hosted” under Agent pool:
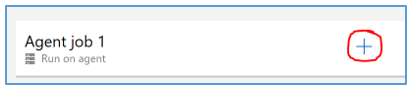
Next, click the “
+” to add a task:
In the filter, enter
npm. Highlight the
npm
task then click on
Add. Add the following five tasks:
Node Tool Installer
|
npm
|
npm
|
Archive Files
|
Publish Build Artifacts
|
This is what the series of tasks
will look like:
Customize each task as follows:
1) Use Node 6.x
Display name
|
|
Version Spec
|
10.x
|
|
2) npm install
This task runs the command “npm
install” to install node packages. You do not need to make any changes
to this task as it does exactly what we want it to do.
|
|

3) npm install
This task will run “npm run build” command, which
is essentially a script in our package.json file:
"scripts": {
"ng": "ng",
"start": "ng serve",
"build": "ng build",
"test": "ng test",
"lint": "ng lint",
"e2e": "ng e2e"
},
Configure the npm task like this:
Display name
|
Build angular
app
|
Command
|
custom
|
Command and
arguments
|
Run build
--prod
|
|
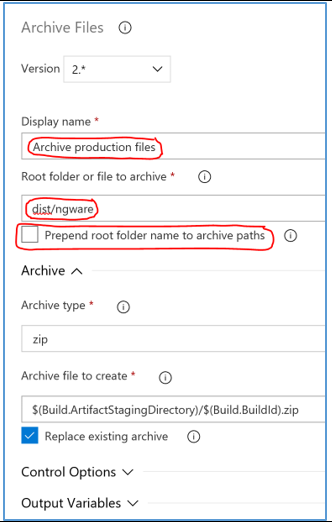
4) Archive $(Build.BinariesDirectory)
This task is responsible for creating a zip file containing
all the files, created by the previous task, that reside in the dist/ngware directory.
Display name
|
Archive production files
|
Root folder or file to archive
|
dist/ngware
|
Prepend root folder name to archive paths
|
Uncheck
|
|
Note: Copy the value of the ‘Archive file to create’ into the clipboard because we will be using
it in the next task.
5) Publish Artifact:
drop
Next, we will publish the zip we created in the last step.
Path to publish
|
$(Build.ArtifactStagingDirectory)/$(Build.BuildId).zip
Paste this from the value you copied into the clipboard in the
previous task.
|
|
|
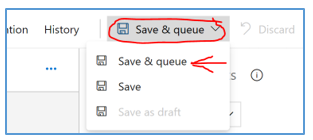
That’s it for all our steps. Let’s
run the build! Click on
Save & Queue
>>
Save & Queue
in the top menu.
On the next dialog, click on “Save & Queue”
Click on the build number link in the in the top left-side
corner.
This will allow you to see progress of the build. When the
build is completed without any errors, you will see a green “
Build
Succeeded” messages as shown below:
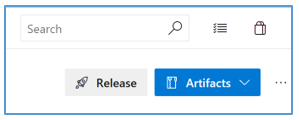
Artifacts
You can see the package that was created by selecting the blue
Artifacts button on the top-right.
Download the
drop folder to see what was
created inside that directory.
Click on the three
dots beside drop to download the zip file.
The
drop.zip file
contains another numbered zip file that has the production files.
Continuous Integration
We will need to setup continuous integration so that
whenever new code is committed, the build process is automatically kicked off. In
the navigation at the top of the page, click on the build as shown:
Click “
Edit” beside the bluer
Queue button:
On the next page, click on “
Triggers”:
Enable continuous integration by enabling the switch:
Click:
Save & Queue >>
Save:
On the next dialog, add a comment then click
Save:
Creating Release
Log into Azure and create a web app.
Back in Azure-DevOps, create a release definition by
clicking on
Pipelines
>> Releases on the left
side. Click on the blue “New pipeline” button in the middle of the page.
In the sliding “Select a template” dialog on the right-side,
select “Azure App Service deployment” and click on the blue
Apply button.
Click on the
X in
the corner of the right-side dialog to close it.
Select the first “Add an artifact” box.
On the right-side dialog, select the build we just created
for “Source (build pipeline)”. Accept all other default values. Then click on
the
Add button.
In order to enable continuous deployment, click on the
thunderbolt icon in the top-right corner of the first box.
A dialog opens on the right side. Enable the “Continuous
deployment trigger”.
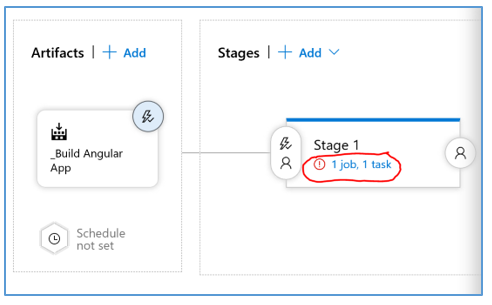
Click on the second box’s “1 job 1 task” link.
Select your Azure subscription then click on the blue
Authorize button.
NOTE: You may need to enable
popup windows for azure.com in your browser.
Once you are authorized with
azure.com, select
App type
to be
Web App. Under
App service name, choose the web app
that you created earlier on the Azure portal. The final state of the dialog
would look similar top the following:
You can enter a comment in the following dialog then click
on
OK.
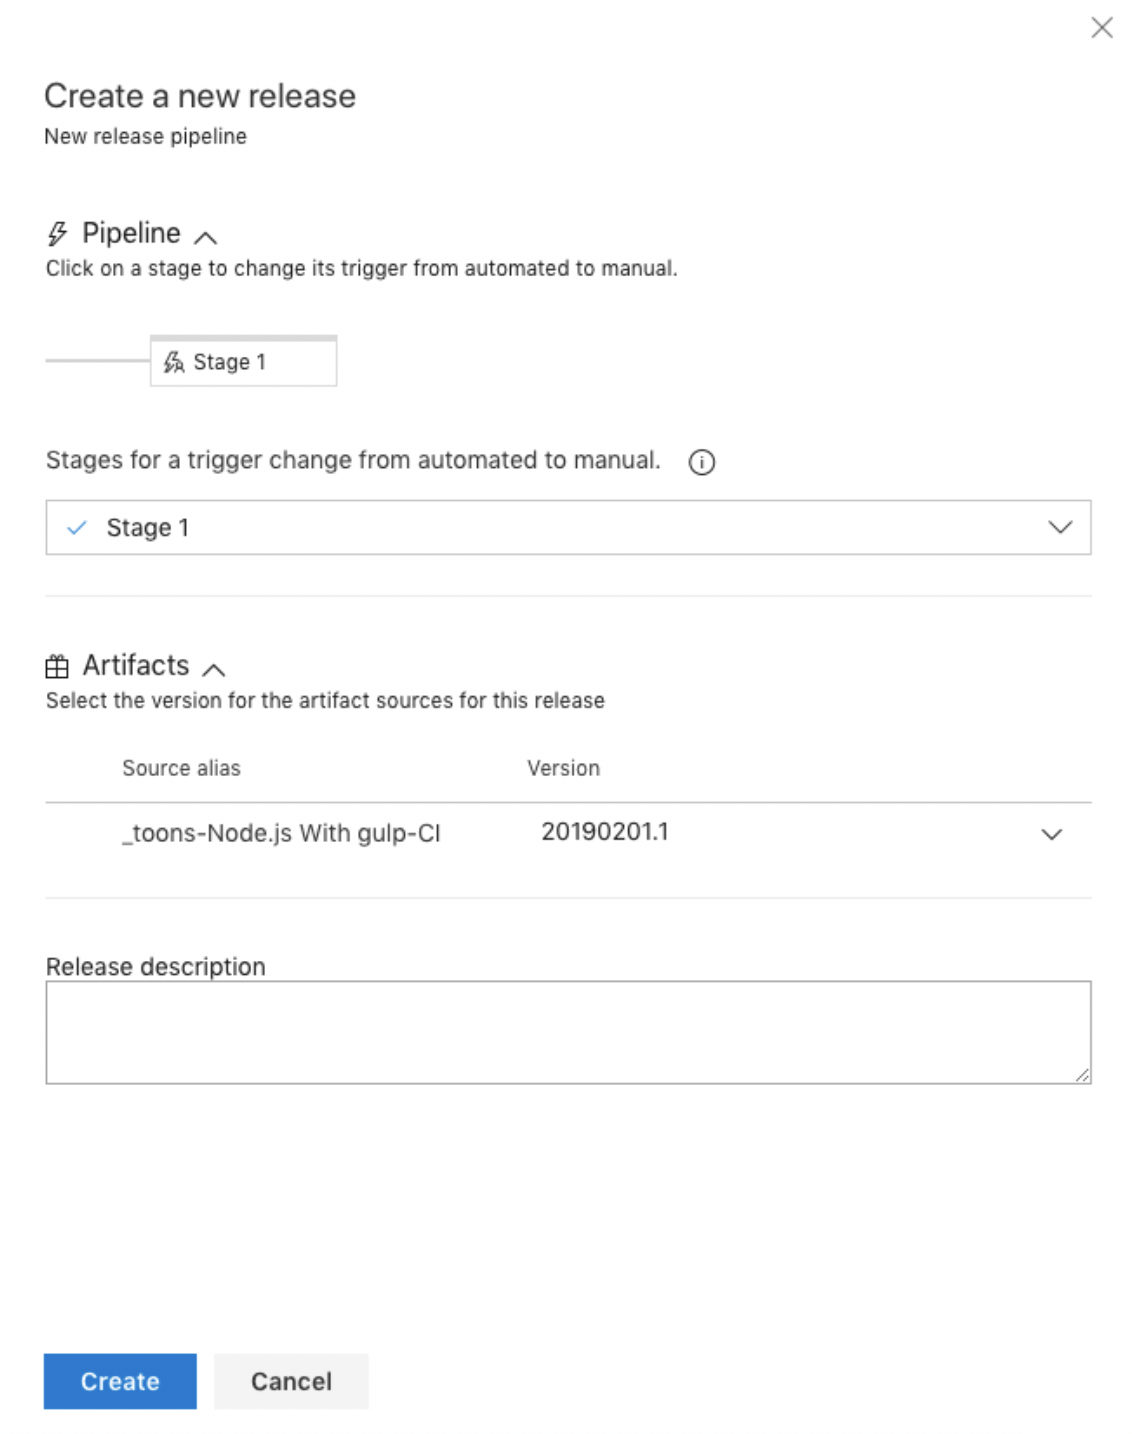
When the “+ Release” link at the top lights up, click on
Release >>
Create a release.
Choose
the stage and build version on the next dialog then click on Create.
The release process is about to start. Click on the release
link on the top side.
When you click on the second box, you will see a
Deploy button. Click on the
Deploy button to start the deployment.
Click on the
Deploy
button again when you experience the following dialog.
Wait until you see an “In progress” message in that box. Click
on it when it appears to see progress of the deployment. If all goes well, all
tasks will show succeeded in green.
What is left is for us to prove that the application has
indeed deployed to azure. In my case, I pointed my browser to
http://ngware.azurewebsites.net
and hit the following website.
Make a change to your source code, like change the
background color, and push your code to the Git repo on Azure-DevOps. The build
and release processes will be automatically triggered and you should find your
changes deployed in less than five minutes.