You have a self contained web app that runs in a docker container and want to deploy it on a cloud service. I will show you how easy it is to deploy your docker image to Azure App Services. I will, as an example use a simple Node.js Express web app in this demonstration.
Source code: https://github.com/medhatelmasry/xpress-sqlite-chart-docker.git
Assumptions:
- Node.js and NPM are installed on your computer
- Docker Desktop is installed on your computer
- You have an Azure subscription
- Git is installed on your computer
- You have a docker hub account
Getting started
In a previous article, I created a Node.js Express app that persists data in SQLite. I will use this sample app i this article.
Clone the Node.js Express sample web app on GitHub by running the following command from a working directory in a terminal window on your computer:
git clone https://github.com/medhatelmasry/xpress-sqlite-chart
Change into the newly cloned directory with:
cd xpress-sqlite-chart
The application is a simple Node.js Express application that uses SQLite as a database. This will come as a surprise to most Node.js developers because MongoDB is the most commonly used database with Node.js. The reason I used SQLite in this case is because it does not need a database server and can run independently in a docker container. To experience what this web app does, run the following commands in the same folder:
npm installnpm start
This will display in the console:
Server running on port 3000Connected to the SQLite database.
Point your browser to http://localhost:3000/api/students and you will see the following output:

You can view a pie-chart summarizing the above information at http://localhost:3000/chart.html as shown below:

This data is being dynamically read from a SQLite database file named school.db located in the root of the web app.
Building our docker image
Stop the Node.js app by hitting CTRL C on the keyboard.
Let us build a web app image and deploy it to docker hub.
We do not need to copy folder node_modules. Also, we should not copy school.db into the image because it is automatically created when the web app starts. Therefore, add a text file named .dockerignore with the following content:
school.dbnode_modules
Add another text file named Dockerfile containing the instructions for creating our Docker image:
FROM node:12.18.1WORKDIR /appCOPY ["package.json", "package-lock.json*", "./"]RUN npm installCOPY . .EXPOSE 3000CMD [ "npm", "start" ]
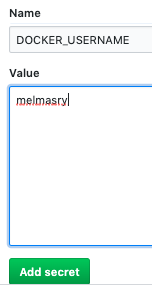
I am hereby using snoopy a an example docker-hub username. Be sure to replace every instance of snoopy with your docker-hub user name.
The command to build a Docker image named bingo version 1.0.0 is:
docker build --tag snoopy/bingo:1.0.0 .
Note: Make sure you run the above command in the same folder as Dockerfile.
To ensure that you created an image named asp-bingo, type the following command:
docker images
You will see your newly created image in a list of Docker images:
Let us run the image in a container to make sure that it works as expected:
docker run -d -p 8888:3000 --name bingo snoopy/bingo:1.0.0
Point your browser to http://localhost:8888/api/students and you should see student JSON data. This confirms to us that our image and container work. Stop and remove the container with the following command:
docker rm -f bingo
docker login --username=snoopy
You will be prompted for your password. If all goes well. you will see the following output:
Login Succeeded
Logging in with your password grants your terminal complete access to your account. For better security, log in with a limited-privilege personal access token. Learn more at https://docs.docker.com/go/access-tokens/
We now need to push our image to docker-hub with:
docker push snoopy/bingo:1.0.0
The output will be similar to this:
The push refers to repository [docker.io/snoopy/bingo]
c8b45ef9554a: Pushed
e98b0d58d677: Pushed
5ffdad44213c: Pushed
db7819aa4316: Pushed
6be3db87bf2b: Mounted from library/node
640ef100e22c: Mounted from library/node
f5efc9f25bb5: Mounted from library/node
6c4912a00957: Mounted from library/node
47b172bd2907: Mounted from library/node
38a97d5a6ebd: Mounted from library/node
bfdc94824303: Mounted from library/node
33c19d48a4f3: Mounted from library/node
db4e0d4c0410: Mounted from library/node
1.0.0: digest: sha256:32d22b3fd5f66a8c8e11bc3566b330e8085edb809f78fa7ca04f8e27bcab3ed6 size: 3051
If you login into https://hub.docker.com, you will find that the newly pushed image is sitting in your repository.
Deploying solution to Azure App Services
Login into Azure by going to the portal at https://portal.azure.com. Click on "App Services" on the left-side hamburger menu:

Click on Create:

Add a new resource group and complete the remaining settings as shown below:

The most important setting you need for Publish is "Docker Container".
Click on the "Next : Docker >" button. On the next screen choose:
Options: Single ContainerImage Source: Docker HubAccess Type: PublicImage and tag: enter the fully qualified name of your docker imageStartup Command: leave blank


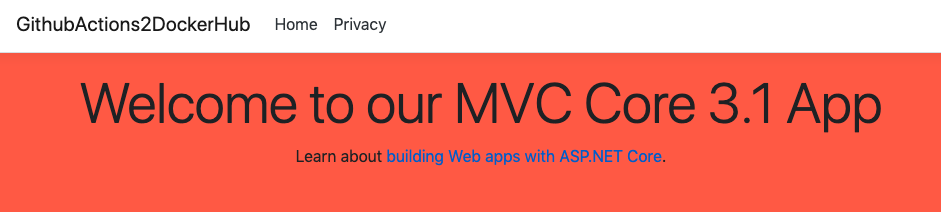
Click the link on the top right-side as shown above. The web app should show in the browser.

If you want to see something more interesting, point to page /chart.html:

I trust that you have a good appreciation of how easy it is to deploy a containerized web app to the Azure App Services.