Localizing your ASP.NET 6.0 MVC web app involves making it work in more than one language. This gives you access to more worldwide markets. In this article, I will show you some technical approaches in achieving this objective.
Source code : https://github.com/medhatelmasry/GlobalWeb6.git
Prerequisites
- .NET 6.0
- Visual Studio Code
- You have familiarity with ASP.NET MVC
- Install the following extension to your Visual Studio Code:

.resx files
Files with .resx extensions play a leading role in localizing ASP.NET applications. They are essentially XML documents that rely on placement and a consistent naming convention. Here is what a typical .resx file may look like:
<?xml version="1.0" encoding="utf-8"?>
<root>
<resheader name="resmimetype">
<value>text/microsoft-resx</value>
</resheader>
<resheader name="version">
<resheader name="reader">
<value>2.0</value>
</resheader>
<value>System.Resources.ResXResourceReader, System.Windows.Forms, Version=4.0.0.0, Culture=neutral, PublicKeyToken=b77a5c561934e089</value>
</resheader>
<resheader name="writer">
<value>System.Resources.ResXResourceWriter, System.Windows.Forms, Version=4.0.0.0, Culture=neutral, PublicKeyToken=b77a5c561934e089</value>
</resheader>
<data name="Press Release" xml:space="preserve">
<value>Communiqué de presse</value>
</data>
<data name="Welcome" xml:space="preserve">
<value>Bienvenue</value>
</data>
</root>
Only the highlighted text above is customized to target a specific language. Note the following localization as specified in the above .resx file pertaining to english to french localization:
| English Key | French Translation |
|---|---|
| Press Release | Communiqué de presse |
| Welcome | Bienvenue |
Getting Started
We will first create a simple ASP.NET 6.0 MVC app. This is accomplished by entering the following commands from within a terminal window is a working directory:
dotnet new mvc -o GlobalWebcd GlobalWeb
Create the following additional directories inside your application:
Resources||----------- Controllers||----------- Views| || || ----------- Home||----------- Models
Add the following to Program.cs right before var app = builder.Build():
builder.Services.AddLocalization(options => options.ResourcesPath = "Resources");
Also, add the following to Program.cs right after var app = builder.Build():
var supportedCultures = new[] {
"en","en-US","fr","fr-FR","ar", "ko"
};
var localizationOptions = new RequestLocalizationOptions().SetDefaultCulture(supportedCultures[1])
.AddSupportedCultures(supportedCultures)
.AddSupportedUICultures(supportedCultures);
localizationOptions.ApplyCurrentCultureToResponseHeaders = true;
app.UseRequestLocalization(localizationOptions);
The first statement above declares that we will be supporting the following languages and cultures:
| en | English language |
| en-US | English language, US culture |
| fr | French language |
| fr-FR | French language, France culture |
| ar | Arabic language |
| ko | Korean language |
The second statement declares en-US as the default culture and adds support for the various cultures to our app. The final statements adds localization support to our web app.
Using localization in your controller classes
Whenever you want to access a localized string in your services or controllers, you can inject an IStringLocalizer<T> and use its indexer property. Add the following instance variable to the HomeController class:
private readonly IStringLocalizer<HomeController> _localizer;
Inject an IStringLocalizer<T> into a HomeController constructor. Your HomeController constructor will look like this:
public HomeController(ILogger<HomeController> logger,IStringLocalizer<HomeController> localizer){_logger = logger;_localizer = localizer;}
Change the Index() action method in the HomeController so it looks like this:
public IActionResult Index() {ViewData["pressRelease"] = _localizer["Press Release"];ViewData["welcome"] = _localizer.GetString("Welcome").Value ?? "";return View();}
Replace Views/Home/Index.cshtml with:
@{ViewData["Title"] = "Home Page";}<div class="text-center"><h1 class="display-4">@ViewData["welcome"]</h1><p>@ViewData["pressRelease"]</p></div>
If we are currently using the fr culture, then the localizer will look for the following resource file:
Resources/Controllers/HomeController.fr.resx
In Visual Studio Code, create the above file. With the .resx extension installed in Visual Studio Code, your editor will immediately look like this:

Add the following name / value pairs:
| Press Release | Communiqué de presse |
| Welcome | Bienvenue |

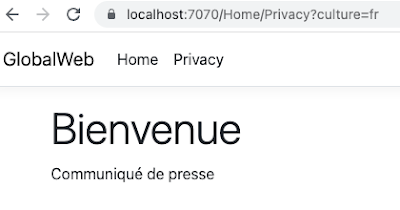
dotnet watch run
A quick way to try it out is to point your browser to /Home. This picks up the default value. However, if you point your browser to /Home?culture=fr, the value is read from the resource file.

Shared Resources
With shared resources you rely on a single file to have all the localization entries in it, so this file can be used among multiple controllers or other classes.
In the root of your application, create a blank class named SharesResource.cs with following content:
namespace GlobalWeb;public class SharedResource {}
Copy Resources/Controllers/HomeController.fr.resx to Resources/SharedResource.fr.resx.
To keep it simple, inside HomeController.cs we will add shared resource entries. Add the following instance variable to HomeController.cs:
private readonly IStringLocalizer<SharedResource> _sharedLocalizer;
Modify the constructor so it looks like this:
public HomeController(ILogger<HomeController> logger,IStringLocalizer<HomeController> localizer,IStringLocalizer<SharedResource> sharedLocalizer){_logger = logger;_localizer = localizer;_sharedLocalizer = sharedLocalizer;}
Now, let us use the shared resource in the Privacy action method. Therefore, add these statements to the Privacy action method:
ViewData["pressRelease"] = _sharedLocalizer["Press Release"];ViewData["welcome"] = _sharedLocalizer.GetString("Welcome").Value ?? "";
Replace Views/Home/Privacy.cshtml with:
@{ViewData["Title"] = "Privacy Policy";}<h3 class="display-4">@ViewData["welcome"]</h3><p>@ViewData["pressRelease"]</p>
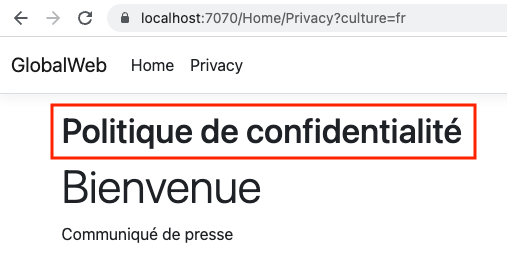
When you point your browser to /Home/Privacy?culture=fr, the values are read from the shared resource file:
Using localization in your views
In Program.cs, modify “builder.Services.AddControllersWithViews()” (around line 4) so it looks like this:
builder.Services.AddControllersWithViews().AddViewLocalization();
We simply add ViewLocalization support as highlighted above.
We will localize strings in a single .cshtml file whereby you inject an IViewLocalizer into the view. IViewLocaliser uses the name of the view file to find the associated resources, so for the fr culture in HomeController's Privacy.cshtml view, the localizer will look for:
Resources/Views/Home/Privacy.fr.resx
Create a resource file Resources/Views/Home/Privacy.fr.resx and add to it the following localization string pair:
Privacy Policy / Politique de confidentialité

Back in Views/Home/Privacy.cshtml, add the following to the top of the file:
@using Microsoft.AspNetCore.Mvc.Localization
@inject IViewLocalizer _localizer
Change the ViewData["Title"] . . . statement to:
ViewData["Title"] = _localizer["Privacy Policy"];
Add the following above the <h3>. . . . markup:
<h1>@ViewData["Title"]</h1>
The complete Views/Home/Privacy.cshtml looks like this:
@using Microsoft.AspNetCore.Mvc.Localization@inject IViewLocalizer _localizer@{ViewData["Title"] = _localizer["Privacy Policy"];}<h1>@ViewData["Title"]</h1><h3 class="display-4">@ViewData["welcome"]</h3><p>@ViewData["pressRelease"]</p>
Once again, check out Home/Privacy and Home/Privacy?culture=fr
 .
. 
Let's see how we can use a shared resource in views, Add the following localization string pair to Resources/SharedResource.fr.resx:
It's great to see you again. / C'est génial de te revoir.

To use the new shared resource string inViews/Home/Privacy.cshtml, Add the following to the top of the file:
@using Microsoft.Extensions.Localization@inject IStringLocalizer<SharedResource> _sharedLocalizer
Thereafter, add this markup to the bottom of Views/Home/Privacy.cshtml:
<p>@_sharedLocalizer["It's great to see you again."]</p>
You will see this when you visit Home/Privacy?culture=fr in your browser:
Using localization with data annotations
You may wish to localize the string messages that exist in your data annotations. These may represent display names and error messages. In Program.cs, modify the “builder.Services.AddControllersWithViews()” statement (around line 4) so it looks like this:
builder.Services.AddControllersWithViews().AddViewLocalization().AddDataAnnotationsLocalization();
Simply add the highlighted code shown above.
Add a class named Contact to the Models folder with the following content:
public class Contact {[Required(ErrorMessage = "Email is required.")][EmailAddress(ErrorMessage = "The Email field is not a valid email address.")][Display(Name = "Your Email.")]public string? Email { get; set; }}
The above Contact model class contains error messages and a display name that are good candidates for localization.
Add a resource file names Contact.fr.resx to the Resources/Models folder with the following localization string name / value pairs:
| Key | Value |
|---|---|
| Email is required. | Un e-mail est requis. |
| The Email field is not a valid email address. | Le champ E-mail n'est pas une adresse e-mail valide. |
| Your Email. | Votre e-mail. |
| Success | Succès |

Let us add an action method that renders a contact form. Add the following action method to Controllers/HomeController.cs:
public IActionResult Contact() {return View();}
This requires a view. Add a file Views/Home/Contact.cshtml with the following content:
@model GlobalWeb.Models.Contact
<div class="row">
<div class="col-md-8">
<section>
<form asp-controller="Home" asp-action="Contact" method="post" class="form-horizontal" novalidate>
<h4>@(ViewData["Result"] == null ? "Enter details" : ViewData["Result"])</h4>
<hr />
<div class="form-group">
<label asp-for="Email" class="col-md-2 control-label"></label>
<div class="col-md-10">
<input asp-for="Email" class="form-control" />
<span asp-validation-for="Email" class="text-danger"></span>
</div>
</div>
<div class="form-group">
<div class="col-md-offset-2 col-md-10">
<button type="submit" class="btn btn-success">Test</button>
</div>
</div>
</form>
</section>
</div>
</div>
The above consists of a simple form with an email input field and a submit button. It submits to Contact action method in the HomeController. Therefore, add the following post action method to HomeController.cs:
[HttpPost]public IActionResult Contact(Contact model) {if (!ModelState.IsValid) {return View(model);}ViewData["Result"] = _localizer["Success!"];return View(model);}
Point your browser to /Home/Contact?culture=fr. You should see that the display name for email is localized.

Add the following localization name / value strings pair to Resources/SharedResource.fr.resx:
Your Email. / Votre e-mail.
Add the following to the top of Views/Home/Contact.cshtml:
@using Microsoft.Extensions.Localization@inject IStringLocalizer<SharedResource> _sharedLocalizer
You can then use _sharedLocalizer in Views/Home/Contact.cshtml as shown below in the highlighted code:
@using Microsoft.Extensions.Localization
@inject IStringLocalizer<SharedResource> _sharedLocalizer
@model GlobalWeb.Models.Contact
<div class="row">
<div class="col-md-8">
<section>
<form asp-controller="Home" asp-action="Contact" method="post" class="form-horizontal" novalidate>
<h4>@(ViewData["Result"] == null ? "Enter details" : ViewData["Result"])</h4>
<hr />
<div class="form-group">
<label class="col-md-2 control-label">
@_sharedLocalizer[@Html.DisplayNameFor(model => model.Email)]
</label>
<div class="col-md-10">
<input asp-for="Email" class="form-control" />
<span asp-validation-for="Email" class="text-danger"></span>
</div>
</div>
<div class="form-group">
<div class="col-md-offset-2 col-md-10">
<button type="submit" class="btn btn-success">Test</button>
</div>
</div>
</form>
</section>
</div>
</div>
Conclusion
We have looked at a number of techniques for localizing ASP.NET 6.0 apps. This should serve as a decent starting point for you to consider making you web apps reach a wider worldwide audience.
No comments:
Post a Comment