A native Entity Framework Core provider for Azure Cosmos DB was released with .NET Core 3.0. This makes it much easier for developers who are familiar with EF Core to work with Azure Cosmos DB.
Source Code: https://github.com/medhatelmasry/CosmosEfWeb
Video: https://youtu.be/VklO8olYTL8
Prerequisites
Before you can start this tutorial, it is assumed that you have the following:
1) At the time of writing, the latest version of .NET Core is 3.1. As a result, I am using .NET Core 3.1. You can, however, use and version of .NET Core as long as it is 3.0 or later.
2) You need to have an Azure account in order to work with Azure Cosmos DB.
3) In order to make this tutorial work on any operating system (Linux, Mac and Windows), I will be using the VS Code editor.
Prior knowledge of ASP.NET MVC is a big bonus because I will not explain the what the roles and responsibilities of Models, Views and Controllers in this article.
Creating a database in Azure Cosmos DB
The first step is to create a database in on Azure Cosmosdb. Login into your Azure account by going to https://portal.azure.com. Click on the "Create a resource" button.
In the filter field, enter the word "cosmos" the select "Azure Cosmos DB".
On the next page, click on the blue Create button.
On the "Create Azure Cosmos DB Account" page:
1) Create a new resource group. I named my resource group CosmosEfWeb-RG.
2) Give your Cosmos DB an account name. I named mine cosmos-ef-web. Not that the name needs to be all in lower case letters.
3) Do not change the API. To use Entity Framework Core we must use "Core (SQL)".
4) Finally, choose the location closest you. Since I reside on the west coast of Canada, I chose "(US) West US 2".
Click on the "Review + create" button. The next page will look like this:
Note the message that indicates that it will take about six minutes to create the account. Click on the blue Create button.
Once the provisioning is completed, you will see a page that looks like this.
Click on the blue "Go to resource" button. Click on "Data Explorer" on the left-side navigation.
Click on the "New Container" dropdown-list then select "New Database".
Give the database a name. I named my database "CollegeDB" because I will soon create an MVC app that does CRUD operations with student data.
Click on the blue OK button. After the database is created, click on the three dots on the right-side of the database then select "New Container". A container is equivalent to a collection or table in a database.
Note that this is where you can delete the entire database.
Enter a container-id. I named my container students because I will be adding a list of students. I added a partition key of /id.
Note: The Partition Key is used to automatically partition data among multiple servers for scale-ability. Choose a JSON property name that has a wide range of values and is likely to have evenly distributed access patterns.
Click on the blue OK button.
At this point our database is ready and we can start populating it with data with an application that we are about to build. We need, however, some credentials. Click on Keys on the left-side menu.
On the next page, you will need the URI and the "PRIMARY KEY". Copy both values and park them in a text editor.
We can now start developing our application.
Building an ASP.NET Core MVC app.
Open a terminal window in a working directory on your computer.
Type the following command to determine which version of .NET Core SDK you have.
dotnet --list-sdks
The following versions were listed on my computer:
2.2.104 [C:\Program Files\dotnet\sdk]
3.0.100 [C:\Program Files\dotnet\sdk]
3.1.100 [C:\Program Files\dotnet\sdk]
Create a folder named CosmosEfWeb with the following terminal command:
mkdir CosmosEfWeb
Change to the new folder with this command:
cd CosmosEfWeb
Now, if you want to use the exact version of .NET Core that I created my application with, then you can create a global.json file for version 3.1.100 with next command. Note that is optional.
dotnet new globaljson --sdk-version 3.1.100
Next, let us create a new MVC app with this command:
dotnet new mvc
In order to use the new Entity Framework .NET Core 3.0 provider, you must add the Nuget package Microsoft.EntityFrameworkCore.Cosmos. Add this package with the following terminal command:
dotnet add package Microsoft.EntityFrameworkCore.Cosmos
Now let's open our application in the VS Code editor. I was able to do so by simply entering the following command in a terminal window:
code .
We are going to model students. Therefore, add the following very simple Student.cs class inside the Models folder:
public class Student {
[JsonProperty(PropertyName = "id")]
public string Id { get; set; }
[Required]
[JsonProperty(PropertyName = "firstname")]
public string FirstName { get; set; }
[Required]
[JsonProperty(PropertyName = "lastname")]
public string LastName { get; set; }
[Required]
[JsonProperty(PropertyName = "school")]
public string School { get; set; }
}
Let us add the database credentials. Add the following section to the appsettings.json file:
"CosmosDb": {
"Endpoint": "https://cosmos-ef-web.documents.azure.com:443/",
"Key": "ABCDEFGHIJKLMNOPQRSTUVWXYZABCDEFGHIJKLMNOPQRSTUVWXYZ1234451234567890ABCDEFGHIJKLMN==",
"DatabaseName": "CollegeDB",
"ContainerName": "Students"
}
Endpoint comes from URI and Key comes from PRIMARY KEY.
Service class
We will next create a service that is the middle tier between our controller and the database. Create a folder named Services.
In the Services folder, add the following interface file:
public interface ICosmosDbService {
Task<IEnumerable<Student>> GetStudentsAsync(string query);
Task<Student> GetStudentAsync(string id);
Task AddStudentAsync(Student student);
Task UpdateStudentAsync(string id, Student student);
Task DeleteStudentAsync(string id);
}
Also, in the same Services folder, add a class file named CosmosDbService, that implements ICosmosDbService. The CosmosDbService.cs file contains the following code:
public class CosmosDbService : ICosmosDbService {
private Microsoft.Azure.Cosmos.Container _container;
public CosmosDbService(
CosmosClient dbClient,
string databaseName,
string containerName) {
this._container = dbClient.GetContainer(databaseName, containerName);
}
public async Task AddStudentAsync(Student student) {
await this._container.CreateItemAsync<Student>(student, new PartitionKey(student.Id));
}
public async Task DeleteStudentAsync(string id) {
await this._container.DeleteItemAsync<Student>(id, new PartitionKey(id));
}
public async Task<Student> GetStudentAsync(string id) {
try {
ItemResponse<Student> response = await this._container.ReadItemAsync<Student>(id, new PartitionKey(id));
return response.Resource;
}
catch (CosmosException ex) when (ex.StatusCode == System.Net.HttpStatusCode.NotFound) {
return null;
}
}
public async Task<IEnumerable<Student>> GetStudentsAsync(string queryString) {
var query = this._container.GetItemQueryIterator<Student>(new QueryDefinition(queryString));
List<Student> results = new List<Student>();
while (query.HasMoreResults) {
var response = await query.ReadNextAsync();
results.AddRange(response.ToList());
}
return results;
}
public async Task UpdateStudentAsync(string id, Student student) {
await this._container.UpsertItemAsync<Student>(student, new PartitionKey(id));
}
}
To Startup.cs, add a method named InitializeCosmosClientInstanceAsync that is responsible for reading the database credentials from appsettings.json and returning the service. Add the following method to Startup.cs:
/// <summary>
/// Creates a Cosmos DB database and a container with the specified partition key.
/// </summary>
/// <returns></returns>
private static async Task<CosmosDbService> InitializeCosmosClientInstanceAsync(IConfigurationSection configurationSection)
{
string databaseName = configurationSection.GetSection("DatabaseName").Value;
string containerName = configurationSection.GetSection("ContainerName").Value;
string account = configurationSection.GetSection("Endpoint").Value;
string key = configurationSection.GetSection("Key").Value;
CosmosClientBuilder clientBuilder = new CosmosClientBuilder(account, key);
CosmosClient client = clientBuilder
.WithConnectionModeDirect()
.Build();
CosmosDbService cosmosDbService = new CosmosDbService(client, databaseName, containerName);
DatabaseResponse database = await client.CreateDatabaseIfNotExistsAsync(databaseName);
await database.Database.CreateContainerIfNotExistsAsync(containerName, "/id");
return cosmosDbService;
}
Also in Startup.cs, add the following code to the ConfigureServices method in order to create a singleton object representing the service:
services.AddSingleton<ICosmosDbService>(InitializeCosmosClientInstanceAsync(Configuration.GetSection("CosmosDb")).GetAwaiter().GetResult());
Students controller
public class StudentsController : Controller {
private readonly ICosmosDbService _cosmosDbService;
public StudentsController(ICosmosDbService cosmosDbService) {
_cosmosDbService = cosmosDbService;
}
[ActionName("Index")]
public async Task<IActionResult> Index() {
return View(await _cosmosDbService.GetStudentsAsync("SELECT * FROM c"));
}
[ActionName("Create")]
public IActionResult Create() {
return View();
}
[HttpPost]
[ActionName("Create")]
[ValidateAntiForgeryToken]
public async Task<ActionResult> CreateAsync(Student student) {
if (ModelState.IsValid) {
student.Id = Guid.NewGuid().ToString();
await _cosmosDbService.AddStudentAsync(student);
return RedirectToAction("Index");
}
return View(student);
}
[ActionName("Edit")]
public async Task<ActionResult> EditAsync(string id) {
if (id == null) return BadRequest();
Student student = await _cosmosDbService.GetStudentAsync(id);
if (student == null) return NotFound();
return View(student);
}
[HttpPost]
[ActionName("Edit")]
[ValidateAntiForgeryToken]
public async Task<ActionResult> EditAsync(Student student) {
if (ModelState.IsValid) {
await _cosmosDbService.UpdateStudentAsync(student.Id, student);
return RedirectToAction("Index");
}
return View(student);
}
[ActionName("Delete")]
public async Task<ActionResult> DeleteAsync(string id) {
if (id == null) return BadRequest();
Student student = await _cosmosDbService.GetStudentAsync(id);
if (student == null) return NotFound();
return View(student);
}
[HttpPost]
[ActionName("Delete")]
[ValidateAntiForgeryToken]
public async Task<ActionResult> DeleteConfirmedAsync(string id) {
await _cosmosDbService.DeleteStudentAsync(id);
return RedirectToAction("Index");
}
[ActionName("Details")]
public async Task<ActionResult> DetailsAsync(string id) {
return View(await _cosmosDbService.GetStudentAsync(id));
}
}
Views
Let us add a menu item on the layout that leads to the Students controller. Add the following line item to the ordered list in _Layout.cshtml:<li class="nav-item">
<a class="nav-link text-dark" asp-area="" asp-controller="Students" asp-action="Index">Students</a>
</li>
The next step is to add all the views necessary for listing, adding, editing, displaying and deleting data.
Create folder Students under Views. In the Views/Students folder add files Index.cshtml, Create.cshtml, Edit.cshtml, Details.cshtml and Delete.cshtml. Below is the code for each of these files.
Index.cshtml
@{
ViewData["Title"] = "List of students";
}
<h1>@ViewData["Title"]</h1>
<p>
<a asp-action="Create" class="btn btn-success btn-sm">Create New Student</a>
</p>
<table class="table">
<thead>
<tr>
<th>
@Html.DisplayNameFor(model => model.FirstName)
</th>
<th>
@Html.DisplayNameFor(model => model.LastName)
</th>
<th>
@Html.DisplayNameFor(model => model.School)
</th>
<th></th>
</tr>
</thead>
<tbody>
@foreach (var item in Model) {
<tr>
<td>
@Html.DisplayFor(modelItem => item.FirstName)
</td>
<td>
@Html.DisplayFor(modelItem => item.LastName)
</td>
<td>
@Html.DisplayFor(modelItem => item.School)
</td>
<td>
@Html.ActionLink("Edit", "Edit", new { id=item.Id }, new { @class = "btn btn-primary btn-sm" }) |
@Html.ActionLink("Details", "Details", new { id=item.Id }, new { @class = "btn btn-primary btn-sm" }) |
@Html.ActionLink("Delete", "Delete", new { id=item.Id }, new { @class = "btn btn-primary btn-sm" })
</td>
</tr>
}
</tbody>
</table>
Create.cshtml
@model CosmosEfWeb.Models.Student
@{
ViewData["Title"] = "Create New Student";
}
<h1>@ViewData["Title"]</h1>
<hr />
<div class="row">
<div class="col-md-4">
<form asp-action="Create">
<div asp-validation-summary="ModelOnly" class="text-danger"></div>
<div class="form-group">
<label asp-for="FirstName" class="control-label"></label>
<input asp-for="FirstName" class="form-control" />
<span asp-validation-for="FirstName" class="text-danger"></span>
</div>
<div class="form-group">
<label asp-for="LastName" class="control-label"></label>
<input asp-for="LastName" class="form-control" />
<span asp-validation-for="LastName" class="text-danger"></span>
</div>
<div class="form-group">
<label asp-for="School" class="control-label"></label>
<input asp-for="School" class="form-control" />
<span asp-validation-for="School" class="text-danger"></span>
</div>
<div class="form-group">
<input type="submit" value="Create" class="btn btn-primary" />
</div>
</form>
</div>
</div>
<div>
<a asp-action="Index">Back to List</a>
</div>
@section Scripts {
@{await Html.RenderPartialAsync("_ValidationScriptsPartial");}
}
Edit.cshtml
@{
ViewData["Title"] = "Edit Student";
}
<h1>@ViewData["Title"]</h1>
<hr />
<div class="row">
<div class="col-md-4">
<form asp-action="Edit">
<div asp-validation-summary="ModelOnly" class="text-danger"></div>
<input type="hidden" asp-for="Id" />
<div class="form-group">
<label asp-for="FirstName" class="control-label"></label>
<input asp-for="FirstName" class="form-control" />
<span asp-validation-for="FirstName" class="text-danger"></span>
</div>
<div class="form-group">
<label asp-for="LastName" class="control-label"></label>
<input asp-for="LastName" class="form-control" />
<span asp-validation-for="LastName" class="text-danger"></span>
</div>
<div class="form-group">
<label asp-for="School" class="control-label"></label>
<input asp-for="School" class="form-control" />
<span asp-validation-for="School" class="text-danger"></span>
</div>
<div class="form-group">
<input type="submit" value="Save" class="btn btn-primary btn-sm" /> |
<a asp-action="Index" class="btn btn-primary btn-sm">Back to List</a>
</div>
</form>
</div>
</div>
@section Scripts {
@{await Html.RenderPartialAsync("_ValidationScriptsPartial");}
}
Details.cshtml
@model CosmosEfWeb.Models.Student
@{
ViewData["Title"] = "Student Details";
}
<h1>@ViewData["Title"]</h1>
<div>
<hr />
<dl class="row">
<dt class = "col-sm-2">
@Html.DisplayNameFor(model => model.FirstName)
</dt>
<dd class = "col-sm-10">
@Html.DisplayFor(model => model.FirstName)
</dd>
<dt class = "col-sm-2">
@Html.DisplayNameFor(model => model.LastName)
</dt>
<dd class = "col-sm-10">
@Html.DisplayFor(model => model.LastName)
</dd>
<dt class = "col-sm-2">
@Html.DisplayNameFor(model => model.School)
</dt>
<dd class = "col-sm-10">
@Html.DisplayFor(model => model.School)
</dd>
</dl>
</div>
<div>
@Html.ActionLink("Edit", "Edit", new { id = Model.Id }, new { @class = "btn btn-primary btn-sm" }) |
<a asp-action="Index" class="btn btn-primary btn-sm">Back to List</a>
</div>
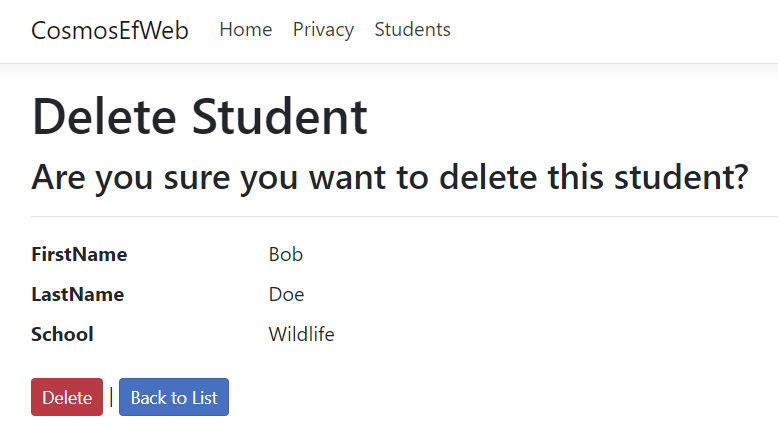
Delete.cshtml
@{
ViewData["Title"] = "Delete Student";
}
<h1>@ViewData["Title"]</h1>
<h3>Are you sure you want to delete this student?</h3>
<div>
<hr />
<dl class="row">
<dt class = "col-sm-2">
@Html.DisplayNameFor(model => model.FirstName)
</dt>
<dd class = "col-sm-10">
@Html.DisplayFor(model => model.FirstName)
</dd>
<dt class = "col-sm-2">
@Html.DisplayNameFor(model => model.LastName)
</dt>
<dd class = "col-sm-10">
@Html.DisplayFor(model => model.LastName)
</dd>
<dt class = "col-sm-2">
@Html.DisplayNameFor(model => model.School)
</dt>
<dd class = "col-sm-10">
@Html.DisplayFor(model => model.School)
</dd>
</dl>
<form asp-action="Delete">
<input type="submit" value="Delete" class="btn btn-danger btn-sm" /> |
<a asp-action="Index" class="btn btn-primary btn-sm">Back to List</a>
</form>
</div>
Run application
From a terminal window, run the following command:
dotnet run
To view the application, point your browser to http://localhost:5000 or https://localhost:5001. You will see a home page that looks like this:

Click on Students on the top menu bar. Click on green "Create New Student" button on the next page:


When I added Bob Fox in the school of Wildlife, I was redirected to the Index.cshtml page with the following list:


I hope you use this tutorial as a launching pad for much more useful applications that take advantage of the many good features that Azure Cosmos DB has to offer.