Wednesday, December 13, 2023

Give your ChatBot personality with Azure OpenAI and C#

We will create a .NET 8.0 chatbot console application that uses the ChatGPT natural language model. This will be done using Azure OpenAI. The chatbot will have a distinct personality which will be reflected in its response.

Source Code: https://github.com/medhatelmasry/BotWithPersonality

Prerequisites

You will need the following to continue:
  • .NET 8 SDK
  • A C# code editor such as Visual Studio Code
  • An Azure subscription with access to the OpenAI Service

Getting started with Azure OpenAI service

To follow this tutorial, you will create an Azure OpenAI service under your Azure subscription. Follow these steps:

Navigate to the Azure portal at https://portal.azure.com/. 


Click on “Create a resource”.


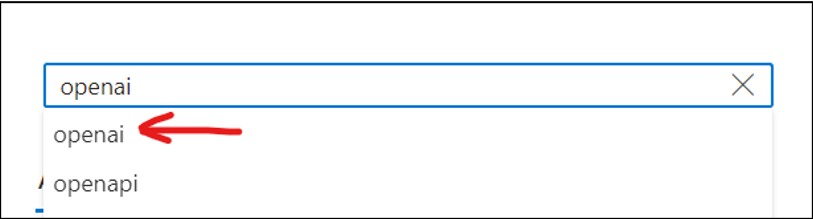
Enter “openai” in the filter then select “openai”.


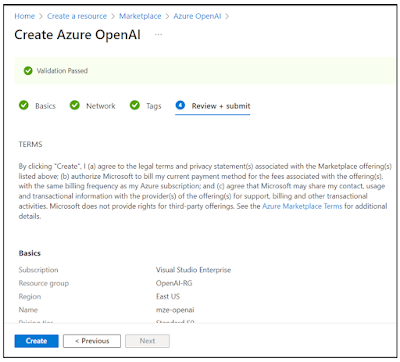
Choose your subscription then create a new resource group. In my case (as shown above), I created a new resource group named “OpenAI-RG”.


Continue with the selection of a region, provide a instance name (mze-openai in the example above) and select the “Standard S0” pricing tier. Click on the Next button.


Accept the default (All networks, including the internet, can access this resource.) on the Network tab then click on the Next button.


On the Tags tab, click on Next without making any changes.


Click the Create button on the “Review + submit” tab. Deployment takes about one minute. 


On the Overview blade, click on “Keys and Endpoint” in the left side navigation.


Copy KEY 1 and Endpoint then save the values in a text editor like Notepad.

We will need to create a model deployment that we can use for text completion. To do this, return to the Overview tab.


Open “Go to Azure OpenAI Studio” in a new browser tab.


Click on “Create new deployment”.


Click on “+ Create new deployment”.


For the model, select “gpt-35-turbo” and give the deployment a name which you need to remember as this will be configured in the app that we will soon develop. I called the deployment name gpt35-turbo-deployment. Click on the Create button.

As a summary, we will need the following parameters in our application:

SettingValue
KEY 1:this-is-a-fake-api-key
Endpoint:https://mze-openai.openai.azure.com/
Model deployment:gpt35-turbo-deployment

Next, we will create our console application.

Console Application

Create a console application with .NET 8.0:

dotnet new console -f net8.0 -o BotWithPersonality
cd BotWithPersonality

Add these two packages:

dotnet add package Azure.AI.OpenAI -v 1.0.0-beta.11
dotnet add package Microsoft.Extensions.Configuration.Json -v 8.0.0


Configuration Settings

The first package is for Azure OpenAI. The second package will help us read configuration settings from the appsettings.json file.

Create a file named apsettings.json and add to the following:

{
    "settings": {
      "deployment-name": "gpt35-turbo-deployment",
      "endpoint": "https://mze-openai.openai.azure.com/",
      "key": "this-is-a-fake-api-key"
    }
}

When our application gets built and packaged, we want this file to get copied to the output directory. Therefore, we need to add the following XML to the .csproj file just before the closing </Project> tag.

<ItemGroup>
  <None Include="*.json" CopyToOutputDirectory="PreserveNewest" />
</ItemGroup> 

In order to read the settings from appsettings.json, we need to create a helper method. Add a class named Utils.cs and add to it the following code to it:

public class Utils {
    public static string GetConfigValue(string config) {

        IConfigurationBuilder builder = new ConfigurationBuilder();

        if (System.IO.File.Exists("appsettings.json"))
            builder.AddJsonFile("appsettings.json", false, true);

        if (System.IO.File.Exists("appsettings.Development.json"))
            builder.AddJsonFile("appsettings.Development.json", false, true);

        IConfigurationRoot root = builder.Build();

        return root[config]!;
    }
}

As an example, if we want to read the endpoint value in appsettings.json, we can use the following statement:

Utils.GetConfigValue("settings:endpoint")

Building our ChatBot app

Delete whatever code there is in Program.cs and add these using statements at the top:

using Azure;
using Azure.AI.OpenAI;
using BotWithPersonality;

Let us first read the settings we need from appsettings.json. Therefore, append this code to Program.cs:

string ENDPOINT = Utils.GetConfigValue("settings:endpoint");
string KEY = Utils.GetConfigValue("settings:key");
string DEPLOYMENT_NAME = Utils.GetConfigValue("settings:deployment-name");

Next, let us give our chatbot a personality. We will tell Azure OpenAI that our chatbot has the personality of a developer from Newfouldland in Eastern Canada. Append this constant to the Program.cs:

const string SYSTEM_MESSAGE 
    = """
    You are a friendly assistant named DotNetBot. 
    You prefer to use Canadian Newfoundland English as your language and are an expert in the .NET runtime 
    and C# and F# programming languages.
    Response using Newfoundland colloquialisms and slang.
    """;
    
Create a new OpenAIClient by appending the following code to Program.cs:

var openAiClient = new OpenAIClient(
    new Uri(ENDPOINT),
    new AzureKeyCredential(KEY)
);

We will next define our ChatCompletionsOptions with a starter user message "Introduce yourself". Append this code to Program.cs:

var chatCompletionsOptions = new ChatCompletionsOptions
{
    DeploymentName = DEPLOYMENT_NAME, // Use DeploymentName for "model" with non-Azure clients
    Messages =
    {
        new ChatRequestSystemMessage(SYSTEM_MESSAGE),
        new ChatRequestUserMessage("Introduce yourself"),
    }
};

The ChatCompletionsOptions object is aware of the deployment model name and keeps track of the conversation between the user and the chatbot. Note that there are two chat messages pre-filled before the conversation even starts. One chat message is from the System (SYSTEM_MESSAGE) and gives the chat model instructions on what kind of chatbot it is supposed to be. In this case, we told the chat model to act like somebody from Newfoundland, Canada. Then we told the chatbot to introduce itself by adding a message as User saying "Introduce yourself.".

Now that we have set up the OpenAIClient, and  ChatCompletionsOptions, we can start calling the APIs. Append the following code to Program.cs to finalize the chatbot:

while (true)
{
    Console.WriteLine();
    Console.Write("DotNetBot: ");
    
    Response<ChatCompletions> chatCompletionsResponse = await openAiClient.GetChatCompletionsAsync(
        chatCompletionsOptions
    );

    var chatMessage = chatCompletionsResponse.Value.Choices[0].Message;
    Console.WriteLine($"[{chatMessage.Role.ToString().ToUpperInvariant()}]: {chatMessage.Content}");
    
    chatCompletionsOptions.Messages.Add(new ChatRequestUserMessage(chatMessage.Content));
    
    Console.WriteLine();
    
    Console.Write("Enter a message: ");
    var userMessage = Console.ReadLine();
    chatCompletionsOptions.Messages.Add(new ChatRequestUserMessage(userMessage));
}

Inside an infinite loop, the chatCompletionsOptions is passed to the openAiClient.GetChatCompletionsAsync method.

The response from the chat model is then written to the console and added to the chat history stored in chatCompletionsOptions.

Now the user is prompted to say anything, which will then be added to the chat history as well. Thereafter, the next iteration of the loop starts, which sends the chat history back to the chat model in Azure OpenAI. One can terminate the endless loop by hitting CTRL+C on the keyboard.

Let us run the app and see how it performs.

Run the app with:

dotnet run

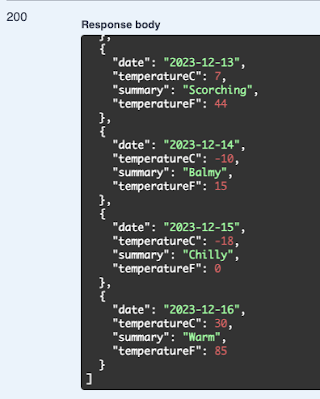
Here is an example of the ongoing dialog:

DotNetBot: [ASSISTANT]: How's she going, buddy? I'm DotNetBot, your trusty virtual assistant from the Rock. I'm here to lend you a hand with all things .NET and programming in C# and F#. So whether you need help with some code or just wanna have a chin wag about tech, I'm your go-to. Don't be shy now, fire away with your questions!

Enter a message: How do you spell color?

DotNetBot: [ASSISTANT]: Sure ting, me ol' pal! In Canadian Newfoundland English, we like to spell "color" as "colour." It's a wee bit different than how they spell it down in other parts of the world, but we like to keep things unique and full of character around here. So, if you're ever writin' some code and need to use that word, remember to toss in that extra "u" for good measure. Happy codin', me son!

Enter a message: 

I asked the question "How do you spell color?" and it rambled on about how it is done in Newfoundland. Quite amusing....

Hope this was useful.

Monday, December 11, 2023

Built-in authentication with ASP.NET Core .NET 8.0 Minimal WebAPI

In this tutorial I will showcase the built-in WebApi authentication that was introduced with ASP.NET Core 8.0. To keep it simple, we shall persist our data in the lightweight SQLite database.

Source Code: https://github.com/medhatelmasry/WebApiAuth

Companion Video: https://youtu.be/SSLSNWRQJiA

Prerequisites

It is assumed that you have installed the following on your computer:
  • .NET 8.0
  • Visual Studio Code editor

Getting Started

In a suitable working directory, create a new WebApi application using the following terminal window command:

dotnet new webapi -f net8.0 --name WebApiAuth

Change directory with:

cd WebApiAuth

We will need to add some packages. Also in the same terminal window, run the following commands:

dotnet add package Microsoft.AspNetCore.Identity.EntityFrameworkCore -v 8.0.0
dotnet add package Microsoft.EntityFrameworkCore.Sqlite -v 8.0.0
dotnet add package Microsoft.EntityFrameworkCore.Tools -v 8.0.0
dotnet add package Microsoft.EntityFrameworkCore.Design -v 8.0.0

The above packages allow us to use SQLite and Entity Framework.

Make sure you have the dotnet-ef tool. If you do not, you can globally install it with:

dotnet tool install --global dotnet-ef

If you already have the dotnet-ef, update your version to the latest with:

dotnet tool update --global dotnet-ef

Let us run our web app and have a peek at what it does. Run the web app with:

dotnet watch

This gets loaded into your default browser:


Click on GET >> Try it out >> Execute. This will produce the following output:


It is time for us to peek into the code. Stop the server with CTRL C, then start Visual Studio Code with the following terminal command:

code .

Database context class

Since we will be using Entity Framework to talk to the SQLite database, we will need a database context class. Add a folder named Data, then add to it a class named ApplicationDbContext that derives from IdentityDbContext<IdentityUser> with the following code:

using Microsoft.AspNetCore.Identity;
using Microsoft.AspNetCore.Identity.EntityFrameworkCore;
using Microsoft.EntityFrameworkCore;

namespace WebApiAuth.Data;

public class ApplicationDbContext: IdentityDbContext<IdentityUser> {
    public ApplicationDbContext(DbContextOptions<ApplicationDbContext> options) : base(options)
    {}
}

Add the following connection string to appsettings.json:

"ConnectionStrings": {
  "DefaultConnection": "Data Source=webapi-auth.db;"
}

Next, we must register ApplicationDbContext with our app by adding the following code into Program.cs right before 'var app = builder.Build();':

// Configure identity database access via EF Core
var connectionString = builder.Configuration.GetConnectionString("DefaultConnection") ?? throw new InvalidOperationException("Connection string 'DefaultConnection' not found.");
builder.Services.AddDbContext<ApplicationDbContext>(options =>
    options.UseSqlite(connectionString));

Other required services

Add the following code right after the above code:

// Authorization
builder.Services.AddAuthorization();

// Activate identity APIs. By default, both cookies and proprietary tokens
// are activated. Cookies will be issued based on the 'useCookies' querystring
// parameter in the login endpoint
builder.Services.AddIdentityApiEndpoints<IdentityUser>()
    .AddEntityFrameworkStores<ApplicationDbContext>();

We need to add authorization and authentication middleware with the following code right after 'app.UseHttpsRedirection();':

app.UseAuthentication(); 
app.UseAuthorization(); 

Let us secure the /weatherforecast endpoint by forcing authentication. Chain the following to the endpoint by add ing this code right under '.WithOpenApi()':

.RequireAuthorization();

The full app.MapGet() code will look like this:

app.MapGet("/weatherforecast", () =>
{
    var forecast =  Enumerable.Range(1, 5).Select(index =>
        new WeatherForecast
        (
            DateOnly.FromDateTime(DateTime.Now.AddDays(index)),
            Random.Shared.Next(-20, 55),
            summaries[Random.Shared.Next(summaries.Length)]
        ))
        .ToArray();
    return forecast;
})
.WithName("GetWeatherForecast")
.WithOpenApi()
.RequireAuthorization();

Adding Identity API endpoints

Add the identity endpoints to your app by calling MapIdentityApi<IdentityUser>(). Add the following code to Program.cs right before 'app.Run();':

app.MapIdentityApi<IdentityUser>();

Migrations

Since our app uses EF Core, we will create a migration in the Data folder and update the database. Run the following terminal commands:

dotnet ef migrations add M1 -o Data/Migrations

dotnet ef database update

You will notice that a SQLite database file is created named webapi-auth.db.

Try it out

Let us test our application to see whether or not we have indeed succeeded in securing our API endpoint. Start your app with:

dotnet watch

You will see a variety of identity related endpoints when the following gets loaded into your default browser:


Try to hit the /weatherforecast endpoint and see the data. You will encounter a 401 (unauthorized) error:

Let us register a user. Click on the /register endpoint then click on the "Try it out" button. Update the JSON object so it looks like this:

{
  "email": "a@a.a",
  "password": "P@$$w0rd"
}

Click on the Execute button. You will get a Code 200 response representing success:


Next, let us login with the credentials we created. Click on the /login endpoint, then click on the "Try it out" button.


Choose true for useCookies and update the JSON object so it only has the credentials we had previously created. Thereafter, click on the Execute button. You should get a code 200 response:

Now let's try getting the data using the GET /weatherforecast endpoint. It should be a relief that we can now see the data.


With ASP.NET Core 8.0 came an easier way for securing WebAPI. 

Mix Blazor with ASP.NET Core MVC

In this tutorial I will show you how you can inject Blazor components into your regular ASP.NET Core MVC web application. We will integrate the free QuickGrid Blazor components into our MVC application. 

Source code: https://github.com/medhatelmasry/MvcWithBlazor

Companion video: https://youtu.be/dsoGW59Vtpk

Prerequisites

It is assumed that you have installed the following on your computer:
  • .NET 8.0
  • Visual Studio Code editor

Getting Started

In a suitable working directory, create an ASP.NET MVC 8.0 web application with the following terminal window command:

dotnet new mvc -f net8.0 --name MvcWithBlazor

Change into the new directory with:

cd MvcWithBlazor

Add the following Blazor QuickGrid package with this terminal window command:

dotnet add package Microsoft.AspNetCore.Components.QuickGrid -v 8.0.0

Start Visual Studio Code with:

code .

To keep it simple, we will create some hard-coded student data. Create a Student.cs class file inside the Models folder with the following code:

namespace MvcWithBlazor.Models;
public class Student
{
    required public int? Id { get; set; }
    required public string FirstName { get; set; }
    required public string LastName { get; set; }
    required public string School { get; set; }
    public static IQueryable<Student> GetStudents()
    {
        int ndx = 0;
        List<Student> students = new List<Student>() {
            new Student() { Id = ++ndx, FirstName="Max", LastName="Pao", School="Science" },
            new Student() { Id = ++ndx, FirstName="Tom", LastName="Fay", School="Mining" },
            new Student() { Id = ++ndx, FirstName="Ann", LastName="Sun", School="Nursing" },
            new Student() { Id = ++ndx, FirstName="Joe", LastName="Fox", School="Computing" },
            new Student() { Id = ++ndx, FirstName="Sue", LastName="Mai", School="Mining" },
            new Student() { Id = ++ndx, FirstName="Ben", LastName="Lau", School="Business" },
            new Student() { Id = ++ndx, FirstName="Zoe", LastName="Ray", School="Mining" },
            new Student() { Id = ++ndx, FirstName="Sam", LastName="Ash", School="Medicine" },
            new Student() { Id = ++ndx, FirstName="Dan", LastName="Lee", School="Computing" },
            new Student() { Id = ++ndx, FirstName="Pat", LastName="Day", School="Science" },
            new Student() { Id = ++ndx, FirstName="Kim", LastName="Rex", School="Computing" },
            new Student() { Id = ++ndx, FirstName="Tim", LastName="Ram", School="Business" },
            new Student() { Id = ++ndx, FirstName="Rob", LastName="Wei", School="Mining" },
            new Student() { Id = ++ndx, FirstName="Jan", LastName="Tex", School="Science" },
            new Student() { Id = ++ndx, FirstName="Jim", LastName="Kid", School="Business" },
            new Student() { Id = ++ndx, FirstName="Ben", LastName="Chu", School="Medicine" },
            new Student() { Id = ++ndx, FirstName="Mia", LastName="Tao", School="Computing" },
            new Student() { Id = ++ndx, FirstName="Ted", LastName="Day", School="Business" },
            new Student() { Id = ++ndx, FirstName="Amy", LastName="Roy", School="Science" },
            new Student() { Id = ++ndx, FirstName="Ian", LastName="Kit", School="Nursing" },
            new Student() { Id = ++ndx, FirstName="Liz", LastName="Tan", School="Medicine" },
            new Student() { Id = ++ndx, FirstName="Mat", LastName="Roy", School="Tourism" },
            new Student() { Id = ++ndx, FirstName="Deb", LastName="Luo", School="Medicine" },
            new Student() { Id = ++ndx, FirstName="Ana", LastName="Poe", School="Computing" },
            new Student() { Id = ++ndx, FirstName="Lyn", LastName="Raj", School="Science" },
            new Student() { Id = ++ndx, FirstName="Amy", LastName="Ash", School="Tourism" },
            new Student() { Id = ++ndx, FirstName="Kim", LastName="Kid", School="Mining" },
            new Student() { Id = ++ndx, FirstName="Bec", LastName="Fry", School="Nursing" },
            new Student() { Id = ++ndx, FirstName="Eva", LastName="Lap", School="Computing" },
            new Student() { Id = ++ndx, FirstName="Eli", LastName="Yim", School="Business" },
            new Student() { Id = ++ndx, FirstName="Sam", LastName="Hui", School="Science" },
            new Student() { Id = ++ndx, FirstName="Joe", LastName="Jin", School="Mining" },
            new Student() { Id = ++ndx, FirstName="Liz", LastName="Kuo", School="Agriculture" },
            new Student() { Id = ++ndx, FirstName="Ric", LastName="Mak", School="Tourism" },
            new Student() { Id = ++ndx, FirstName="Pam", LastName="Day", School="Computing" },
            new Student() { Id = ++ndx, FirstName="Stu", LastName="Gad", School="Business" },
            new Student() { Id = ++ndx, FirstName="Tom", LastName="Bee", School="Tourism" },
            new Student() { Id = ++ndx, FirstName="Bob", LastName="Lam", School="Agriculture" },
            new Student() { Id = ++ndx, FirstName="Jim", LastName="Ots", School="Medicine" },
            new Student() { Id = ++ndx, FirstName="Tom", LastName="Mag", School="Mining" },
            new Student() { Id = ++ndx, FirstName="Hal", LastName="Doe", School="Agriculture" },
            new Student() { Id = ++ndx, FirstName="Roy", LastName="Kim", School="Nursing" },
            new Student() { Id = ++ndx, FirstName="Vis", LastName="Cox", School="Science" },
            new Student() { Id = ++ndx, FirstName="Kay", LastName="Aga", School="Tourism" },
            new Student() { Id = ++ndx, FirstName="Reo", LastName="Hui", School="Business" },
            new Student() { Id = ++ndx, FirstName="Bob", LastName="Roe", School="Medicine" },
        };
        return students.AsQueryable();
    }
}

Create a Components folder and add to it the following files with their respective contents:

_Imports.razor

@using System.Net.Http
@using System.Net.Http.Json
@using Microsoft.AspNetCore.Components.Forms
@using Microsoft.AspNetCore.Components.Routing
@using Microsoft.AspNetCore.Components.Web
@using static Microsoft.AspNetCore.Components.Web.RenderMode
@using Microsoft.AspNetCore.Components.Web.Virtualization
@using Microsoft.JSInterop
@using MvcWithBlazor
@using MvcWithBlazor.Components 
@using Microsoft.AspNetCore.Components.QuickGrid
@using MvcWithBlazor.Models

Routes.razor

<Router AppAssembly="@typeof(Program).Assembly">
    <Found Context="routeData">
        <RouteView RouteData="@routeData" />
        <FocusOnNavigate RouteData="@routeData" Selector="h1" />
    </Found>
</Router>

App.razor

<!DOCTYPE html>
<html lang="en">
<head>
    <meta charset="utf-8" />
    <meta name="viewport" content="width=device-width, initial-scale=1.0" />
    <base href="/" />
    <link rel="stylesheet" href="MvcWithBlazor.styles.css" />
    <HeadOutlet />
</head>
<body>
    <Routes />
    <script src="_framework/blazor.web.js"></script>
</body>
</html>

Note that you need adjust the above highlighted text with your application name.

Inside the Components folder, add a sub-folder named Pages. Inside the Components/Pages folder add a Students.razor component file with this code:

@page "/students"
@rendermode InteractiveServer
<PageTitle>Students</PageTitle>
<h1>Students</h1>
<QuickGrid Items="@students" Pagination="@pagination">
    <PropertyColumn Property="@(_ => _.Id)" Sortable="true" />
    <TemplateColumn Title="Name" SortBy="@sortByName">
        <div class="flex items-center">
            <nobr>
                <strong>@context.FirstName @context.LastName</strong>
            </nobr>
        </div>
    </TemplateColumn>
    <PropertyColumn Property="@(_ => _.School)" Sortable="true" />
</QuickGrid>
<Paginator State="@pagination" />

@code {
    IQueryable<Student> students = Student.GetStudents();
    PaginationState pagination = new PaginationState { ItemsPerPage = 10 };
    GridSort<Student> sortByName = GridSort<Student>
    .ByAscending(_ => _.FirstName).ThenAscending(_ => _.LastName);
}

Adding appropriate services and middleware to Program.cs

Add the following using statement at the top of Program.cs:

using MvcWithBlazor.Components;

Add the following razor component services before the line that calls builder.Build():

builder.Services
.AddRazorComponents()
.AddInteractiveServerComponents()
.AddCircuitOptions(options => options.DetailedErrors = true); // for debugging razor components

Add this anti-forgery middleware right after 'app.UseRouting();':

app.UseAntiforgery();

Place this code before the line that calls app.Run():

app.MapRazorComponents<App>()
.AddInteractiveServerRenderMode();

Try it out

Run the application with the following terminal window command:

dotnet watch

When the home page loads in your browser, try the /students page. You should see a page that looks like this:


You can sort any column by clicking on the column title and the paging should also work. We have succeeded in mixing Blazor with ASP.NET MVC. 

Injecting Blazor components into MVC views

We can inject Blazor components directly into MVC .cshtml views. We must first make the appropriate namespaces visible to the environment for the MVC views. Add the following using statements to Views/_ViewImports.cshtml:

@using MvcWithBlazor.Components
@using MvcWithBlazor.Components.Pages

Note that you must adjust the above highlighted text with the appropriate name of your application.

Add the following <base> tag and Component Tag Helper for a HeadOutlet component to the <head> markup of Views/Shared/_Layout.cshtml:

<base href="~/" />
<component type="typeof(Microsoft.AspNetCore.Components.Web.HeadOutlet)" 
    render-mode="ServerPrerendered" />

The HeadOutlet component is used to render head (<head>) content for page titles (PageTitle component) and other head elements (HeadContent component) set by Razor components.

Also, in the same Views/Shared/_Layout.cshtml file, add a <script> tag for the blazor.web.js script immediately before the Scripts render section (@await RenderSectionAsync(...)):

<script src="_framework/blazor.web.js"></script>

Next, add the following tag to the bottom of home page Views/Home/Index.cshtml:

<component type="typeof(Students)" render-mode="ServerPrerendered" />

Point your browser to the home page of the ASP.NET Core MVC app. You should experience a page that has the Students component embedded inside it.

Paging and sorting work as expected.

Conclusion

You can do the same with ASP.NET Core Razor Pages.

I hope you found this article useful.

Wednesday, December 6, 2023

Using free QuickGrid component with Static Server Rendering Blazor App

 Overview

QuickGrid is a Razor component that quickly and efficiently displays data in tabular form. Visit https://aspnet.github.io/quickgridsamples/ to check out what you can do with this component. In this tutorial, you will discover how easy it is to incorporate in your apps and how versatile it is. I will be using the current version of .NET 8.0.

Source Code: https://github.com/medhatelmasry/BlazorQuickGrid

Companion Video: https://youtu.be/LBoG1WMaFGI

Getting Started

We will create a Static Server rendering (SSR) application with the following terminal command:

dotnet new blazor --name BlazorQuickGrid 

cd BlazorQuickGrid

Add this class to Models/Student.cs to generate some sample student data:

namespace BlazorQuickGrid.Models;

public class Student {
    required public int? Id { get; set; }
    required public string FirstName { get; set; }
    required public string LastName { get; set; }
    required public string School { get; set; }

    public static IQueryable<Student> GetStudents() {
        int ndx = 0;
        List<Student> students = new List<Student>() {
            new Student() { Id = ++ndx, FirstName="Max", LastName="Pao", School="Science" },
            new Student() { Id = ++ndx, FirstName="Tom", LastName="Fay", School="Mining" },
            new Student() { Id = ++ndx, FirstName="Ann", LastName="Sun", School="Nursing" },
            new Student() { Id = ++ndx, FirstName="Joe", LastName="Fox", School="Computing" },
            new Student() { Id = ++ndx, FirstName="Sue", LastName="Mai", School="Mining" },
            new Student() { Id = ++ndx, FirstName="Ben", LastName="Lau", School="Business" },
            new Student() { Id = ++ndx, FirstName="Zoe", LastName="Ray", School="Mining" },
            new Student() { Id = ++ndx, FirstName="Sam", LastName="Ash", School="Medicine" },
            new Student() { Id = ++ndx, FirstName="Dan", LastName="Lee", School="Computing" },
            new Student() { Id = ++ndx, FirstName="Pat", LastName="Day", School="Science" },
            new Student() { Id = ++ndx, FirstName="Kim", LastName="Rex", School="Computing" },
            new Student() { Id = ++ndx, FirstName="Tim", LastName="Ram", School="Business" },
            new Student() { Id = ++ndx, FirstName="Rob", LastName="Wei", School="Mining" },
            new Student() { Id = ++ndx, FirstName="Jan", LastName="Tex", School="Science" },
            new Student() { Id = ++ndx, FirstName="Jim", LastName="Kid", School="Business" },
            new Student() { Id = ++ndx, FirstName="Ben", LastName="Chu", School="Medicine" },
            new Student() { Id = ++ndx, FirstName="Mia", LastName="Tao", School="Computing" },
            new Student() { Id = ++ndx, FirstName="Ted", LastName="Day", School="Business" },
            new Student() { Id = ++ndx, FirstName="Amy", LastName="Roy", School="Science" },
            new Student() { Id = ++ndx, FirstName="Ian", LastName="Kit", School="Nursing" },
            new Student() { Id = ++ndx, FirstName="Liz", LastName="Tan", School="Medicine" },
            new Student() { Id = ++ndx, FirstName="Mat", LastName="Roy", School="Tourism" },
            new Student() { Id = ++ndx, FirstName="Deb", LastName="Luo", School="Medicine" },
            new Student() { Id = ++ndx, FirstName="Ana", LastName="Poe", School="Computing" },
            new Student() { Id = ++ndx, FirstName="Lyn", LastName="Raj", School="Science" },
            new Student() { Id = ++ndx, FirstName="Amy", LastName="Ash", School="Tourism" },
            new Student() { Id = ++ndx, FirstName="Kim", LastName="Kid", School="Mining" },
            new Student() { Id = ++ndx, FirstName="Bec", LastName="Fry", School="Nursing" },
            new Student() { Id = ++ndx, FirstName="Eva", LastName="Lap", School="Computing" },
            new Student() { Id = ++ndx, FirstName="Eli", LastName="Yim", School="Business" },
            new Student() { Id = ++ndx, FirstName="Sam", LastName="Hui", School="Science" },
            new Student() { Id = ++ndx, FirstName="Joe", LastName="Jin", School="Mining" },
            new Student() { Id = ++ndx, FirstName="Liz", LastName="Kuo", School="Agriculture" },
            new Student() { Id = ++ndx, FirstName="Ric", LastName="Mak", School="Tourism" },
            new Student() { Id = ++ndx, FirstName="Pam", LastName="Day", School="Computing" },
            new Student() { Id = ++ndx, FirstName="Stu", LastName="Gad", School="Business" },
            new Student() { Id = ++ndx, FirstName="Tom", LastName="Bee", School="Tourism" },
            new Student() { Id = ++ndx, FirstName="Bob", LastName="Lam", School="Agriculture" },
            new Student() { Id = ++ndx, FirstName="Jim", LastName="Ots", School="Medicine" },
            new Student() { Id = ++ndx, FirstName="Tom", LastName="Mag", School="Mining" },
            new Student() { Id = ++ndx, FirstName="Hal", LastName="Doe", School="Agriculture" },
            new Student() { Id = ++ndx, FirstName="Roy", LastName="Kim", School="Nursing" },
            new Student() { Id = ++ndx, FirstName="Vis", LastName="Cox", School="Science" },
            new Student() { Id = ++ndx, FirstName="Kay", LastName="Aga", School="Tourism" },
            new Student() { Id = ++ndx, FirstName="Reo", LastName="Hui", School="Business" },
            new Student() { Id = ++ndx, FirstName="Bob", LastName="Roe", School="Medicine" },
        };
        return students.AsQueryable();
    }
}

Add this QuickGrid package to your server-side blazor app:

dotnet add package Microsoft.AspNetCore.Components.QuickGrid

Add this to Components/_Imports.razor:

@using Microsoft.AspNetCore.Components.QuickGrid
@using BlazorQuickGrid.Models

Replace Components/Pages/Home.razor with the following:

@page "/"
@rendermode InteractiveServer

<PageTitle>Students</PageTitle>
<h1>Students</h1>
<QuickGrid Items="@students">
    <PropertyColumn Property="@(_ => _.Id)" Sortable="true" />
    <PropertyColumn Property="@(_ => _.FirstName)" Sortable="true" />
    <PropertyColumn Property="@(_ => _.LastName)" Sortable="true" />
    <PropertyColumn Property="@(_ => _.School)" Sortable="true" />
</QuickGrid>
@code {
    IQueryable<Student> students = Student.GetStudents();
}

You can now run your app with:

dotnet watch

The following page would load in your browser:


One of the quick wins that you get out of the box is the ability to sort. Click on the column titles and you will see that the data in the column sorts.

Pagination

Add this variable inside the @code { . . .  } block in Components/Pages/Home.razor.

private PaginationState pagination = new PaginationState { ItemsPerPage = 10 };

Add this parameter in to the opening <QuickGrid> tag:

Pagination="@pagination"

To provide for paging, add this pagination component under </QuickGrid>:

<Paginator State="@pagination" />

Pagination will appear at the bottom of the table:


TemplateColumn

Suppose we want to combine first and last names into the same column. This is a good example of why you would use TemplateColumn. 

Replace:

<PropertyColumn Property="@(_ => _.FirstName)" Sortable="true" />
<PropertyColumn Property="@(_ => _.LastName)" Sortable="true" />

WITH

<TemplateColumn Title="Name">
  <div class="flex items-center">
    <nobr>
      @context.FirstName @context.LastName
    </nobr>
  </div>
</TemplateColumn>


Although we succeeded in putting the full name under one column, unfortunately, the Name column is not sortable. Let us fix that.Add this sortByName variable into the @code {  . . . } code block:

GridSort<Student> sortByName = GridSort<Student>
    .ByAscending(_ => _.FirstName).ThenAscending(_ => _.LastName);

Also, add this parameter to the opening <TemplateColumn> tag for Name:

SortBy="@sortByName"
It is now possible to sort the Name column.

There is much more you can do with the QuickGrid component. Consider this a small taste of what is possible.

Tuesday, November 28, 2023

Using Mongo DB in an ASP.NET 8.0 Minimal Web API web app

 In this tutorial I will show you how to develop an ASP.NET 8.0 Minimal API application that interacts with MongoDB. In order to proceed you will need the following pre-requisites:

  • Docker - used to host MongoDB. This is my preferred approach because it is quick and does not take too many resources on the host computer.
  • .NET 8.0
  • Visual Studio Code

The Database

Run the following command in a terminal window to start a MongoDB container named mdb:

docker run -p 27777:27017 --name mgo -d mongo:4.1.6

You can verify that the container is running by typing the following command in a terminal window:

docker ps -a

Let us start a bash session inside the container so that we can create a database and add some sample data to it. Enter the following command to start an interactive bash session inside the container:

docker exec -it mgo bash

We can then use the mongo command line interface (CLI) to create a database named school-db and then add some sample data to a collection of students. Type the following command:

mongo

This takes you into a mongo session command prompt. Enter the following command to create a database named school-db:

use school-db

Next, let's create a collection named students and add to it six sample students:

db.Students.insertMany(
[
  {'FirstName':'Sue','LastName':'Fox','School':'Business'},
  {'FirstName':'Tom','LastName':'Max','School':'Mining'},
  {'FirstName':'Ann','LastName':'Lee','School':'Nursing'},
  {'FirstName':'Joe','LastName':'Roy','School':'Tourism'},
  {'FirstName':'Jan','LastName':'Ash','School':'Communications'},
  {'FirstName':'Eva','LastName':'Day','School':'Medicine'},
]);

You can retrieve the list of students with the following command:

db.Students.find().pretty();

To exit the mongo command prompt by typing:

exit

You can also exit the bash session and return to the host operating system by typing:

exit

Creating an ASP.NET 8.0 Minimal Web API application

Create an ASP.NET 8.0 Minimal Web API application. This is accomplished by entering this command:

dotnet new webapi -f net8.0 -o AspMongoApi

Let's see what our application looks like. Run the application by executing:

cd AspMongoApi
dotnet run

The above command builds and runs the application in a web server. Point your browser to https://localhost:????/weatherforecast (Where ???? is your port number). This is what you should see:


Stop the web server by hitting CTRL+C on the keyboard.

Building the Students API

Add the MongoDB driver Nuget package with the following command:

dotnet add package MongoDB.Driver

Now that we have the driver, we can proceed with coding our Minimal API. I will use Visual Studio Code because it is operating system agnostic. To load your application workspace into VS Code, simply type in the following command from the root folder of your application:

code .

We need a Student class to represent the schema for student documents in a Students collection in the MongoDB school-db database. Create a Models folder. Inside the Models folder, add a file named Student.cs with the following code:

using MongoDB.Bson;
using MongoDB.Bson.Serialization.Attributes;

namespace AspMongoApi.Models;
public class Student {
    [BsonId]
    [BsonRepresentation(BsonType.ObjectId)]
    public string? Id { get; set; }
    public string? FirstName { get; set; }
    public string? LastName { get; set; }
    
    [BsonElement("School")]
    public string? Department { get; set; }
}

In the preceding class, the Id property:
  • Is required for mapping the Common Language Runtime (CLR) object to the MongoDB collection.
  • Is annotated with [BsonId] to designate this property as the document's primary key.
  • Is annotated with [BsonRepresentation(BsonType.ObjectId)] to allow passing the parameter as type string instead of an ObjectId structure. Mongo handles the conversion from string to ObjectId.
The Department property is annotated with the [BsonElement] attribute. The attribute's value of School represents the property name in the MongoDB collection.

Add the following to appsettings.json:

"StudentDbSettings": {
"CollectionName": "Students",
"ConnectionString": "mongodb://localhost:27777",
"DatabaseName": "school-db"
},

The entire contents of appsettings.json will look like this:

{
  "StudentDbSettings": {
    "CollectionName": "Students",
    "ConnectionString": "mongodb://localhost:27777",
    "DatabaseName": "school-db"
  },
  "Logging": {
    "LogLevel": {
      "Default": "Information",
      "Microsoft.AspNetCore": "Warning"
    }
  },
  "AllowedHosts": "*"
}

Add StudentDbSettings.cs to the Models folder with this code:

namespace AspMongoApi.Models;

public class StudentsDbSettings {
    public string ConnectionString { get; set; } = null!;
    public string DatabaseName { get; set; } = null!;
    public string CollectionName { get; set; } = null!;
}

The above StudentDbSettings class is used to store the appsettings.json file's StudentDbSettings property values. The JSON and C# property names are named identically to simplify the mapping process.

Add the following code to Program.cs before "var app = builder.Build();" :

builder.Services.Configure<StudentsDbSettings>(
    builder.Configuration.GetSection("StudentDbSettings"));

In the above code, the configuration instance to which the appsettings.json file's StudentDatabaseSettings section binds is registered in the Dependency Injection (DI) container.

Create a folder named Services and add to it a file named StudentService.cs with the following code:

namespace AspMongoApi.Services;

public class StudentsService {
    private readonly IMongoCollection<Student> _studentsCollection;

    public StudentsService(IOptions<StudentsDbSettings> studentsDatabaseSettings) {
        var mongoClient = new MongoClient(
            studentsDatabaseSettings.Value.ConnectionString);

        var mongoDatabase = mongoClient.GetDatabase(
            studentsDatabaseSettings.Value.DatabaseName);

        _studentsCollection = mongoDatabase.GetCollection<Student>(
            studentsDatabaseSettings.Value.CollectionName);
    }

    public async Task<List<Student>> GetAsync() =>
        await _studentsCollection.Find(_ => true).ToListAsync();

    public async Task<Student?> GetAsync(string id) =>
        await _studentsCollection.Find(x => x.Id == id).FirstOrDefaultAsync();

    public async Task CreateAsync(Student newStudent) =>
        await _studentsCollection.InsertOneAsync(newStudent);

    public async Task UpdateAsync(string id, Student updatedStudent) =>
        await _studentsCollection.ReplaceOneAsync(x => x.Id == id, updatedStudent);

    public async Task RemoveAsync(string id) =>
        await _studentsCollection.DeleteOneAsync(x => x.Id == id);
}

In the above code, an StudentsDbSettings instance is retrieved from Dependency Injection via constructor injection. Also, the above class knows how to connect to the MongoDB server and use the available driver methods to retrieve, insert, update and delete data.

Register the StudentService class with DI to support constructor injection. Add the following to Program.cs before "var app = builder.Build();" :

builder.Services.AddSingleton<StudentsService>();

Add the following code to Program.cs right before the "app.Run()l" statement:

app.MapGet("/students", async (StudentsService studentsService) => {
    var students = await studentsService.GetAsync();
    return students;
});

app.MapGet("/students/{id}", async (StudentsService studentsService, string id) => {
    var student = await studentsService.GetAsync(id);
    return student is null ? Results.NotFound() : Results.Ok(student);
});

app.MapPost("/students", async (StudentsService studentsService, Student student) => {
    await studentsService.CreateAsync(student);
    return student;
});

app.MapPut("/students/{id}", async (StudentsService studentsService, string id, Student student) => {
    await studentsService.UpdateAsync(id, student);
    return student;
});

app.MapDelete("/students/{id}", async (StudentsService studentsService, string id) => {
    await studentsService.RemoveAsync(id);
    return Results.Ok();
});

The above endpoints:
  • Use the StudentService class to perform CRUD operations.
  • Contains action methods to support GET, POST, PUT, and DELETE HTTP requests.

Running the application

Start the application by executing the this command from a terminal windows at the root of the application:

dotnet watch

Test the API with the Swagger interface that is available in your browser:


You can also view the data by pointing your browser to https://localhost:????/api/Students. This is the expected output:


Note that even though the last field is named School in the database, it appears as Department in our app because that is how we mapped it in the Student class.

Go ahead and test the other API endpoints for POST, PUT and DELETE using your favourite tool like Postman or curl. It should all work.

Cleanup

To stop & remove the MongoDB docker container, enter the following from any terminal window on your computer:

docker rm -f mgo

I hope you learned something new in this tutorial. Until next time, happy coding.