This article discussed one approach to having your ASP.NET development environment work with SQL Server (MSSQL) running in a docker container.
Source code: https://github.com/medhatelmasry/AspMSSQL
It is assumed that the following installed on your computer:
- .NET 10.0
- Docker Desktop
- ‘dotnet-ef’ tool
Setting up SQL Server docker container
To download a suitable SQL Server image from Docker Hub and run it on your local computer, type the following command from within a terminal window:
docker run --cap-add SYS_PTRACE -e ACCEPT_EULA=1 -e MSSQL_SA_PASSWORD=SqlPassword! -p 1444:1433 --name mssql -d mcr.microsoft.com/mssql/server:2022-latest
This starts a container named mssql that listens on port 1444 on your local computer. The sa password is SqlPassword!.
To ensure that the SQL Server container is running, type the following from within a terminal window:
docker ps
You will see a message like the following:
CONTAINER ID   IMAGE                                        ...... NAMES
e84053717017   mcr.microsoft.com/mssql/server:2022-latest   ...... mssql
Creating our ASP.NET MVC App
Create an ASP.NET MVC app named AspMSSQL with SQL Server support by running the following terminal window commands:
dotnet new mvc --auth individual --use-local-db -o AspMSSQL
cd AspMSSQL
To run the web application and see what it looks like, enter the following command:
dotnet watch
The app starts in your default browser and looks like this:

Let us configure our web application so that the connection string can be constructed from environment variables. Open the Program.cs file in your favourite editor and comment out (or delete) the following statements:
var connectionString = builder.Configuration.GetConnectionString("DefaultConnection")
?? throw new InvalidOperationException("Connection string 'DefaultConnection' not found.");
Replace the above code with the following:
var host = builder.Configuration["DBHOST"] ?? "localhost";
var port = builder.Configuration["DBPORT"] ?? "1444";
var password = builder.Configuration["DBPASSWORD"] ?? "SqlPassword!";
var db = builder.Configuration["DBNAME"] ?? "mydb";
var user = builder.Configuration["DBUSER"] ?? "sa";

string connectionString = $"Server={host},{port};Database={db};UID={user};PWD={password};TrustServerCertificate=True;";
Five environment variables are used in the database connection string. These are: DBHOST, DBPORT , DBPASSWORD, DBNAME and DBUSER. If these environment variables are not found then they will take on default values: localhost, 1444, SqlPassword!, mydb and sa respectively.
Go ahead and delete the connection string from appsettings.json as it is not needed anymore:
"ConnectionStrings": {
  "DefaultConnection": "Server=(localdb)\\mssqllocaldb;Database=aspnet-AspMSSQL; MultipleActiveResultSets=true"
},
Entity Framework Migrations
We can instruct our application to automatically process any outstanding Entity Framework migrations. This is done by adding the following statement to Program.cs right before the last app.Run() statement:
using (var scope = app.Services.CreateScope()) {
    var services = scope.ServiceProvider;

    var context = services.GetRequiredService<ApplicationDbContext>();
    context.Database.Migrate();
}
Test app
Now, let's test our web app and see whether it can talk to the containerized MSSQL database server. Run the web application with the following terminal command:
dotnet watch
Click on the Register link on the top right side.

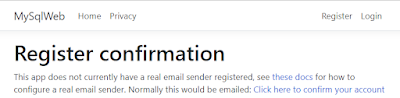
I entered an Email, Password and Confirm password, then clicked on the Register button. The website then displays the following page that requires that you confirm the email address:

Click on the “Click here to confirm your account” link. This leads you to a confirmation page:

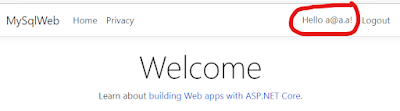
Login with the email address and password that you registered with.

Dockeri-zing app
We will generate the release version of the application by executing the following command from a terminal window in the root directory of the web app:
dotnet publish -o distrib
The above command instructs dotnet to produce the release version of the application in the distrib directory. When you inspect the distrib directory, you will see files like the following:

The highlighted file in the above image is the main DLL file that is the entry point into the web application. Let us run the DLL. To do this, change to the distrib directory, then run your main DLL file with:
cd distrib
dotnet AspMSSQL.dll
This displays the familiar messages from the web server that the app is ready to be accessed from a browser.

Hit CTRL C to stop the web server.
We now have a good idea about the ASP.NET artifacts that need to be copied into a container.
In a terminal window, stop and remove the MSSQL container with:
docker rm -f mssql
Return to the root directory of your project by typing the following in a terminal window:
cd ..
Docker image for web app
We need to create a docker image that will contain the .NET runtime. At the time of writing this article, the current version of .NET is 10.0.
We can exclude files from being copied into the container imag Add a file named .dockerignore in the root of the web application with this content:
**/.git
**/.gitignore
**/node_modules
**/npm-debug.log
**/.DS_Store
**/bin
**/obj
**/.vs
**/.vscode
**/.env
**/*.user
**/*.suo
**/.idea
**/coverage
**/.nyc_output
**/docker-compose*.yml
**/Dockerfile*
**/.github
**/README.md
**/LICENSE
Create a text file named Dockerfile and add to it the following content:
# Build stage
FROM mcr.microsoft.com/dotnet/sdk:10.0 AS build
WORKDIR /src

# Copy project file and restore dependencies
COPY ["AspMSSQL.csproj", "."]
RUN dotnet restore "AspMSSQL.csproj"

# Copy the rest of the source code
COPY . .

# Build the application
RUN dotnet build "AspMSSQL.csproj" -c Release -o /app/build

# Publish stage
FROM build AS publish
RUN dotnet publish "AspMSSQL.csproj" -c Release -o /app/publish /p:UseAppHost=false

# Runtime stage
FROM mcr.microsoft.com/dotnet/aspnet:10.0 AS runtime
WORKDIR /app

# Install curl for health checks (optional)
RUN apt-get update && apt-get install -y curl && rm -rf /var/lib/apt/lists/*

# Copy published application from publish stage
COPY --from=publish /app/publish .

# Expose port 8080 (HTTP)
EXPOSE 8080

# Set environment variables
ENV ASPNETCORE_URLS=http://+:8080
ENV ASPNETCORE_ENVIRONMENT=Production

# Run the application
ENTRYPOINT ["dotnet", "AspMSSQL.dll"]
docker-compose.yml
We will next create a docker yml file that orchestrates the entire system involving two containers: a MSSQL database server and our web app. In the root folder of your application, create a text file named docker-compose.yml and add to it the following content:
services:
  # SQL Server Service
  mssql:
    image: mcr.microsoft.com/mssql/server:2022-latest
    container_name: aspmsql-mssql
    environment:
      ACCEPT_EULA: 'Y'
      MSSQL_SA_PASSWORD: 'SqlPassword!123'
      MSSQL_PID: 'Developer'
    ports:
      - "1433:1433"
    volumes:
      - ./mssql-data:/var/opt/mssql/data

  # ASP.NET Application Service
  aspmsql-app:
    build:
      context: .
      dockerfile: Dockerfile
    container_name: aspmsql-app
    depends_on:
      - mssql
    environment:
      ASPNETCORE_ENVIRONMENT: Development
      ASPNETCORE_URLS: http://+:8080
      DBHOST: mssql
      DBPORT: 1433
      DBUSER: sa
      DBPASSWORD: SqlPassword!123
      DBNAME: AspMSSQLDb
    ports:
      - "8080:8080"
    restart: unless-stopped

volumes:
  sqlserver-data:
    driver: local
Running the yml file
To find out if this all works, go to a terminal window and run the following command:
docker-compose up -d --build
Point your browser to http://localhost:8080/ and you should see the main web page. Register a user, confirm the email, and login. It should all work as expected.

Cleanup
Run the following command to shutdown docker-compose and cleanup:
docker-compose down
Conclusion
We have seen how straight forward and easy it is to containerize an application and its database with docker-compose.