Showing posts with label SQL Server. Show all posts

Thursday, February 12, 2026

docker-compose with SQL Server and ASP.NET

This article discussed one approach to having your ASP.NET development environment work with SQL Server (MSSQL) running in a docker container.

Source code: https://github.com/medhatelmasry/AspMSSQL

It is assumed that the following installed on your computer:

  1. .NET 10.0 
  2. Docker Desktop 
  3. ‘dotnet-ef’ tool 

Setting up SQL Server docker container

To download a suitable SQL Server image from Docker Hub and run it on your local computer, type the following command from within a terminal window:

docker run --cap-add SYS_PTRACE -e ACCEPT_EULA=1 -e MSSQL_SA_PASSWORD=SqlPassword! -p 1444:1433 --name mssql -d mcr.microsoft.com/mssql/server:2022-latest

This starts a container named mssql that listens on port 1444 on your local computer. The sa password is SqlPassword!.

To ensure that the SQL Server container is running, type the following from within a terminal window:

docker ps

You will see a message like the following:

CONTAINER ID   IMAGE                                        ...... NAMES
e84053717017   mcr.microsoft.com/mssql/server:2022-latest   ...... mssql

Creating our ASP.NET MVC App

Create an ASP.NET MVC app named AspMSSQL with SQL Server support by running the following terminal window commands:

dotnet new mvc --auth individual --use-local-db -o AspMSSQL
cd AspMSSQL

To run the web application and see what it looks like, enter the following command:

dotnet watch

The app starts in your default browser and looks like this:

The default page when starting an ASP.NET MVC application.

Let us configure our web application so that the connection string can be constructed from environment variables. Open the Program.cs file in your favourite editor and comment out (or delete) the following statements:

var connectionString = builder.Configuration.GetConnectionString("DefaultConnection") ?? throw new InvalidOperationException("Connection string 'DefaultConnection' not found.");

Replace the above code with the following:

var host = builder.Configuration["DBHOST"] ?? "localhost";
var port = builder.Configuration["DBPORT"] ?? "1444";
var password = builder.Configuration["DBPASSWORD"] ?? "SqlPassword!";
var db = builder.Configuration["DBNAME"] ?? "mydb";
var user = builder.Configuration["DBUSER"] ?? "sa";

string connectionString = $"Server={host},{port};Database={db};UID={user};PWD={password};TrustServerCertificate=True;";

Five environment variables are used in the database connection string. These are: DBHOST, DBPORT , DBPASSWORD, DBNAME and DBUSER. If these environment variables are not found then they will take on default values: localhost, 1444, SqlPassword!, mydb and sa respectively.

Go ahead and delete the connection string from appsettings.json as it is not needed anymore:

"ConnectionStrings": {
  "DefaultConnection": "Server=(localdb)\\mssqllocaldb;Database=aspnet-AspMSSQL; MultipleActiveResultSets=true"
},

Entity Framework Migrations

We can instruct our application to automatically process any outstanding Entity Framework migrations. This is done by adding the following statement to Program.cs right before the last app.Run() statement:

using (var scope = app.Services.CreateScope()) {
    var services = scope.ServiceProvider;

    var context = services.GetRequiredService<ApplicationDbContext>();    
    context.Database.Migrate();
}

Test app

Now, let's test our web app and see whether it can talk to the containerized MSSQL database server. Run the web application with the following terminal command:

dotnet watch

Click on the Register link on the top right side.

The ASP.NET MVC user register page.

I entered an Email, Password and Confirm password, then clicked on the Register button. The website then displays the following page that requires that you confirm the email address:

User Register Confirmation Page.

Click on the “Click here to confirm your account” link. This leads you to a confirmation page:

After a user confirms email, the user confirm email aler displays.

Login with the email address and password that you registered with.

The message on the top right side confirms that the user was saved and that communication between the ASP.NET MVC app and SQL Server is working as expected.

Dockeri-zing app

We will generate the release version of the application by executing the following command from a terminal window in the root directory of the web app:

dotnet publish -o distrib

The above command instructs dotnet to produce the release version of the application in the distrib directory. When you inspect the distrib directory, you will see files like the following:

A screen capture of the files in the bin folder containing the main DLL named AspMSSQL.dll

The highlighted file in the above image is the main DLL file that is the entry point into the web application. Let us run the DLL. To do this, change to the distrib directory, then run your main DLL file with:

cd distrib
dotnet AspMSSQL.dll

This displays the familiar messages from the web server that the app is ready to be accessed from a browser. 

Screen capture showing the terminal window after executing command "dotnet AspMSSQL.dll"

Hit CTRL C to stop the web server.

We now have a good idea about the ASP.NET artifacts that need to be copied into a container.

In a terminal window, stop and remove the MSSQL container with:

docker rm -f mssql

Return to the root directory of your project by typing the following in a terminal window:

cd ..

Docker image for web app

We need to create a docker image that will contain the .NET runtime. At the time of writing this article, the current version of .NET is 10.0.

We can exclude files from being copied into the container imag Add a file named .dockerignore in the root of the web application with this content:

**/.git
**/.gitignore
**/node_modules
**/npm-debug.log
**/.DS_Store
**/bin
**/obj
**/.vs
**/.vscode
**/.env
**/*.user
**/*.suo
**/.idea
**/coverage
**/.nyc_output
**/docker-compose*.yml
**/Dockerfile*
**/.github
**/README.md
**/LICENSE

Create a text file named Dockerfile and add to it the following content:

# Build stage
FROM mcr.microsoft.com/dotnet/sdk:10.0 AS build
WORKDIR /src

# Copy project file and restore dependencies
COPY ["AspMSSQL.csproj", "."]
RUN dotnet restore "AspMSSQL.csproj"

# Copy the rest of the source code
COPY . .

# Build the application
RUN dotnet build "AspMSSQL.csproj" -c Release -o /app/build

# Publish stage
FROM build AS publish
RUN dotnet publish "AspMSSQL.csproj" -c Release -o /app/publish /p:UseAppHost=false

# Runtime stage
FROM mcr.microsoft.com/dotnet/aspnet:10.0 AS runtime
WORKDIR /app

# Install curl for health checks (optional)
RUN apt-get update && apt-get install -y curl && rm -rf /var/lib/apt/lists/*

# Copy published application from publish stage
COPY --from=publish /app/publish .

# Expose port 8080 (HTTP)
EXPOSE 8080

# Set environment variables
ENV ASPNETCORE_URLS=http://+:8080
ENV ASPNETCORE_ENVIRONMENT=Production

# Run the application
ENTRYPOINT ["dotnet", "AspMSSQL.dll"]

docker-compose.yml

We will next create a docker yml file that orchestrates the entire system involving two containers: a MSSQL database server and our web app. In the root folder of your application, create a text file named docker-compose.yml and add to it the following content:

services:
  # SQL Server Service
  mssql:
    image: mcr.microsoft.com/mssql/server:2022-latest
    container_name: aspmsql-mssql
    environment:
      ACCEPT_EULA: 'Y'
      MSSQL_SA_PASSWORD: 'SqlPassword!123'
      MSSQL_PID: 'Developer'
    ports:
      - "1433:1433"
    volumes:
      - ./mssql-data:/var/opt/mssql/data

  # ASP.NET Application Service
  aspmsql-app:
    build:
      context: .
      dockerfile: Dockerfile
    container_name: aspmsql-app
    depends_on:
      - mssql
    environment:
      ASPNETCORE_ENVIRONMENT: Development
      ASPNETCORE_URLS: http://+:8080
      DBHOST: mssql
      DBPORT: 1433
      DBUSER: sa
      DBPASSWORD: SqlPassword!123
      DBNAME: AspMSSQLDb
    ports:
      - "8080:8080"
    restart: unless-stopped

volumes:
  sqlserver-data:
    driver: local

Running the yml file

To find out if this all works, go to a terminal window and run the following command:

docker-compose up -d --build

Point your browser to http://localhost:8080/ and you should see the main web page. Register a user, confirm the email, and login. It should all work as expected.

Screen capture showing that qq@qq.qq is logged into the web app.

Cleanup

Run the following command to shutdown docker-compose and cleanup:

docker-compose down

Conclusion

We have seen how straight forward and easy it is to containerize an application and its database with docker-compose.

Thursday, June 12, 2025

MCP server that connects VS Code to SQL Server

In this tutorial we will configure VS Code to use an MCP Server that connects to a SQL Server database. In a similar manner, you can also connect to SQLite, PostgresDB, and MySQL. This is a very compelling proposition because it allows developers to use AI to assist in generating code that dynamically interacts with data in a relational database.

Companion Video: https://youtu.be/Ymxyjm3YrCI

Prerequisites

You will need to install the following software in order to proceed:

  • Visual Studio Code with the GitHub Copilot Chat extension
  • Docker Desktop
  • Latest versions of node.js, npm, and npx

The Database

We will run a SQL Server database with the well known Northwind sample database in a Docker container. Therefore:

  • Start Docker Desktop on your computer
  • Run a SQL Server container by executing this command in a terminal window:


docker run --cap-add SYS_PTRACE -e ACCEPT_EULA=1 -e MSSQL_SA_PASSWORD=SqlPassword! -p 1333:1433 --name nw -d melmasry/my-sqlserver-northwind:latest

The Database MCP Server

We will be using the MCP Server from the mcp-database-server GitHub Repo. Visit https://github.com/executeautomation/mcp-database-server for more details

Install and configure the SQL Server MCP server

In a suitable working directory, clone the repo, then build, and publish the code by executing these commands in a terminal window:

 
git clone https://github.com/executeautomation/mcp-database-server.git
cd mcp-database-server
npm install
npm run build

We will next install the MCP server globally with:

  
npm install -g @executeautomation/database-server

To use the MCP server with our SQL Server database, run the following terminal window command:

  
node dist/src/index.js --sqlserver --server localhost --port 1333 --database Northwind --user sa --password SqlPassword!

Keep the above terminal window open and running.

Configuring VS Code

Open VS Code. Click on the settings gear in the bottom-left corner, followed by Settings.

In the search field, enter MCP, then click on "Edit in settings.json".

Under the mcp >> servers section, add the following MCP server settings:


"sqlserver": {
  "command": "npx",
  "args": [
	"-y",
	"@executeautomation/database-server",
	"--sqlserver",
	"--server", "localhost",
	"--port", "1333",
	"--database", "Northwind",
	"--user", "sa",
	"--password", "SqlPassword!"
  ]
}

Click on Start:

Open the GitHub Copilot Chat panel:


In the GitHub Copilot Chat panel, choose any Claude model followed by Agent Mode.

Click on the tools icon in the prompt window.

You will see a list of commands that the MCP server can carry out with SQL Server

We can now start querying the database using natural language. Start with this prompt:

You have access to the Northwind database through an MCP server. What are the tables in the database?

It detects that it can use the list_tables command.

Click on Continue. I got the following output:

Similarly, you can ask another question like: 
Display the contents of the suppliers table.

Yet, another question:
What are the products supplied by "Exotic Liquids"?

Conclusion

It is very easy to connect VS Code with a relational database MCP server. In addition, you can similarly connect MCP Servers to any client C# application. MCP Servers open a ton of possibilities for AI aided software development. 

Monday, September 25, 2023

Code First development with ASP.NET MVC

 In this tutorial, you will develop a data driven web application using ASP.NET MVC, SQL Server, and Entity Framework. We shall use Visual Studio Code for our editor. The data model will be based on a Team/Player relationship in sports. We will use SQL Server running in a Docker Container.

Source code: https://github.com/medhatelmasry/TeamPlayersMvc

Assumptions

It is assumed that you have the following installed on your computer:

  • Visual Studio Code
  • .NET 7.0 SDK
  • Docker Desktop

Visual Studio Code Extension

Add this Visual Studio Code Extension if you do not have it already:

The Data Model

We will use the following class to represent a Team:

public class Team {
    [Key]
    public string? TeamName { get; set; }
    public string? City { get; set; }
    public string? Province { get; set; }
    public string? Country { get; set; }

    public List<Player>? Players { get; set; }
}

The primary key is the TeamName and a team has many players.

The following class represents a Player:

public class Player {
    public int PlayerId { get; set; }
    public string? FirstName { get; set; }
    public string? LastName { get; set; }
    public string?  Position { get; set; }

    public string? TeamName { get; set; }

    [ForeignKey("TeamName")]
    public Team? Team { get; set; }
}

The primary key is PlayerId and each player must belong to a team.

Getting started

In a working directory, run the following command in a terminal window to create a Razor Pages web application in a folder names TeamPlayers:

dotnet new mvc -f net7.0 -o TeamPlayersMvc

Change to the newly created folder with terminal command:

cd TeamPlayersMvc

For the application to work with SQL Server, we will need to add some packages by running the following commands:

dotnet add package Microsoft.EntityFrameworkCore
dotnet add package Microsoft.EntityFrameworkCore.SqlServer
dotnet add package Microsoft.EntityFrameworkCore.Tools
dotnet add package Microsoft.EntityFrameworkCore.Design
 
We will use code generation to scaffold MVC controllers & views. For that purpose, you will also need to add this package:

dotnet add package Microsoft.VisualStudio.Web.CodeGeneration.Design

If you have not done so already, you will need to globally install the following tools for Entity Framework and Code Generation respectively:

dotnet tool install -g dotnet-aspnet-codegenerator
dotnet tool install -g dotnet-ef

NOTE: If these tools are already installed, run the above commands while replacing ‘install’ with ‘update’ to get the latest version of the tool.

Creating the model classes

Open your app in Visual Studio Code with this command:

code .

Add to the Models Teamclasses Team & Player mentioned under title “The Data Model” above.

The Context Class

We will need to create a database context class to work with relational databases using Entity Framework. To this end, create a Data folder. Inside the Data folder, create a class named ApplicationDbContext with the following code:
public class ApplicationDbContext : DbContext {
    public ApplicationDbContext(DbContextOptions<ApplicationDbContext> options)
        : base(options) {}


    public DbSet<Team>? Teams { get; set; }
    public DbSet<Player>? Players { get; set; }
}

Seeding the database with sample data

It is always useful to have some sample data to visualize what the app does. Therefore, we will create a class dedicated to seeding data. In the Data folder, create a static class named SeedData and add to it the following code that contains sample data for teams and players:

public static class SeedData {
    // this is an extension method to the ModelBuilder class
    public static void Seed(this ModelBuilder modelBuilder) {
        modelBuilder.Entity<Team>().HasData(
            GetTeams()
        );
        modelBuilder.Entity<Player>().HasData(
            GetPlayers()
        );
    }
    public static List<Team> GetTeams() {
        List<Team> teams = new List<Team>() {
            new Team() {    // 1
                TeamName="Canucks",
                City="Vancouver",
                Province="BC",
                Country="Canada",
            },
            new Team() {    //2
                TeamName="Sharks",
                City="San Jose",
                Province="CA",
                Country="USA",
            },
            new Team() {    // 3
                TeamName="Oilers",
                City="Edmonton",
                Province="AB",
                Country="Canada",
            },
            new Team() {    // 4
                TeamName="Flames",
                City="Calgary",
                Province="AB",
                Country="Canada",
            },
            new Team() {    // 5
                TeamName="Leafs",
                City="Toronto",
                Province="ON",
                Country="Canada",
            },
            new Team() {    // 6
                TeamName="Ducks",
                City="Anaheim",
                Province="CA",
                Country="USA",
            },
            new Team() {    // 7
                TeamName="Lightening",
                City="Tampa Bay",
                Province="FL",
                Country="USA",
            },
            new Team() {    // 8
                TeamName="Blackhawks",
                City="Chicago",
                Province="IL",
                Country="USA",
            },
        };

        return teams;
    }

    public static List<Player> GetPlayers() {
        List<Player> players = new List<Player>() {
            new Player {
                PlayerId = 1,
                FirstName = "Sven",
                LastName = "Baertschi",
                TeamName = "Canucks",
                Position = "Forward"
            },
            new Player {
                PlayerId = 2,
                FirstName = "Hendrik",
                LastName = "Sedin",
                TeamName = "Canucks",
                Position = "Left Wing"
            },
            new Player {
                PlayerId = 3,
                FirstName = "John",
                LastName = "Rooster",
                TeamName = "Flames",
                Position = "Right Wing"
            },
            new Player {
                PlayerId = 4,
                FirstName = "Bob",
                LastName = "Plumber",
                TeamName = "Oilers",
                Position = "Defense"
            },
        };

        return players;
    }
}

Note that the SeedData class is static because it contains an extension method named Seed() to ModelBuilder.

The Seed() method needs to be called from somewhere. The most appropriate place is the ApplicationDbContext class. Add the following OnModelCreating() method to the ApplicationDbContext class:

protected override void OnModelCreating(ModelBuilder builder)
{
    base.OnModelCreating(builder);
    builder.Entity<Player>().Property(m => m.TeamName).IsRequired();

    builder.Entity<Team>().Property(p => p.TeamName).HasMaxLength(30);

    builder.Entity<Team>().ToTable("Team");
    builder.Entity<Player>().ToTable("Player");

    builder.Seed();

In addition to seeding data, the above code ensures the following:
  • TeamName is required
  • The maximum length of TeamName is 30 characters
  • The names of the tables that get created in the database are Team & Player. Otherwise, the names get created as Teams & Players.

The database

You can use any SQL Server database you wish. In my case, so that this app works on Linux, Windows, Mac Intel, and Mac M1, I will run SQL Server in a Docker container. To run SQL Server in a Docker container, run the following command:

docker run --cap-add SYS_PTRACE -e ACCEPT_EULA=1 -e MSSQL_SA_PASSWORD=SqlPassword! -p 1444:1433 --name azsql -d mcr.microsoft.com/azure-sql-edge

The connection string to the database is setup in the appsettings.json (or appsetting.Development.json) file. Edit this file and make the following highlighted updates to it:

{
  "Logging": {
    "LogLevel": {
      "Default": "Information",
      "Microsoft.AspNetCore": "Warning"
    }
  },
  "AllowedHosts": "*",
  "ConnectionStrings": {
    "DefaultConnection": "Server=tcp:127.0.0.1,1444;Database=TeamPlayersDB;UID=sa;PWD=SqlPassword!;TrustServerCertificate=True;"
  }
}
 

To make our app work with SQL Server, you will need to add the following code to Program.cs just before “var app = builder.Build();”: 

string connStr = builder.Configuration.GetConnectionString("DefaultConnection")!;
builder.Services.AddDbContext<ApplicationDbContext>(
    options => options.UseSqlServer(connStr)
);

Migrations

We can now create a migration named m1 with:

dotnet ef migrations add M1 -o Data/Migrations

This creates a migrations file in Data/Migrations folder. To execute the migrations and create the database and seed data, run the following command:

dotnet ef database update

If all goes well and no errors are generated, we can assume that a database named TeamPlayersDB was created, and data is seeded into tables Team & Player.

NOTE: If you wish to drop the database for whatever reason, you can run command: dotnet ef database drop
 
This is what the tables in the database look like:

Scaffolding Teams & Players controller and views

To incorporate pages into our app that allow us to manage Team & Player data, we will scaffold the necessary controller & views using the aspnet-codegenerator utility. Run the following command from a terminal window in the root of the project to generate files pertaining to teams and players respectively:

dotnet aspnet-codegenerator controller -name TeamsController -outDir Controllers -m Team -dc ApplicationDbContext -udl -scripts

dotnet aspnet-codegenerator controller -name PlayersController -outDir Controllers -m Player -dc ApplicationDbContext -udl -scripts

This produces controllers in the Controllers folder and fiews files in folders Views/Teams & Views/Players respectively. To add menu items on the home page that point to Team & Player pages, edit Views/Shared/_Layout.cshtml and add the following HTML to the <ul> block around line 28:

<li class="nav-item">
    <a class="nav-link text-dark" asp-area="" asp-controller="Teams" asp-action="Index">Teams</a>
</li>

<li class="nav-item">
    <a class="nav-link text-dark" asp-area="" asp-controller="Players" asp-action="Index">Players</a>
</li>

The final product

Run the web app and notice the main menu:


Click on Teams:


Click on Players:


Conclusion

You just learned how to use the code-first database approach with ASP.NET MVC. The same priciples work with ASP.NET Razor Pages. 

Monday, September 18, 2023

Connect Azure OpenAI Service to your custom SQL Server data

In this tutorial, we will lear how to connect your custom SQL Server data to Azure OpenAI. You need to have an active Azure subscription in order to proceed with this tutorial.

Create Azure Cognitive Search

Point your browser to https://portal.azure.com/. Enter 'search' in the search field at the top of the page, then click on "Cognitive Search" from the short list of services.
 

On the resulting "Azure AI services | Cognitive search" page, click on the Create button.


On the "Create a search service" page:

  • choose a suitable subscription if you have more than one
  • create a new resource group named openai-and-sql-server
  • let the "Service name" be openai-and-sql-server-service-name
  • let the location be a data center closer to where you are. In my case I chose "East US".
  • leave the "Pricing tier" as Standard

Click on the blue "Review + create" button, then click on blue "Create" button. Once deployment is complete, click on the blue "Go to resource" button. This takes you to the page of the search resource that you just created.

Click on the blue Import button under "Connect your data".


On the import data page, let "Data Source" be Samples. Then click on realestate-us-sample.

Click on the blue "Next: Add cognitive skills (Optional)" button at the bottom of the page.

On the "Import data" page, click on the blue "Skip to: Customize target index" at the bottom of the page.


You will be taken to the "Customize target index" tab. Click on the blue "Next: Create an indexer" button at the bottom of the page.


In the "Create an indexer" tab, click on the blue Submit button.


In your main service page, click on indexers on the left side. Wait until the indexer you just created shows that it is successfully provisioned.


Click on Overview on the left-side menu, then click on the "Search explorer" link.


On the "Search explorer" page, we can query the database. The Index field is defaulted to the index that was just created. In the "Query string" field, enter search=condo, then click on the blue Search button.  You will see results for condos.


Azure OpenAI Service

We are now ready to connect this cognitive search service with OpenAI. Click on the Home link in the top left corner of the page.


In the filter field at the top, enter the word openai, then select Azure OpenAI.


Click on the "+ Create" link. 


Fill out the form parameters. I entered the data shown below.


Click on the blue Next button at the bottom of the page. Accept default values on the Network tab then click on blue Next button.


Also, accept default values on the Tags tab then click on blue Next button.


Click on the blue Create button when it appears at the bottom of tthe page.


Deployment takes some time. When it is complete, cclik on the blue "Go to resource" button.


Click on the Explore button.


Click on "Bring your own data".


We will need to create a deployment. Click on "Create new deployment".


Expand "Advanced options. Choose the gpt-35-turbo model, give the deployment a name (gpt-35-turbo-deploy), leave Default for "Content Filter". Click on the Create button.


On the "Data source" tab, choose as follows:

Select data source: Azure Cognitive Search
Subscription: {your azure subscription}
Azure Cognitive Search service: {the cognitive service you created earlier}
Azure Cognitive Search Index: {the cognitive search index that was created earlier.

Enable "I acknowledge that connecting to an Azure Cognitive Search account will incue usage too my account", then click on Next.


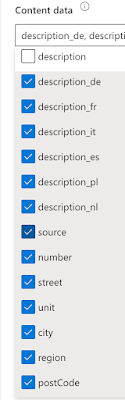
Choose all the fields for "Content data". 


Choose description for "Field name" and Title fields then click on Next.


Chooose Keyword for "Search type", then click oon Next.


Finally, click on the "Save and close" button on the "Review and finish" tab.


On the "Chat playground" page, the data source is automatically connected to the chat session.


Enter the following in the chat field: property in renton. Then, hit ENTER on your keyboard.


A response similar to the following will appear:


Conclusion

We were able to link Azure OpenAI with custom data and generate output through ChatGPT chat. The data source, of course, can be any enterprise relational data.