In this tutorial I will showcase the built-in WebApi authentication that was introduced with ASP.NET Core 8.0. To keep it simple, we shall persist our data in the lightweight SQLite database.
Source Code: https://github.com/medhatelmasry/WebApiAuth
Companion Video: https://youtu.be/SSLSNWRQJiA
Prerequisites
- .NET 8.0
- Visual Studio Code editor
Getting Started
In a suitable working directory, create a new WebApi application using the following terminal window command:
dotnet new webapi -f net8.0 --name WebApiAuth
Change directory with:
cd WebApiAuth
We will need to add some packages. Also in the same terminal window, run the following commands:
dotnet add package Microsoft.AspNetCore.Identity.EntityFrameworkCore -v 8.0.0
dotnet add package Microsoft.EntityFrameworkCore.Sqlite -v 8.0.0
dotnet add package Microsoft.EntityFrameworkCore.Tools -v 8.0.0
dotnet add package Microsoft.EntityFrameworkCore.Design -v 8.0.0
The above packages allow us to use SQLite and Entity Framework.
Make sure you have the dotnet-ef tool. If you do not, you can globally install it with:
dotnet tool install --global dotnet-ef
If you already have the dotnet-ef, update your version to the latest with:
dotnet tool update --global dotnet-ef
Let us run our web app and have a peek at what it does. Run the web app with:
dotnet watch
This gets loaded into your default browser:

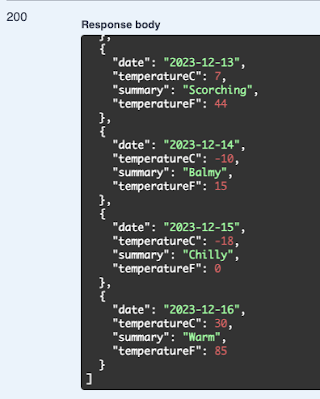
Click on GET >> Try it out >> Execute. This will produce the following output:
It is time for us to peek into the code. Stop the server with CTRL C, then start Visual Studio Code with the following terminal command:
code .
Database context class
Since we will be using Entity Framework to talk to the SQLite database, we will need a database context class. Add a folder named Data, then add to it a class named ApplicationDbContext that derives from IdentityDbContext<IdentityUser> with the following code:
using Microsoft.AspNetCore.Identity;using Microsoft.AspNetCore.Identity.EntityFrameworkCore;using Microsoft.EntityFrameworkCore;namespace WebApiAuth.Data;public class ApplicationDbContext: IdentityDbContext<IdentityUser> {public ApplicationDbContext(DbContextOptions<ApplicationDbContext> options) : base(options){}}
Add the following connection string to appsettings.json:
"ConnectionStrings": {"DefaultConnection": "Data Source=webapi-auth.db;"}
Next, we must register ApplicationDbContext with our app by adding the following code into Program.cs right before 'var app = builder.Build();':
// Configure identity database access via EF Corevar connectionString = builder.Configuration.GetConnectionString("DefaultConnection") ?? throw new InvalidOperationException("Connection string 'DefaultConnection' not found.");builder.Services.AddDbContext<ApplicationDbContext>(options =>options.UseSqlite(connectionString));
Other required services
Add the following code right after the above code:
// Authorizationbuilder.Services.AddAuthorization();// Activate identity APIs. By default, both cookies and proprietary tokens// are activated. Cookies will be issued based on the 'useCookies' querystring// parameter in the login endpointbuilder.Services.AddIdentityApiEndpoints<IdentityUser>().AddEntityFrameworkStores<ApplicationDbContext>();
We need to add authorization and authentication middleware with the following code right after 'app.UseHttpsRedirection();':
app.UseAuthentication();app.UseAuthorization();
Let us secure the /weatherforecast endpoint by forcing authentication. Chain the following to the endpoint by add ing this code right under '.WithOpenApi()':
.RequireAuthorization();
The full app.MapGet() code will look like this:
app.MapGet("/weatherforecast", () =>{var forecast = Enumerable.Range(1, 5).Select(index =>new WeatherForecast(DateOnly.FromDateTime(DateTime.Now.AddDays(index)),Random.Shared.Next(-20, 55),summaries[Random.Shared.Next(summaries.Length)])).ToArray();return forecast;}).WithName("GetWeatherForecast").WithOpenApi().RequireAuthorization();
Adding Identity API endpoints
Add the identity endpoints to your app by calling MapIdentityApi<IdentityUser>(). Add the following code to Program.cs right before 'app.Run();':
app.MapIdentityApi<IdentityUser>();
Migrations
Since our app uses EF Core, we will create a migration in the Data folder and update the database. Run the following terminal commands:
dotnet ef migrations add M1 -o Data/Migrations
dotnet ef database update
You will notice that a SQLite database file is created named webapi-auth.db.
Try it out
Let us test our application to see whether or not we have indeed succeeded in securing our API endpoint. Start your app with:
dotnet watch
You will see a variety of identity related endpoints when the following gets loaded into your default browser:

Try to hit the /weatherforecast endpoint and see the data. You will encounter a 401 (unauthorized) error:

Let us register a user. Click on the /register endpoint then click on the "Try it out" button. Update the JSON object so it looks like this:
{"email": "a@a.a","password": "P@$$w0rd"}
Click on the Execute button. You will get a Code 200 response representing success:

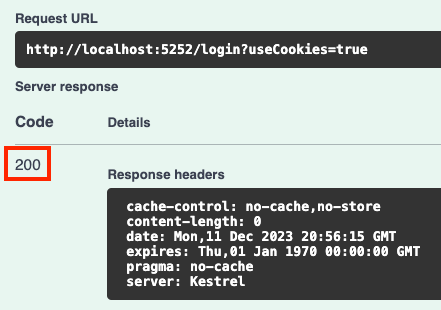
Next, let us login with the credentials we created. Click on the /login endpoint, then click on the "Try it out" button.

Choose true for useCookies and update the JSON object so it only has the credentials we had previously created. Thereafter, click on the Execute button. You should get a code 200 response:

With ASP.NET Core 8.0 came an easier way for securing WebAPI.
Thank You. Article is very nice.
ReplyDelete