In this tutorial I will introduce you to GitHub Codespaces. We will first create an ASP.NET Core MVC application on your local computer. We will then push the application to GitHub. Once the application source code is on GitHub, we will use Visual Studio Code in GitHub Codespaces to modify the app and test it out - all in the cloud.
Companion video: https://youtu.be/DsGNAx_kJ3g
What is GitHub codespaces?
GitHub codespaces is an online development environment, hosted by GitHub and powered by Visual Studio Code. It allows you to develop entirely in the cloud. Codespaces is currently in limited public beta and subject to change.
You can signup for access to GitHub Codespaces at: https://github.com/features/codespaces/signup
Let's get started.
1) Create a repository in GitHub. I named mine MvcOnCodespaces.
2) Create an ASP.NET Core MVC application on your local computer. These are the commands I used to create the application named MvcOnCodespaces.
Create a directory for your application
mkdir MvcOnCodespaces
Change to the directory you just created.
cd MvcOnCodespaces
At the moment, the default version of .NET Core that is available on GitHub Codespaces is version 3.1. Therefore, to ensure that we create an application that uses .NET Core 3.1, we will create a global.json file specifying .NET Core version as follows:
dotnet new globaljson --sdk-version 3.1.401
NOTE: Find out the version of .NET Core 3.1 that exists on your computer using command:
dotnet --list-sdks
Use the appropriate version in the 'dotnet new globaljson ..." command.
This was necessary for me to do because the default version of .NET Core on my computer was 5.0 at the time of writing this post.
Now we can create an ASP.NET Core MVC 3.1 app with:
dotnet new mvc
If you inspect your .csproj file, you will find that it, indeed, targets .NET Core 3.1 (netcoreapp3.1).
At this point, you can go ahead and delete
global.json because it served its purpose and we do not need it anymore.
3) Before we push our ASP.NET Core MVC application to GitHub, we need to have a .gitignore file. To create an appropriate .gitignore file, enter the following command in a terminal window:
dotnet new gitignore
Thereafter, create a local git repository, add all your source code files to it and commit your changes with these commands:
git init
git add .
git commit -m "1st commit"
4) Push your source-code to GitHub with the instructions on your repository for pushing existing code:
4) Create a Codespace. In your GitHub repository, click on Code followed by "Open with Codespaces".
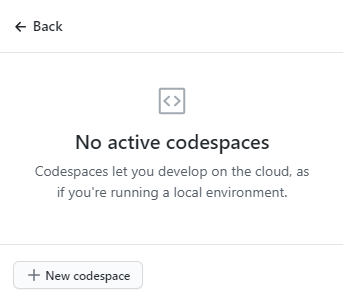
On the next dialog, click on the "+ New codespace" button.
At the top right side you will see a progress bar that indicates that a Codespace is being prepared for you.
Click on
Yes when you see this dialog:
You will find yourself in familiar territory with
VS Code running in your browser. Wait until all the activity in the lower pane settles down and you see a
Finished statement.
Querying the .NET environment in your Codespace
Let us query the .NET Core environment in a terminal window. Click on the
TERMINAL tab.
In the terminal window, type:
dotnet --list-sdks
The list of SDKs at the time of writing this article were as shown below:
Build & run your web app
You can also go ahead and build with:
dotnet buildTo run your application, hit
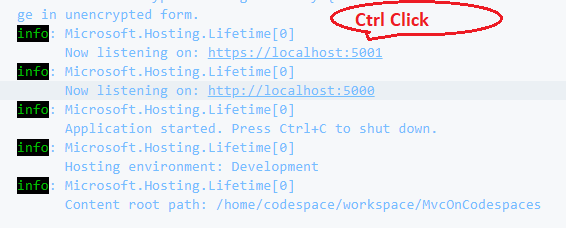
CTRL F5. In the "DEBUG CONSOLE" pane, do a "CTRL Click" on the https://localhost:5001 link.
Port forwarding happens and the web app opens in a separate tab in your browser.
Let's make a change to our application. Edit Views/Shared/_Layout.cshtml in the Codespace. Around line 32, add the following style to the main <div> tag to change the background color to gold:
style="background-color: gold;"
Stop and restart the application. This is done by clicking on the stop button first.
Thereafter, hit
CTRL F5. After the application restarts, go to the other tab that has theweb app and refresh the page. You will see the style change that we made.
Syncing source code
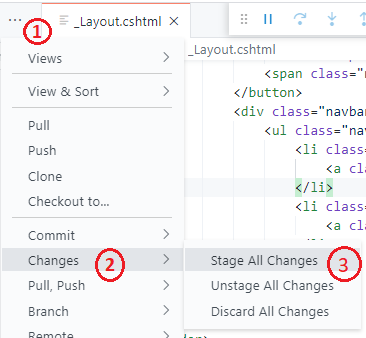
Git reminds us that there are three changes that happened to our code.
Stage changes with the following:
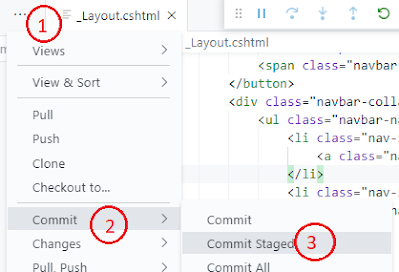
Next, let us commit staged changes:
Enter a message:
Finally, push the changes:
Debugging
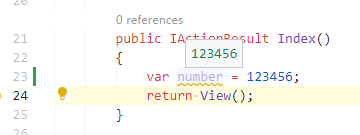
Let us see if we can debug the application in GitHub Codespaces. Stop the application. Open Controllers/HomeController.cs in the online VS Code editor. Add some code to the Index() action method as follows:
Add a breakpoint on the line with statement 'return View()'.
Run your application in Debug mode by hitting F5. If you refresh the web app in the other tab, the app will stop at the breakpoint, as expected.
You can use the debug controls to: Continue, Step Over, Step Into, Step Out, Restart and Stop
Cleanup
Delete the codespace you created once you determine that you do not need it anymore. Click on the Codespaces tab, click the ... (three dots) on the right side of the codepace, then choose delete.
I hope this journey through the world of GitHub Codespaces gave you a good understanding of what is possible with this new cloud service.










No comments:
Post a Comment