Showing posts with label Git. Show all posts

Saturday, March 26, 2022

Deploy DB driven Laravel web app to Azure App Service running on Linux NGINX web server through GitHub Actions

Laravel is an open-source PHP framework designed to make developing web apps mush easier and faster through built-in features. It is based on the MVC design pattern.

In this article, I will show you how to deploy a Laravel application to Azure App Services. The Azure web server is NGINX running on Linux version "Debian GNU/Linux 10 (buster)".

Assumptions

The following is assumed:

  • You have Git, PHP and Composer installed on your computer.
  • You have an Azure subscription
  • You have a GitHub account

Getting Started

We will start our journey with a very simple Laravel application that lists some data from a SQLite database. Go into a working directory on your computer and run the following command from a terminal window to clone a GitHub repo:

git clone https://github.com/medhatelmasry/laravel-azure.git

It is a good idea to delete the .git folder on your computer.

Once the application is cloned, change directory to the cloned app and start your app as shown below:

cd laravel-azure
composer install
php artisan serve --port=8888

The web server will start on your computer listening on port 8888.

Starting Laravel development server: http://127.0.0.1:8888
[Sat Mar 26 15:36:29 2022] PHP 8.1.2 Development Server (http://127.0.0.1:8888) started

Point your browser to http://localhost:8888/ and you will see the following page:


For demo purposes, data is pulled from a SQLite database file at database/autos.db

Disclaimer: It is normal practice that the .env file is excluded from being pushed to source control. If you look at the .gitignore file, the line pertaining to .env is commented out because there is really no confidential information in this file.

Create a repository in your GitHub account and push the source code to it.

Create Azure App Service

Login to your Azure account by visiting https://portal.azure.com. Enter "app services" in the filter field, then click on "App Services".


Click on "+ Create" on the top left-side.

On the "Create Web App Page", choose. your subscription then create new resource group.


Give your app a suitable host name that is unique.


Next, ensure these settings for Publish, Runtime stack and Operating System:


Choose suitable values for the remaining settings based on your individual preference then click on the blue "Review + create" button:


Click on Create button after you have reviewed your. choices.


Once your app service is successfully provisioned, you can click on the "Go to resource" button.


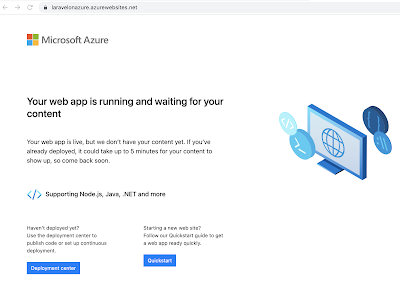
You can see a default web page to your web app be clicking on the URL link on the top right-side.


The default page looks like this.
\

CI/CD pipeline

Of course, we want to deploy our Laravel PHP site from our GitHub repo. An easy way to achieve this is to use Azure's "Deployment Center". Click on "Deployment Center" in the left-side navigation.

In the "Deployment Center" blade, select GitHub.


If this is your first time to connect Azure to your GitHub account, you will be asked to go through the GitHub authentication process. Thereafter, select the appropriate GitHub Organization, Repository and Branch. My experience was:


Once you click on Save, the deployment process commences.


To go to your GitHub repo, click on the main link under Branch.

To see the deployment in action, click on Actions in your GitHub repository.


Click on the workflow in progress.


The workflow will be going through a build and deploy process. 


Be patient as it takes about 15 minutes to complete. This is because during build the command "composer install" is executed. This produces a multitude of files under the vendors folder, which are thereafter sent to Azure. Once the workflow is completed, your GitHub workflow page will look like this:


The workflow files were automatically generated and placed a .yml file in the .github/workflows folder with your source code.


You can click on the .yml file to see what the file looks like.


At this point, it is worth going back to the code on your computer and doing a pull of your code so that you get a copy of the .yml file that was added to your source code.

Configuring app on Azure

Back on the Azure portal, if you refresh the default page of our web app, you will experience a "403 Forbidden" message, which typically means that the root directory has no welcome page.


This is understandable because the main index.php page in Laravel resides in the /public folder. THis means that we need to do some configuration work on Azure. 

In Azure, enter the term advanced in the search input field then click on "Advanced Tools".


Click "Go -->".


A page opens up in a new browser tab. Click on SSH on the top menu.


A Linux terminal window is open.


If you are interested to know what version of Linux this is, enter the following terminal command:

cat /etc/os-release

The value beside PRETTY_NAME is the Linux distribution and version.

PRETTY_NAME="Debian GNU/Linux 10 (buster)"
NAME="Debian GNU/Linux"
VERSION_ID="10"
VERSION="10 (buster)"
VERSION_CODENAME=buster
ID=debian
HOME_URL="https://www.debian.org/"
SUPPORT_URL="https://www.debian.org/support"
BUG_REPORT_URL="https://bugs.debian.org/"

We will make a copy of the existing nginx configuration and place the file inside the /home/site directory with the following command:

cp /etc/nginx/sites-available/default /home/site/default

Once copied, edit the /home/site/default file with nano or vi. I will use nano.

nano /home/site/default

Make the following changes:

FromToAround Line #
root /home/site/wwwrootroot /home/site/wwwroot/public6
location / {
   index  index.php index.html index.htm hostingstart.html;
}
      
location / {
   index  index.php index.html index.htm hostingstart.html;
   try_files $uri $uri/ /index.php?$query_string;
}
      
10


In nano, hit CTRL X to save, enter Y then hit return.

We need to create a bash script file that overrides the existing default file with our customized version, then restart the server. Change directory to the site folder.

cd site

Inside the site directory, using vi or nano, create a file named startup.sh. To create a file with nano, type "nano startup.sh". Otherwise,  to create a file with vi, type "vi startup.sh". Add the following content to startup.sh:

#!/bin/bash

cp /home/site/default /etc/nginx/sites-available/default
service nginx reload

We will make our bash script file executable with:

chmod u+x startup.sh

While in the terminal window on Azure, let's visit the folder that contains our Laravel application. Do this by going to the wwwroot folder.

cd wwwroot
ls -a

This reveals the existence of all the files that we had on GitHub plus files in the vendor folder.


Navigate back to your App Service via the Azure Portal. Select Configuration in the Settings section.


Click on the "General Settings" tab, enter "/home/site/startup.sh" for the "Startup Command", then click on Save.


Click on blue Continue button the the "Save changes" prompt.


Now, when you refresh the website, you should see that our web app is working as expected.

Conclusion

We have successfully deployed a database driven Laravel PHP application to Azure App Services through GitHub. I hope you use the principles you learned in this tutorial to deploy much more interesting Laravel applications.

Sunday, January 23, 2022

Deploy multi-container docker-compose solution on Azure

In this tutorial I will show you how to deploy a multi-container solution to Azure. The example I will use is an ASP.NET 6.0 Razor web app that works with a SQL Server database. The web app and database server run in separate containers. We will setup the solution on the Azure portal.

Assumptions

  • .NET 6.0 is installed on your computer
  • Docker Desktop is installed on your computer
  • You have an Azure subscription
  • Git is installed on your computer
  • You have a docker hub account

Getting started

In a previous example, I discuss docker-compose with ASP.NET 6.0 & SQL Server.

Clone the ASP.NET 6.0 sample startup application by running the following command from a working directory on your computer:

git clone https://github.com/medhatelmasry/AspMsSQL-docker-compose

Change into the newly cloned directory with:

cd AspMsSQL-docker-compose

The application is a simple ASP.NET 6.0 Razor application that should be very familiar to any .NET developer. 

To understand how you can run this solution, you must inspect the following two files:

Dockerfile

FROM mcr.microsoft.com/dotnet/aspnet:6.0
COPY dist /app
WORKDIR /app
EXPOSE 80/tcp
ENTRYPOINT ["dotnet", "AspMsSQL.dll"]

Docker file is used to build the web app. In line 2 above, the dist folder is copied into the image. Therefore, we must create a dist folder with the following command:

dotnet publish -o dist

docker-compose.yml

version: '3.8'

services:
  db:
    image: mcr.microsoft.com/azure-sql-edge
    
    volumes:
      - sqlsystem:/var/opt/mssql/
      - sqldata:/var/opt/sqlserver/data
      - sqllog:/var/opt/sqlserver/log
      - sqlbackup:/var/opt/sqlserver/backup

    ports:
      - "1433:1433"
    restart: always
    
    environment:
      ACCEPT_EULA: Y
      MSSQL_SA_PASSWORD: SqlPassword!

  webapp:
    build:
      context: .
      dockerfile: Dockerfile
    depends_on:
      - db
    ports:
      - "8888:80"
    restart: always
    environment:
      - DBHOST=db
      - DBPORT=1433
      - DBUSER=sa
      - DBPASSWORD=SqlPassword!
      - DBNAME=YellowDB
      - ASPNETCORE_ENVIRONMENT=Development

volumes:
  sqlsystem:
  sqldata:
  sqllog:
  sqlbackup:

The db service above starts a SQL Server container from mcr.microsoft.com/azure-sql-edge.

The webapp service builds an image from Dockerfile and runs it. The web app can be accessed on the host computer with http://localhost:8888.

Running the solution on your computer

To run the application on your computer, type the following command from within the root folder of the web app (I.E. inside the AspMsSQL-docker-compose folder):

docker-compose up

Once the script in the terminal windows settles down, point your browser to http://localhost:8888. You will see the following landing page:


Register and login to ensure that the app functions properly with the database.

Cleanup

Let's shutdown and cleanup resources on our computer.

Inside of the terminal window that is running docker-compose, hit Ctrl C on your keyboard to stop the services. Thereafter, enter the following terminal command:

docker-compose down

To remove the webapp docker image, type:

docker rmi -f aspmssql-docker-compose_webapp

To remove all the volumes that were created on your computer, type:

docker volume rm aspmssql-docker-compose_sqlbackup
docker volume rm aspmssql-docker-compose_sqldata
docker volume rm aspmssql-docker-compose_sqllog
docker volume rm aspmssql-docker-compose_sqlsystem

Prepare solution for Azure deployment

We need to make one minor tweak so that our application can run on Azure. The tweak is to build the web app image and deploy it to docker hub.

I am hereby using snoopy a an example docker-hub username. Be sure to replace every instance of snoopy with your docker-hub user name.

The command to build a Docker image named asp-mssql version 1.0.0 is:

docker build --tag snoopy/asp-mssql:1.0.0 .

Note: Make sure you run the above command in the same folder as Dockerfile.

You ensure that you created an image named asp-mssql, type the following command:

docker images

You will see the image that you created among the list of docker images on your computer.

We can now push our image to docker hub. First we need to login into docker-hub with the following command:

docker login --username=snoopy

You will be prompted for your password. If all goes well. you will see the following output:

Login Succeeded


Logging in with your password grants your terminal complete access to your account.

For better security, log in with a limited-privilege personal access token. Learn more at https://docs.docker.com/go/access-tokens/

We now need to push our image to docker-hub with:

docker push snoopy/asp-mssql:1.0.0

The output will be similar to this:

The push refers to repository [docker.io/snoopy/asp-mssql]

5f70bf18a086: Mounted from snoopy/toon
3b9aa4fcf4e8: Pushed
a41af57309b5: Mounted from snoopy/toon
63fa163dde0c: Mounted from snoopy/toon
0f53df05d8e3: Mounted from snoopy/toon
bc1e58de0815: Mounted from snoopy/toon
2edcec3590a4: Mounted from snoopy/toon

If you login to https://hub.docker.com, you will find that the image is sitting in your repository.

Let's modify our docker-compose.yml file so that it used this image on docker-hub instead of building it locally. Open docker-compose.yml in an editor and replace lines 22-24 with:

image: snoopy/asp-mssql:1.0.0

Needless to say that instead of snoopy, you should use your docker-hub username.

The final docker-compose.yml will look like this:

version: '3.8'
services:
  db:
    image: mcr.microsoft.com/azure-sql-edge
    
    volumes:
      - sqlsystem:/var/opt/mssql/
      - sqldata:/var/opt/sqlserver/data
      - sqllog:/var/opt/sqlserver/log
      - sqlbackup:/var/opt/sqlserver/backup
    ports:
      - "1433:1433"
    restart: always
    
    environment:
      ACCEPT_EULA: Y
      MSSQL_SA_PASSWORD: SqlPassword!
  webapp:
    image: snoopy/asp-mssql:1.0.0
    depends_on:
      - db
    ports:
      - "8888:80"
    restart: always
    environment:
      - DBHOST=db
      - DBPORT=1433
      - DBUSER=sa
      - DBPASSWORD=SqlPassword!
      - DBNAME=YellowDB
      - ASPNETCORE_ENVIRONMENT=Development
volumes:
  sqlsystem:
  sqldata:
  sqllog:
  sqlbackup:

Deploying solution to Azure

Login into Azure by going to the portal at https://portal.azure.com. Click on "App Services" on the left-side hamburger menu:


Click on Create:

Add a new resource group:


Here are the remaining settings that I chose:


The most important setting you need to have for Publish is "Docker Container".

Click on the "Next : Docker >" button. On the next screen choose:

Options Docker Compose (Preview)
Image Source Docker Hub
Access Type Public
Configuration File Navigate to the docker-compose.yml file and load it. It will load in the text-area below.

This is what it should look like:


Click on "Review + create" button.


Review the configuration then click on Create.

You will see a blue "Go to resource" button once the deployment is completed.

Click on "Go to resource". This takes you to the control page for your web app. 


Click on the URL on the top right-side to see your solution running in the browser. Be patient because the solution takes some time to load. In my case, the app displayed like this:


At the time of writing this article, the Docker Compose capability in Azure App services is in preview mode. It seems to work quite well and, I am confident, it will be production ready soon.

Saturday, December 12, 2020

Exploring GitHub Codespaces

In this tutorial I will introduce you to GitHub Codespaces. We will first create an ASP.NET Core MVC application on your local computer. We will then push the application to GitHub. Once the application source code is on GitHub, we will use Visual Studio Code in GitHub Codespaces to modify the app and test it out - all in the cloud.

Companion video: https://youtu.be/DsGNAx_kJ3g

What is GitHub codespaces?

GitHub codespaces is an online development environment, hosted by GitHub and powered by Visual Studio Code. It allows you to develop entirely in the cloud. Codespaces is currently in limited public beta and subject to change.

You can signup for access to GitHub Codespaces at: https://github.com/features/codespaces/signup

Let's get started.

1) Create a repository in GitHub. I named mine MvcOnCodespaces.

2) Create an ASP.NET Core MVC application on your local computer. These are the commands I used to create the application named MvcOnCodespaces.

Create a directory for your application

mkdir MvcOnCodespaces

Change to the directory you just created.

cd MvcOnCodespaces

At the moment, the default version of .NET Core that is available on GitHub Codespaces is version 3.1. Therefore, to ensure that we create an application that uses .NET Core 3.1, we will create a global.json file specifying .NET Core version as follows:

dotnet new globaljson --sdk-version 3.1.401

NOTE: Find out the version of .NET Core 3.1 that exists on your computer using command:

dotnet --list-sdks 

Use the appropriate version in the 'dotnet new globaljson ..." command.

This was necessary for me to do because the default version of .NET Core on my computer was 5.0 at the time of writing this post. 

Now we can create an ASP.NET Core MVC 3.1 app with:

dotnet new mvc

If you inspect your .csproj file, you will find that it, indeed, targets .NET Core 3.1 (netcoreapp3.1).

netcoreapp3.1
At this point, you can go ahead and delete global.json because it served its purpose and we do not need it anymore.

3) Before we push our ASP.NET Core MVC application to GitHub, we need to have a .gitignore file. To create an appropriate .gitignore file, enter the following command in a terminal window:

dotnet new gitignore

Thereafter, create a local git repository, add all your source code files to it and commit your changes with these commands:

git init
git add .
git commit -m "1st commit"

4) Push your source-code to GitHub with the instructions on your repository for pushing existing code:
an existing repository from the command line

4) Create a Codespace. In your GitHub repository, click on Code followed by "Open with Codespaces".

Open with Codespaces

On the next dialog, click on the "+ New codespace" button.

+ New codespace

At the top right side you will see a progress bar that indicates that a Codespace is being prepared for you.

preparing your codespace
Click on Yes when you see this dialog:
required assets to build and debug
You will find yourself in familiar territory with VS Code running in your browser. Wait until all the activity in the lower pane settles down and you see a Finished statement.
Online VS Code

Querying the .NET environment in your Codespace

Let us query the .NET Core environment in a terminal window. Click on the TERMINAL tab.
Terminal
In the terminal window, type:
dotnet --list-sdks
The list of SDKs at the time of writing this article were as shown below:

dotnet --list-sdks

Build & run your web app

You can also go ahead and build with: dotnet build
dotnet build
To run your application, hit CTRL F5. In the "DEBUG CONSOLE" pane, do a "CTRL Click" on the https://localhost:5001 link.
Ctrl Click
Port forwarding happens and the web app opens in a separate tab in your browser.
Port forwarding in codespaces

Let's make a change to our application. Edit Views/Shared/_Layout.cshtml in the Codespace. Around line 32, add the following style to the main <div> tag to change the background color to gold:

style="background-color: gold;"

css style

Stop and restart the application. This is done by clicking on the stop button first.
Stop application
Thereafter, hit CTRL F5. After the application restarts, go to the other tab that has theweb app and refresh the page. You will see the style change that we made.

CSS style change

Syncing source code

Git reminds us that there are three changes that happened to our code.

Git changes

Stage changes with the following:
Stage all changes

Next, let us commit staged changes:
Commit stages

Enter a message:
git commit message
Finally, push the changes:
git push

Debugging

Let us see if we can debug the application in GitHub Codespaces. Stop the application. Open Controllers/HomeController.cs in the online VS Code editor. Add some code to the Index() action method as follows:

breakpoint
Add a breakpoint on the line with statement 'return View()'.

Run your application in Debug mode by hitting F5. If you refresh the web app in the other tab, the app will stop at the breakpoint, as expected.

stop at breakpoint

You can use the debug controls to: Continue, Step Over, Step Into, Step Out, Restart and Stop

debug controls

Cleanup

Delete the codespace you created once you determine that you do not need it anymore. Click on the Codespaces tab, click the ... (three dots) on the right side of the codepace,  then choose delete.

delete github codespace

Conclusion

I hope this journey through the world of GitHub Codespaces gave you a good understanding of what is possible with this new cloud service.
