Wednesday, February 28, 2018

Dockerising an ASP.NET Core 2.0 and MySQL App

In a previous post I showed how you can have an ASP.NET Core 2.0 application work with a containerized MySQL database server. In this post I will take this one step further by also containerizing the ASP.NET Core 2.0 application.

Please go through my previous post before continuing with this tutorial.

We will generate the release version of the application by executing the following command from a terminal window in the root directory of your ASP.NET 2.0 project:

dotnet publish -o dist

The above command instructs the dotnet utility to produce the release version of the application in the dist directory. This results in output similar to the following:

Microsoft (R) Build Engine version 15.5.180.51428 for .NET Core
Copyright (C) Microsoft Corporation. All rights reserved.

  Restore completed in 315.96 ms for D:\demo\_aspnet\AspCoreMySQL\AspCoreMySQL.csproj.
  Restore completed in 409.11 ms for D:\demo\_aspnet\AspCoreMySQL\AspCoreMySQL.csproj.
  Restore completed in 448.93 ms for D:\demo\_aspnet\AspCoreMySQL\AspCoreMySQL.csproj.
  Restore completed in 476.7 ms for D:\demo\_aspnet\AspCoreMySQL\AspCoreMySQL.csproj.
  AspCoreMySQL -> D:\demo\_aspnet\AspCoreMySQL\bin\Debug\netcoreapp2.0\AspCoreMySQL.dll
  AspCoreMySQL -> D:\demo\_aspnet\AspCoreMySQL\dist\

If you inspect the dist directory, you will see content similar to the following:


The highlighted file in the above screen capture is my main DLL file that is the entry point into the web application.

Let us run the release version of your application. To do this, change directory to the dist directory with the following terminal instruction:

cd dist

You can then run your main DLL file. In my case, this file is AspCoreMySQL.dll. I executed the following command:

dotnet AspCoreMySQL.dll

This generates an understandable error because the application is unable to connect to a database:

Application startup exception: MySql.Data.MySqlClient.MySqlException (0x80004005): Unable to connect to any of the specified MySQL hosts.

This gives us a good idea about what ASP.NET Core 2.0 artifacts need to be copied into a container. We shall simply copy contents of the dist directory into a Docker container that has the dotnet core 2.0 runtime.

return to the root directory of your project by typing the following in a terminal window:

cd ..

We need to create a docker image that will contain the dotnet core 2.0 runtime. A suitable image for this purpose is: microsoft/aspnetcore:2-jessie

Create a text file named Dockerfile.mvc and add to it the following content:

FROM microsoft/aspnetcore:2-jessie
COPY dist /app
WORKDIR /app
EXPOSE 80/tcp
ENTRYPOINT ["dotnet", "AspCoreMySQL.dll"]

Above are instructions to create a Docker image that will contain our ASP.NET Core 2.0 application. I describe each line below:

FROM microsoft/aspnetcore:2-jessie Base image microsoft/aspnetcore:2-jessie will be used
COPY dist /app Contents of the dist directory on the host computer will be copied to directory /app in the container
WORKDIR /app The working directory in the container is /app
EXPOSE 80/tcp Port 80 will be exposed in the container
ENTRYPOINT ["dotnet", "AspCore4Docker.dll"] The main ASP.NET Core 2.0 web application will be launched by executing "dotnet AspCore4Docker.dll"

We will next compose a docker yml file that orchestrates the entire system which involves two containers: a MySQL database server container and a container that holds our application. In the root folder of your application, create a text file named docker-compose-aspnetcore-mysql.yml and add to it the following content:

version: '3'

volumes:
  datafiles:

services:
  db:
    image: mysql:8.0.0
    volumes:
      - datafiles:/var/lib/mysql
    restart: always
    environment:
      MYSQL_ROOT_PASSWORD: secret
      MYSQL_TCP_PORT: 3306

  mvc:
    build:
      context: .
      dockerfile: Dockerfile.mvc
    depends_on:
      - db
    ports:
      - "8888:80"
    restart: always
    environment:
      - DBHOST=db
      - DBPORT=3306
      - DBPASSWORD=secret
      - ASPNETCORE_ENVIRONMENT=Development


Below is an explanation of what this file does.

We will be having two containers. Each container is considered to be a service. The first service is named db and will host MySQL. The second service is named mvc and will host our ASP.NET Core 2.0 web app.

The most current version of docker-compose is version 3. This is the first line in our docker-compose file.

The MySQL Container

Image mysql:8.0.0 will be used for the MySQL container.

A volume named datafiles is declared that will host MySQL data outside of the container. This ensures that even if the MySQL container is decommissioned, data will not be lost.

restart: always is so that if the container stops, it will be automatically restarted.

The root password will be secret when MySQL is configured. This is set by the MYSQL_ROOT_PASSWORD environment variable.

The ASP.NET Core 2.0 Web Application Container

The container will be built using the instructions in the Dockerfile.aspnetcore2 file and the context used is the current directory.

depends_on indicated that the web app relies on the MySQL container (db) to properly function.

Port 80 in the mvc container is mapped to port 8888 on the host computer.

Just like in the db container, restart: always is so that if the container stops, it will be automatically restarted.

The environment variables needed by the web app are:

DBHOST pointing to the MySQL service and  
- ASPNETCORE_ENVIRONMENT set to Development more. In reality, you should change this to Production one you determine that your web app container works as expected.

Running the yml file

To find out if this all works, go to a terminal window and run the following command:

docker-compose -f  docker-compose-aspnetcore-mysql.yml up

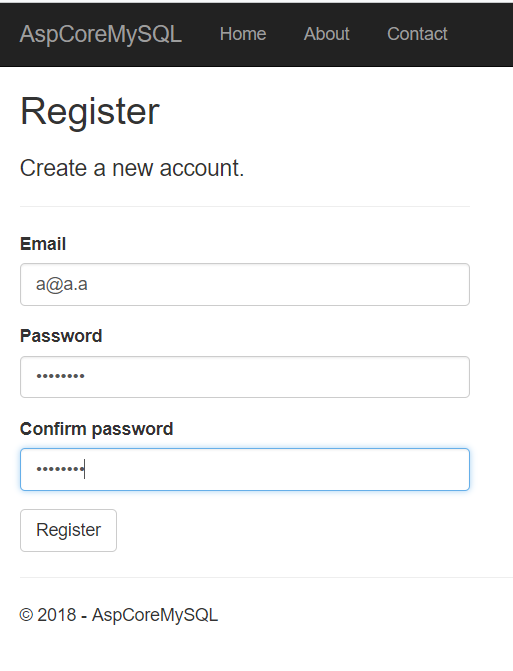
Point your browser to http://localhost:8888/ and you should see the main web page. To ensure that the database works properly, register a user by clicking on the Register link in the top right corner.

In my case, I received confirmation that a user was indeed registered:

As you can see in the top-right corner, the user with email a@a.a has been successfully registered.

This opens up a whole new world for containerizing your ASP.NET Core 2.0 web applications.


Monday, February 26, 2018

Using MySQL database in a docker container with an ASP.NET Core 2.0 web app on your host computer

It is customary to develop ASP.NET Core 2.0 applications with either SQL Server or SQLite databases. How about if you want to use the popular MySQL database server? This article discussed one approach to making this possible by having your ASP.NET Core 2 development environment connect with MySQL running in a docker container.

This article assumes the following:

1) You have .NET Core 2.0 installed on your computer. Go to https://www.microsoft.com/net to download and install .NET Core 2.0.
2) You have Docker installed on your computer. Refer to https://docs.docker.com/docker-for-windows/install/ for instructions on how to install "Docker for Windows".

Let's get started.

The first step is to create a working directory somewhere on your computer's hard drive. I did so by creating a folder named AspCoreMySQL with the following terminal command:

mkdir AspCoreMySQL

Thereafter, go into the new folder with:

cd AspCoreMySQL 

We will create an ASP.NET Core 2.0 application that uses individual authentication with the following command:

dotnet new mvc --auth individual

To run the web application and see what it looks like, enter the following command:

dotnet run

You will see a message in the terminal window that resembles the following:

Hosting environment: Production
Content root path: D:\demo\_aspnet\AspCoreMySQL
Now listening on: http://localhost:5000
Application started. Press Ctrl+C to shut down.

The above message indicates that the Kestrel web server is running and listening on port 5000. Start your browser and enter URL http://localhost:5000. You should see a page that looks like this:


If you look into the root folder of the project, you will find a file named app.db. This is a SQLite database file. The web application that we scaffolded is configured to work with SQLite. We will change it so that it works with the popular MySQL database instead.

Close your browser and stop the web server in the terminal window by hitting CTRL + C.

We will be using an Entity Framework Core driver for MySQL named Pomelo. Add the Pomelo driver package with the following terminal command:

dotnet add package Pomelo.EntityFrameworkCore.MySql

Let us configure our web application to use MySQL instead of SQLite. Open the Startup.cs file in your favorite editor and comment out (or delete) the following statement found in the ConfigureServices() method:

// services.AddDbContext<ApplicationDbContext>(options =>
//    options.UseSqlite(Configuration.GetConnectionString("DefaultConnection")));

Replace the above code with the following:

var host = Configuration["DBHOST"] ?? "localhost";
var port = Configuration["DBPORT"] ?? "3306";
var password = Configuration["DBPASSWORD"] ?? "secret";

services.AddDbContext<ApplicationDbContext>(options =>
{
    options.UseMySql($"server={host}; userid=root; pwd={password};"
        + $"port={port}; database=products");
});

Three environment variables are used in the database connection string. These are: DBHOSTDBPORT and DBPASSWORD. If these environment variables are not found then they will take up default values: localhost, 3306 and secret respectively.

We can instruct our application to automatically process any outstanding Entity Framework migrations. This is done by adding the following argument to the Configure() method in Startup.cs:

ApplicationDbContext context

This means that our Configure() method will have the following signature:

public void Configure(IApplicationBuilder app, IHostingEnvironment env, ApplicationDbContext context)

Next, add the following code inside the Configure() method in Startup.cs right before 
app.UseMvc:

context.Database.Migrate();

This is all you need to do in order to change the database configuration of our application so that it uses MySQL instead of SQLite. There is, of course, something major that is missing I.E. we do not have a MySQL database server yet. Let us have a Docker container for our MySQL database server. Run the following command from a terminal window:

docker run -p 3306:3306 --name mysqldb -e MYSQL_ROOT_PASSWORD=secret -d mysql:8.0.0

Here's what this command does:

-p 3306:3306 maps port 3306 in the container to port 3306 on the host machine
--name mysqldb names the container
-e MYSQL_ROOT_PASSWORD=secret sets the root password for the MySQL database server
-d runs container in background and prints container ID
mysql:8.0.0 Image MySQL version 8.0.0 from hub.docker.com will be used

If you do not already have the docker image for MySQL version 8.0.0, it will be downloaded. Thereafter, a container will be made from that image and will run in background mode. To prove that the container was indeed created from the image and is active, run this command:

docker ps -a

You will see output that looks like this:

CONTAINER ID  IMAGE        COMMAND                  CREATED        STATUS         PORTS                    NAMES
b271f5bc4615  mysql:8.0.0  "docker-entrypoint.s…"   21 seconds ago Up 19 seconds  0.0.0.0:3306->3306/tcp   mysqldb

Now, let us test our application and see whether or not is is able to talk to the containerized MySQL database server. 

Run the web application with the following terminal command:

dotnet run

If all goes well, you will see a message that indicates that the web server is listening on port 5000. Point your browser to http://localhost:5000. The same web page will appear as before. Click on the Register link on the top right side.

I entered an Email, Password and Confirm password then clicked on the Register button. I was then rewarded with the following confirmation that the credentials were saved in the MySQL database server:

The message on the top right side confirmed that the user was saved and that communication between my ASP.NET Core 2.0 application and MySQL is working as expected.

In my next post I will demonstrate how we can also containerize our ASP.NET Core 2.0 web application.

Adding Swagger to an ASP.NET Core 2.0 app

Swagger is an API specification framework. It reminds me of WSDL in the SOAP days. In this article I will guide you in add Swagger documentation to an ASP.NET Core Web API app.

There are three components that we need to buckle-up in our Web API application. These are, not surprisingly, called Swashbuckle:
  1. Swashbuckle.AspNetCore.SwaggerGen : builds SwaggerDocument objects from your router, controllers and models.
  2. Swashbuckle.SwaggerUI : embedded version of Swagger UI tool which uses the above documents for a rich customizable experience for describing the Web API functionality and includes built in test harness capabilities for the public methods.
  3. Swashbuckle.AspNetCore.Swagger: Swagger object model and middleware to expose SwaggerDocument objects as JSON endpoints.
For starters, add package Swashbuckle to your project. This can be done in two ways:

1) If you are using Visual Studio 2017, execute the following command from the Package Manager Console:

install-package --version 2.1.0 Swashbuckle.AspNetCore

You can find the Package Manager Console in Visual Studio 2017 at Tools >>  NuGet Package Manager >> Package Manager Console.

2) From a terminal window in the main project folder, enter the following command:

dotnet add package Swashbuckle.AspNetCore -Version 2.1.0

Add the following using statement at the top of your Startup.cs file:

using Swashbuckle.AspNetCore.Swagger;

Next, add the Swagger generator to bottom of the ConfigureServices() method in Startup.cs:

// Register the Swagger generator, defining one or more Swagger 
// documents
services.AddSwaggerGen(c => {
  c.SwaggerDoc("v1", new Info { Title = "My API", Version = "v1" });
});

Add the following two lines of code to the Cofigure() method in Startup.cs just before app.UseMvc():

// Enable middleware to serve generated Swagger as JSON endpoint
app.UseSwagger();

// Enable middleware to serve swagger-ui (HTML, JS, CSS, etc.)
// specifying the Swagger JSON endpoint.
app.UseSwaggerUI(c =>
{
  c.SwaggerEndpoint("/swagger/v1/swagger.json", "My API V1");
});

NOTE: You can exclude the service generated by an API controller by annotating the controller class with: [ApiExplorerSettings(IgnoreApi = true)]

Run your application with CTRL + F5.

Point your browser to http://localhost:{port number}/swagger/v1/swagger.json and you will see a JSON document that describes the endpoints of your service.

image

You can also see the Swagger UI at URL http://localhost{port number}/swagger.

image

In the above example the API service is Studentapi. Your service will be under API V1. Click on it and you will see something similar to the following:

image

To test out GET, click on the first blue GET button and the section will expand describing to you the structure of your object:

image

Click on the “Try it out!” button to view the data coming back from the service for all items in the collection:

image

Click on the first blue GET button again to collapse the section. Now, click on the second blue GET button to test retrieval of an item by id.

image

Enter a value for ‘id’ then click the “Try it out!” button. It should get for you the item for that id.

image

In a similar manner, go ahead and test out all the other POSTDELETE, and PUT buttons.

The official Swagger website at http://swagger.io/. You can generate a Swagger client for most programming languages at http://editor.swagger.io/.