In this tutorial I will show you how to easily deploy a simple Node-Express docker image and run it from Azure containers. It is assumed that you have:
- Docker installed on your computer
- Git installed on your computer
- You have a billable Azure account
- You have a Docker hub account
- You have installed the Azure CLI on your computer
Let us start with a very simple Node-Express application. I have one that you can clone from GitHub. Run the following command from a working directory in order to clone my simple Node-Express application:
Once you have cloned the application, you can create a Docker image named toon-node. View a file named Dockerfile located in the root of the application. This file looks like this:
# Create image based on the official Node 6 image from the dockerhub
FROM node:10.13.0-jessie
# Create a directory where our app will be placed
RUN mkdir -p /usr/src/app
# Change directory so that our commands run inside this new directory
WORKDIR /usr/src/app
# Copy dependency definitions
COPY package.json /usr/src/app
# Install dependecies
RUN npm install
# Get all the code needed to run the app
COPY . /usr/src/app
# Expose the port the app runs in
ENV PORT 80
# Serve the app
CMD ["npm", "start"]
This is what each command in Dockerfile does.
| FROM node:10.13.0-jessie | Base the new image on node:10:13.0-jessie |
| RUN mkdir -p /usr/src/app | Create a directory /usr/src/app in the container |
| WORKDIR /usr/src/app | Make /usr/src/app the working dir in the container |
| COPY package.json /usr/src/app | Copy package.json on your computer into the working directory in the container |
| RUN npm install | Execute "npm install" in the container |
| COPY . /usr/src/app | Copy all files in the. current directory of your computer into the container’s working directory. Note that any files in .dockerignore will be ignored |
| ENV PORT 80 | The node application inside the container will listen in on port 80 |
| CMD ["npm", "start"] | Launch the web application by executing “npm start”. |
Create a Docker image with the following terminal command:
docker build -f Dockerfile -t snoopy/toons:toon-node . --no-cache
Note that you must prefix the image name with your Docker hub account. In the above example, snoopy represents your username on Docker hub.
Once the image is created, you can verify that it indeed exists by using the following Docker terminal command that lists on the images on your computer:
docker images
You should see an image named toons:toon-node prefixed by your Docker hub username.
Now let us run this Node-Express application to see what it does. We will create a container from the image that we just created. Run the following command to create a container whereby port 80 in the container is mapped to port 3000 on your computer:
docker run -p 3000:80 snoopy/toons:toon-node
You can then point your browser to http://localhost:3000 to see what the node-express application looks like. If all goes well, you should see the following web page:

The next thing we need to do is push our image to Docker hub. This is done by first logging-in into Docker hub with:
docker login
Note that this needs to be done only once on the computer.
You can then push the image to Docker hub with:
docker push snoopy/toons:toon-node
If you go to Docker hub at https://hub.docker.com/, you will see that the image exists in the toons repository. This is what my toons repository looked like on Docker hub:

With our image sitting in the Docker hub repository, we can now start using Azure to pull the image and run a container in Azure.
Login into Azure on your computer using the Azure CLI (command line interface). This is done by running the following terminal window command:
az login
This opens a browser window in which you will be authenticated. You can close the browser once you have successfully authenticated.
We need to either use an existing resource group or. create a new one. I created a new resource group named toon-rg in data centre West-US2 with the following terminal window command:
az group create --location westus2 --name toon-rg
Once you execute the above command, a successful response from the server will look similar to this:
{
"id": "/subscriptions/aaaaaaaa-bbbb-cccc-dddd-eeeeeeeeeeee/resourceGroups/toon-rg",
"location": "westus2",
"managedBy": null,
"name": "toon-rg",
"properties": {
"provisioningState": "Succeeded"
},
"tags": null,
"type": null
}
Let us use the image we have in Docker hub to run a container in Azure. This can be done by executing the following command:
az container create --name toon-c --resource-group toon-rg --image snoopy/toons:toon-node --ip-address public
These are what the above settings represent:
| --name toon-c | The container name is “toon-c". |
| --resource-group toon-rg | The resource group name is “toon-rg". |
| --image snoopy/toons:toon-node | The name of our image on Docker hub is "snoopy/toons:toon-node". |
| --ip-address public | Respond with the public IP address so that we can run and verify that indeed our web site is working on Azure. |
Remember that you must replace snoopy with your Docker hub username.
When I ran the last command, it took some time to run and I eventually got a long JSON response. I am showing you a part of the response that has the public IP address:
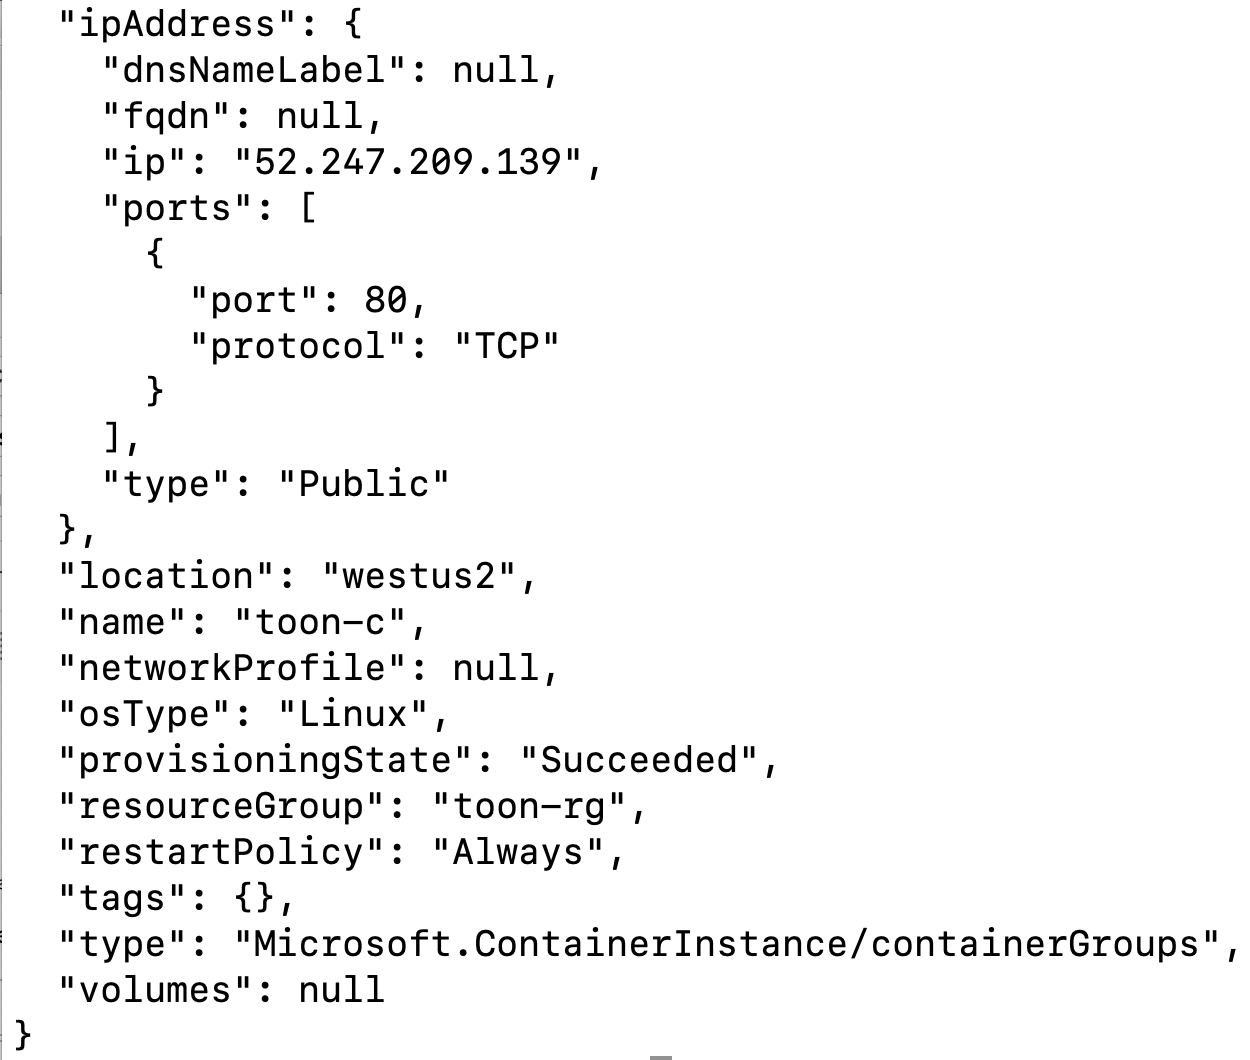
You can see the public IP address in the JSON response. If you point your browser to this IP address you should see the application running on Azure. This is what I experienced when I pointed my browser to http://52.247.209.239

It is rather impressive how easy it is to host a Docker container on Azure.