With time, the volume of data in our databases increases exponentially. Excessive raw data is simply noise if we cannot summarize, examine, and visualize the information. In today’s tutorial, we will look at one way of visualizing data using Chart.js. This is a free JavaScript library that you can use within any web application technology. We will, of course, see how we can use Chart.js in an ASP.NET 7.0 web app. I will be using Visual Studio Code & the SQLite database in this tutorial.
Source Code: https://github.com/medhatelmasry/ChartJsRazor
Companion Video: https://youtu.be/ya2XyvRqJIw
VS Code extensions needed:
Razor Pages
In a suitable working directory, create a Razor Pages web application with:
dotnet new razor -f net7.0 --auth individual -o ChartJsRazor
cd ChartJsRazor
mkdir Models
code .
dotnet watch
I chose to create a web app with individual authentication simply because it automatically adds support for Entity Framework and SQLite.
Sample Data
We will be importing sample data from a CSV file, students.csv, that contains some sample student data. Therefore, we will add this package to help us with the CSV file import process.
dotnet add package CsvHelper
Here is a sample of what data in Data/students.csv looks like:
StudentId,FirstName,LastName,School
1,Tom,Max,Nursing
2,Ann,Fay,Mining
3,Joe,Sun,Nursing
4,Sue,Fox,Computing
5,Ben,Ray,Mining
6,Zoe,Cox,Business
7,Sam,Ray,Mining
8,Dan,Ash,Medicine
9,Pat,Lee,Computing
10,Kim,Day,Nursing
11,Tim,Rex,Computing
12,Rob,Ram,Business
13,Jan,Fry,Mining
14,Jim,Tex,Nursing
15,Ben,Kid,Business
16,Mia,Chu,Medicine
17,Ted,Tao,Computing
18,Amy,Day,Business
19,Ian,Roy,Nursing
20,Liz,Kit,Nursing
21,Mat,Tan,Medicine
22,Deb,Roy,Medicine
23,Ana,Ray,Mining
24,Lyn,Poe,Computing
25,Amy,Raj,Nursing
26,Kim,Ash,Mining
27,Bec,Kid,Nursing
28,Eva,Fry,Computing
29,Eli,Lap,Business
30,Sam,Yim,Nursing
31,Joe,Hui,Mining
32,Liz,Jin,Nursing
33,Ric,Kuo,Business
34,Pam,Mak,Computing
35,Cat,Yao,Medicine
36,Lou,Zhu,Mining
37,Tom,Dag,Business
38,Stu,Day,Business
39,Tom,Gad,Mining
40,Bob,Bee,Business
41,Jim,Ots,Business
42,Tom,Mag,Business
43,Hal,Doe,Mining
44,Roy,Kim,Mining
45,Vis,Cox,Nursing
46,Kay,Aga,Nursing
47,Reo,Hui,Nursing
48,Bob,Roe,Mining
49,Jay,Eff,Computing
50,Eva,Chu,Business
51,Lex,Rae,Nursing
52,Lin,Dex,Mining
53,Tom,Dag,Business
54,Ben,Shy,Computing
55,Rob,Bos,Nursing
56,Ali,Mac,Business
57,Ken,Sim,Medicine
58,May,Chu,Business
Student.cs
Create a class file named Student.cs in the Models folder with the following content.
public class Student {
public int StudentId { get; set; }
public string? LastName { get; set; }
public string? FirstName { get; set; }
public string? School { get; set; }
}
Add the following code to Data/ApplicationDbContext.cs to specify the Students DbSet and to also import sample data from Data/students.csv:
public DbSet<Student> Students => Set<Student>();
private static IEnumerable<Student> GetStudents() {
string[] p = { Directory.GetCurrentDirectory(), "Data", "students.csv" };
var csvFilePath = Path.Combine(p);
var config = new CsvConfiguration(CultureInfo.InvariantCulture) {
PrepareHeaderForMatch = args => args.Header.ToLower(),
};
var data = new List<Student>().AsEnumerable();
using (var reader = new StreamReader(csvFilePath)) {
using (var csvReader = new CsvReader(reader, config)) {
data = (csvReader.GetRecords<Student>()).ToList();
}
}
return data;
}
protected override void OnModelCreating(ModelBuilder modelBuilder) {
base.OnModelCreating(modelBuilder);
modelBuilder.Entity<Student>().HasData(GetStudents());
}
In the above code, students data is being seeded in the OnModelCreating() method by reading contents of students.csv file.
Let us add a migration and subsequently update the database. Execute the following CLI commands in a terminal window.
dotnet ef migrations add Student -o Data/Migrations
dotnet ef database update
At this point the database and tables are created.
Chart.js library
The official website for Chart.js is https://www.chartjs.org/ where you can find documentation and examples. You can either point to the Chart.js JavaScript library on an online CDN (Content Delivery Network) or download and install the library directly into your application.
Chart.js library online CDN
This is the link you can use to point to an online library:
<script src="https://cdn.jsdelivr.net/npm/chart.js@3.9.1/dist/chart.min.js"></script>
Download Chart.js library
Run the following command if you do not already have the LibMan .NET tool:
dotnet tool install -g Microsoft.Web.LibraryManager.Cli
Run the following command to get the Chart.js client library by using LibMan.
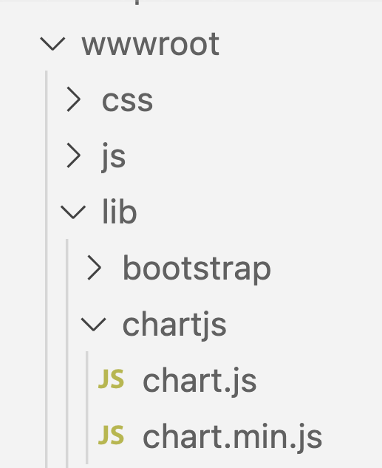
libman install chartjs --provider jsdelivr --destination wwwroot/lib/chartjs --files chart.min.js --files chart.js
This places the chart.js JavaScript files in the wwwroot/lib/chartjs folder.
Vertical Bar Chart
We will re-purpose the Pages/Index.cshtml & Pages/Index.cshtml.cs files so that they render charts that reveal how many students are in each school. We will add a class Models/SchoolCount.cs that simply holds two properties: School (string) and Count (int). Add the following SchoolCount class to the Models folder:
public class SchoolCount {
public string? Name { get; set; }
public int Count { get; set; }
Add the following highlighted code to Pages/Index.cshtml.cs:
class IndexModel : PageModel
{
private readonly ILogger<IndexModel> _logger;
private readonly ApplicationDbContext _context;
[BindProperty]
public List<SchoolCount> ChartData { get; set; } = default!;
public IndexModel(ILogger<IndexModel> logger,
ApplicationDbContext context)
{
_logger = logger;
_context = context;
}
public void OnGet() {
List<SchoolCount> studentsInSchool = new List<SchoolCount>();
var data = _context.Students
.GroupBy(_ => _.School)
.Select(g => new {
Name = g.Key,
Count = g.Count()
})
.OrderByDescending(cp => cp.Count)
.ToList();
foreach (var item in data) {
studentsInSchool.Add(new SchoolCount() {
Name = item.Name,
Count = item.Count
});
}
ChartData = studentsInSchool;
}
}
If you put a breakpoint to inspect the data that is being assigned to ChartData, you will find out the following:
| School | Count |
|---|
| Computing |
15 |
| Business |
15 |
| Nursing |
13 |
| Mining |
9 |
| Medicing |
6 |
The real interaction with the Chart.js JavaScript library will happen the Pages/Index.cshtml file. We will first display a simple vertical bar chart. Replace the contents of Pages/Index.cshtml with the following:
@page
@model IndexModel
@{
ViewData["Title"] = "Chart.js";
}
<div class="text-center">
<h4 class="display-4">Students by school</h4>
<div class="card">
<div class="card-header">Vertical Bar Chart</div>
<div class="chart-container">
<canvas id="bar-chart" width="100" height="300"></canvas>
</div>
</div>
</div>
<script src="https://cdn.jsdelivr.net/npm/chart.js@3.9.1/dist/chart.min.js"></script>
@* <script src="lib/chartjs/chart.min.js"></script> *@
<script>
var Count = [];
var Schools = [];
@if (Model.ChartData.Count > 0)
{
foreach (var item in Model.ChartData)
{
@:Count.push(@item.Count);
@:Schools.push('@item.Name');
}
}
var School = {
label: "School",
data: Count,
backgroundColor: [
'rgba(255, 99, 132, 0.2)',
'rgba(54, 162, 235, 0.2)',
'rgba(255, 206, 86, 0.2)',
'rgba(75, 192, 192, 0.2)',
'rgba(153, 102, 255, 0.2)',
'rgba(255, 159, 64, 0.2)'
],
borderColor: [
'rgba(255, 99, 132, 1)',
'rgba(54, 162, 235, 1)',
'rgba(255, 206, 86, 1)',
'rgba(75, 192, 192, 1)',
'rgba(153, 102, 255, 1)',
'rgba(255, 159, 64, 1)'
],
borderWidth: 1,
lineTension: 0,
};
var datasetvalues = {
labels: Schools, // x-azis label values
datasets: [School] // y-axis
};
barChartOptions = {
indexAxis: 'x',
responsive: true,
maintainAspectRatio: false,
scales: {
x: {
barPercentage: 1,
categoryPercentage: 0.6,
},
y: {
barPercentage: 1,
categoryPercentage: 0.6,
ticks: {
beginAtZero: true
}
}
},
plugins: {
title: {
display: true,
text: 'Students by school'
}
}
}
var verticalBarChart = new Chart(
document.getElementById('bar-chart').getContext('2d'), {
type: 'bar',
data: datasetvalues,
options: barChartOptions
});
</script>
Explaining the code:
1) At first, we place a <canvas> element in our markup where the chart will be injected:
<canvas id="bar-chart" width="100" height="300"></canvas>
2) Load the Chart.js library from a CDN:
<script src="https://cdn.jsdelivr.net/npm/chart.js@3.9.1/dist/chart.min.js"></script>
We could, instead, use a locally available library with:
<script src="lib/chartjs/chart.min.js"></script>
3) We then declare two JavaScript arrays (Count & Schools), which will contain the count and names of schools respectively. The data in the C# ChartData collection will then populate these two arrays. You may find the “@:” operator in the foreach loop strange. This simply renders the line as HTML (in this case JavaScript).
@if (Model.ChartData.Count > 0) {
foreach (var item in Model.ChartData)
@:Count.push(@item.Count);
@:Schools.push('@item.Name');
4) The School object describes the design of the bars and the data source for the count in the chart
5) The datasetvalues object describes the data source of the school names
6) The barChartOptions object describes the chart options
7) Finally the new Chart(….) command is what actually creates the chart using the previously described objects.
This is what our bar-chart looks like:
From this chart we can gather that most of our students are studying Nursing & Business. Medicine has the least students. We need more medical doctors.
Horizontal Bar Chart
The horizontal bar-chart is like the previous bar-chart, except that the bars display horizontally. To add a horizontal bar-chart, add this markup after the previous bar chart and inside <div class="card">:
<div class="card-header">Horizontal bar chart</div>
<div class="chart-container">
<canvas id="horizontal-bar-chart" width="100" height="300"></canvas>
</div>
Add the following code below “var verticalBarChart . . . ” at the bottom of Index.chtml:
horizonntalBarChartOptions = barChartOptions;
horizonntalBarChartOptions['indexAxis'] = 'y' ;
delete horizonntalBarChartOptions.scales;
var horizonntalBarChart = new Chart(
document.getElementById('horizontal-bar-chart').getContext('2d'), {
type: 'bar',
data: datasetvalues,
options: horizonntalBarChartOptions
});
In the above code, we make a copy of the barChartOptions and modify it slightly:
- Set 'indexAxis' to ‘y’
- Delete scales
Our horizontal bar-chart looks like this:
Other types of charts
Using the same data, let us add these charts:
- pie-chart
- doughnut-chart
- polar-area-chart
Add this HTML under similar markup for the horizontal bar-chart so that we have canvas elements for the three additional charts that we require:
<div class="card-header">Pie chart</div>
<div class="chart-container">
<canvas id="pie-chart" width="100" height="300"></canvas>
</div>
<div class="card-header">Doughnut chart</div>
<div class="chart-container">
<canvas id="doughnut-chart" width="100" height="300"></canvas>
</div>
<div class="card-header">Polar area chart</div>
<div class="chart-container">
<canvas id="polar-area-chart" width="100" height="300"></canvas>
</div>
Add the following code below “var horizonntalBarChart . . . ” at the bottom of Index.chtml:
pieChartOptions = barChartOptions;
delete pieChartOptions.indexAxis;
delete pieChartOptions.scales;
var pieChart = new Chart(
document.getElementById('pie-chart').getContext('2d'), {
type: 'pie',
data: datasetvalues,
options: pieChartOptions
});
var doughnutChart = new Chart(
document.getElementById('doughnut-chart').getContext('2d'), {
type: 'doughnut',
data: datasetvalues,
options: pieChartOptions
});
var polarAreaChart = new Chart(
document.getElementById('polar-area-chart').getContext('2d'), {
type: 'polarArea',
data: datasetvalues,
options: pieChartOptions
});
We should see these additional charts on our home page:
Summary
In addition to the five chart types that we created, there are many more others that you can use such as: Area Chart, Bubble Chart, Line Chart, Radar Chart, Scatter Chart, etc…
You have control over the colors, scales, and other features. Best of all, it is easy and can be used with any backend technology such as ASP.NET, PHP, Node, etc…


No comments:
Post a Comment