In this post, I will show you how to deploy an ASP.NET MVC application on GitHub to Azure. The application will first be pushed to GitHub then we will configure Azure to automatically sync changes from GitHub.
The following are prerequisites:
- git is installed on your computer
- you have Visual Studio 2015 (or later)
- you have a GitHub account
- you have an Azure subscription
Creating a simple ASP.NET MVC 5 application
The first step is to create an application named
Aspnet2Azure. In Visual Studio 2015:
File >> New >> Project
Templates >> Visual C# >> Web >> ASP.NET Web Application (.NET Framework)
Name the application
Aspnet2Azure then click
OK.

Select
MVC, uncheck “
Host in the cloud”, then click
OK.
Hit
CTRL + F5 to view the web app in a browser:

Adding GitHub source control to your application
Before we push our code to GitHub, here are some configuration changes that you need to make to the ASP.NET web application:
1) Open the
.csproj file in the solution folder and comment out this block of XML:
<Target Name="EnsureNuGetPackageBuildImports" BeforeTargets="PrepareForBuild">
<PropertyGroup>
<ErrorText>This project references NuGet package(s) that are missing on this computer. Use NuGet Package Restore to download them. For more information, see http://go.microsoft.com/fwlink/?LinkID=322105. The missing file is {0}.</ErrorText>
</PropertyGroup>
<Error Condition="!Exists('..\packages\Microsoft.Net.Compilers.1.0.0\build\Microsoft.Net.Compilers.props')" Text="$([System.String]::Format('$(ErrorText)', '..\packages\Microsoft.Net.Compilers.1.0.0\build\Microsoft.Net.Compilers.props'))" />
<Error Condition="!Exists('..\packages\Microsoft.CodeDom.Providers.DotNetCompilerPlatform.1.0.0\build\Microsoft.CodeDom.Providers.DotNetCompilerPlatform.props')" Text="$([System.String]::Format('$(ErrorText)', '..\packages\Microsoft.CodeDom.Providers.DotNetCompilerPlatform.1.0.0\build\Microsoft.CodeDom.Providers.DotNetCompilerPlatform.props'))" />
</Target>
NOTE: This is a NuGet packages restore feature, which is
ON by default. Simply put, if the packages are missing, NuGet will download them before the build starts. This feature is not needed in production and, therefore, should be disabled.
2) In the
web.config file, comment out this block of XML:
<system.codedom>
<compilers>
<compiler language="c#;cs;csharp" extension=".cs" type="Microsoft.CodeDom.Providers.DotNetCompilerPlatform.CSharpCodeProvider, Microsoft.CodeDom.Providers.DotNetCompilerPlatform, Version=1.0.0.0, Culture=neutral, PublicKeyToken=31bf3856ad364e35" warningLevel="4" compilerOptions="/langversion:6 /nowarn:1659;1699;1701" />
<compiler language="vb;vbs;visualbasic;vbscript" extension=".vb" type="Microsoft.CodeDom.Providers.DotNetCompilerPlatform.VBCodeProvider, Microsoft.CodeDom.Providers.DotNetCompilerPlatform, Version=1.0.0.0, Culture=neutral, PublicKeyToken=31bf3856ad364e35" warningLevel="4" compilerOptions="/langversion:14 /nowarn:41008 /define:_MYTYPE=\"Web\" /optionInfer+" />
</compilers>
</system.codedom>
NOTE: These settings are used for dynamic compilation. They can be safely removed from the
web.config file if you do pre-compilation and only put the compiled assemblies on the web server.
3) This is optional. In order to see debug information in production, add this to your
web.config in the
<system.web> block:
<customErrors mode="Off"/>
Go to
http://github.com and login into your account.

On the right-side, beside “
Your repositories”, click on the green “
New Repository” button.

Enter
Aspnet2Azure for repository name, then click on the green “
Create repository” button.

We will follow some of the instructions highlighted above. Go to a command-line in the web application
Aspnet2Azure directory (not the solution) on your computer. and type in the following commands:
git init
git add .
git commit -m "first commit"
git remote add origin https://github.com/{github user}/Aspnet2Azure.git
git push -u origin master
NOTE: Make sure you enter your GitHub handle instead of
{github user} in the URL above.
Once you have successfully completed the above, you can go back to GitHub in your browser and view all the files in your
Aspnet2Azure repository:

Continuous deployment on azure
Go to
http://portal.azure.com and login into you Azure account.
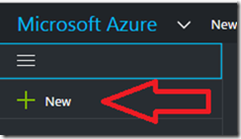
Click on the big
+ (New) on the top left-side.

Click “
Web App” on the next blade.

- Choose an “App name” that is sufficiently unique when combined with domain azurewebsites.net
- Choose your subscription
- For “Resource Group” either create a new or use an existing resource group
- While configuring “App Service plan/Location”, you get to choose which data center you want.
Finally, click on the blue
Create button at the bottom of the blade. Once your web app is created, it will appear in the list of your “
App Services”.

Click on the web app you just created.

Enter “
deploy” in the filter field at the top then select “
Deployment Options”.
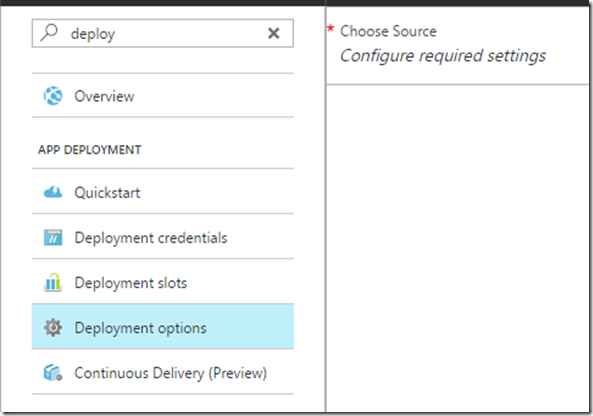
On the next blade, click on “
Choose Source”.

Click on
GitHub. If this is the first time you connect to GitHub from Azure, you will be asked for your credentials. Once your GitHub credentials are known to Azure then you will see a blade that looks like this:

Click on “
Choose project” to select the appropriate GitHub repository that you wish to connect Azure with.

Click on the
Aspnet2Azure repository you previously setup on GitHub.
Back in the “
Deployment source” blade, click on the blue
OK button at the bottom of the blade. If you click on “
Deployment options” again, you will determine that Azure is building your app. Finally, when the build process is complete, you should see the following:

Now let us point to our application in the browser.

Even though the web application appears to be working, our task is not yet complete because we have not setup the database properly. To make my point, click on the
Register link on the top right-side and try and register a user. Most likely, you will receive the following error if you have turned debug on in the
web.config file:

Setting up the database with SQL-Azure
Back in the Azure portal (
http://portal.azure.com), click on “SQL databases” on the left navigation.

Click on
+ Add at the top left corner.

Add a database name, choose the same resource group that you created when you setup the App Service. Click on “
Server Configure required settings” to setup your server. This involves entering a database server name, login name, and password. It is necessary for you to remember the username and password because you will need it later on when you configure the database connection string for your web application.

Once you have setup the database server, click the blue
Select button at the bottom of the blade.

Back in the SQL Database blade, click on the blue
Create button. The newly created database should show after a short while.

Click on the database. You should see a link “
Show database connection strings” on the third blade.

Click on the “
Show database connection strings” link. The connection strings for ADO.NET, JDBC, ODBC, and PHP will be displayed:
Copy the connection string for
ADO.NET and paste it into Notepad or any other text editor. Replace
{your_username} and
{your_password} with your database credentials.
Our next task is to tell our web application about our connection string.
Click on
App Services then click on the web application.

In the top filter field, enter the work “
setting”. Then, click on “
Application settings”. This leads to the next blade titled “
General settings”. Scroll down until you find the “
Connection strings” section.

Give the connection string the name “
DefaultConnection” and the value is the connection string that you previously pasted in a text editor. Do not forget to click on
Save at the top of the blade to save the connection string.
This is the moment of truth. Get back to your web application and register a user. It should work for you as it did for me.

The magic of setting up continuous deployment with azure through GitHub is that if you make a change to your application then push the changes to GitHub, then Azure will automatically sync with GitHub and you will see your changes in production within minutes. Try it out.
References:
https://docs.microsoft.com/en-us/azure/app-service-web/app-service-continuous-deployment
https://github.com/Microsoft/azure-docs/blob/master/articles/app-service-web/app-service-continuous-deployment.md
http://answers.flyppdevportal.com/MVC/Post/Thread/d5721a11-0f95-4751-b801-84ef056b2b09?category=windowsazurewebsitespreview


