In this article, let us explore the "Semantic Kernel Tools" extension for Visual Studio Code. We will simply run the C# "Hello World" startup chat-completion application that comes with the the tool. The main purpose of this tutorial is to help you configure and run your first C# Semantic Kernel app with the Visual Studio extension.
What is Semantic Kernel?
This is the official definition obtained from Create AI agents with Semantic Kernel | Microsoft Learn:
Semantic Kernel is an open-source SDK that lets you easily build agents that can call your existing code. As a highly extensible SDK, you can use Semantic Kernel with models from OpenAI, Azure OpenAI, Hugging Face, and more!
We now have an extension for Visual Studio Code that makes it very easy to build AI apps that use the large language models (LLMs) available through OpenAI.
In order to proceed with this tutorial, you will need the following prerequisites:
- .NET 8.0 Framework
- Visual Studio Code
- Access to Azure OpenAI
- Install the 'Semantic Kernel Tool' extension into Visual Studio Code.

Getting Started
Once you have installed the 'Semantic Kernel Tool' extension, start Visual Studio Code. Click on View >> Command Palette:

Select "Semantic Kernel: Create Project.

Choose "C# Hello World".


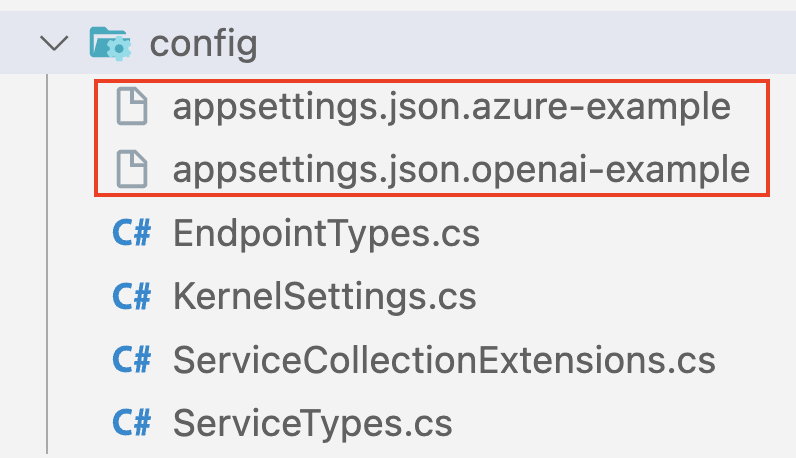
A new directory named sk-csharp-hello-world is created in your working directory. In Visual Studio Code, you will see the following directories and files:

Expand the config folder. You will see that there are two appsettings.json files - one for Azure-OpenAI and the other for OpenAI.

{"endpointType": "text-completion","serviceType": "AzureOpenAI","serviceId": "text-davinci-003","deploymentOrModelId": "text-davinci-003","endpoint": "https:// ... your endpoint ... .openai.azure.com/","apiKey": "... your Azure OpenAI key ..."}
We need to make an important adjustment to the deploymentOrModelId setting. The clue for what needs to be done comes from the config/KernelSettings.cs file. You will notice that it expects property names deploymentId and modelId - see lines 15 and 18 below:

Therefore, replace the deploymentOrModelId setting in appsettings.json with two settings deploymentId and modelId. Our appsettings.json now looks like this:
{"endpointType": "text-completion","serviceType": "AzureOpenAI","serviceId": "text-davinci-003","deploymentId": "text-davinci-003","modelId": "text-davinci-003","endpoint": "https:// ... your endpoint ... .openai.azure.com/","apiKey": "... your Azure OpenAI key ..."}
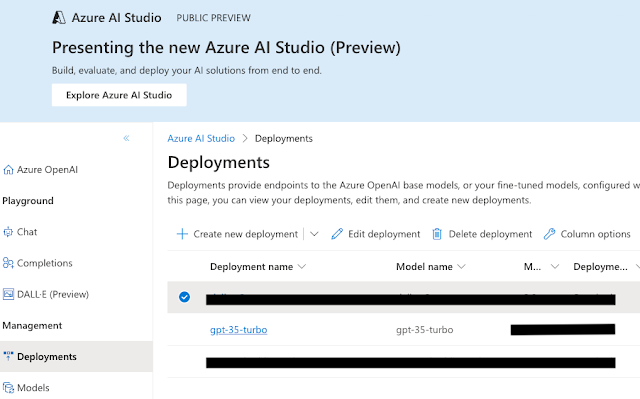
Of course, the next step is to use the proper values for serviceId, deploymentId, modelId, endpoint, and apiKey. This depends on the names of the various settings in your Azure-OpenAI account. Here is what I have in my Azure-OpenAI account:

The final state of my appsettings.json file is very similar to below. Since I cannot share the endpoint and apiKey with the world, I have fake values for these settings.
{"endpointType": "text-completion","serviceType": "AzureOpenAI","serviceId": "gpt-3.5-turbo","deploymentId": "gpt-35-turbo","modelId": "gpt-35-turbo","endpoint": "https://fake.openai.azure.com/","apiKey": "fakekey-fakekey-fakekey-fakekey"}
We can now run the application and see what it does. In a terminal window, enter:
dotnet run
Here is the interaction I had with the application:
% dotnet run
User > in the summertime
Assistant > In the summertime, the weather is usually warm and sunny. It's a great time to enjoy outdoor activities like swimming, hiking, and barbecues. Many people also go on vacations or spend time at the beach. It's a season of relaxation and fun!
User >
The prompt that is central to the way the app works is found in prompts/Chat.yaml.
name: Chattemplate: |<message role="system">You are a helpful assistant.</message>{{#each messages}}<message role="{{Role}}">{{~Content~}}</message>{{/each}}template_format: handlebarsdescription: A function that uses the chat history to respond to the user.input_variables:- name: messagesdescription: The history of the chat.is_required: true
Now that you were able to get the "Hello World" app working with the "Semantic Kernel Tool" extension for Visual Studio Code, go ahead and explore the other startup application types.
Good luck.
No comments:
Post a Comment