Showing posts with label Windows Container. Show all posts

Friday, March 16, 2018

Dockerising both ASP.NET Core 2.0 and SQL Server Express in Windows containers

In a previous post I showed how you can have an ASP.NET Core 2.0 application work with a containerized SQL Server Express database server running in a Windows container. In this post I will take this one step further by also containerizing the ASP.NET Core 2.0 application.

Please go through my previous post before continuing with this tutorial.

We will generate the release version of the application by executing the following command from a terminal window in the root directory of your ASP.NET 2.0 project:

dotnet publish --framework netcoreapp2.0 --configuration Release --output dist

The above command instructs the dotnet utility to produce the release version of the application in the dist directory. This results in output similar to the following:

Microsoft (R) Build Engine version 15.6.82.30579 for .NET Core
Copyright (C) Microsoft Corporation. All rights reserved.

  Restore completed in 340.14 ms for E:\_aspnet\_docker\AspCoreSqlExpress\AspCoreSqlExpress.csproj.
  Restore completed in 340.57 ms for E:\_aspnet\_docker\AspCoreSqlExpress\AspCoreSqlExpress.csproj.
  Restore completed in 339.79 ms for E:\_aspnet\_docker\AspCoreSqlExpress\AspCoreSqlExpress.csproj.
  Restore completed in 346.67 ms for E:\_aspnet\_docker\AspCoreSqlExpress\AspCoreSqlExpress.csproj.
  AspCoreSqlExpress -> E:\_aspnet\_docker\AspCoreSqlExpress\bin\Debug\netcoreapp2.0\AspCoreSqlExpress.dll
  AspCoreSqlExpress -> E:\_aspnet\_docker\AspCoreSqlExpress\dist\

If you inspect the dist directory, you will see content similar to the following:


The highlighted file in the above folder screen capture is my main DLL file that is the entry point into the web application.

Let us run the release version of the web application. To do this, change directory to the dist directory with the following terminal instruction:

cd dist

You can then run your main DLL file. In my case, this file is AspCoreSqlExpress.dll. I executed the following command:

dotnet AspCoreSqlExpress.dll

This generates an understandable error, if the SQL Server Express container is not running, because the application is unable to connect to a database:

Application startup exception: System.Data.SqlClient.SqlException (0x80131904): A network-related or instance-specific error occurred while establishing a connection to SQL Server. The server was not found or was not accessible. Verify that the instance name is correct and that SQL Server is configured to allow remote connections. (provider: Named Pipes Provider, error: 40 - Could not open a connection to SQL Server) ---> System.ComponentModel.Win32Exception (0x80004005): The network path was not found

Contents of the /dist folder give us a good idea about ASP.NET Core 2.0 artifacts that need to be copied into a container. We shall simply copy contents of the dist directory into a Docker container that has the .NET Core 2.0 runtime.

Return to the root directory of your project by typing the following in a terminal window:

cd ..

Code in Startup.cs will need to be modified so that we can pass environment variables into the ASP.NET Core application. Therefore, open Startup.cs in your favorite editor and find method ConfigureServices(). Comment out (or delete) the following code:

services.AddDbContext<ApplicationDbContext>(options =>
   options.UseSqlServer(Configuration.GetConnectionString("DefaultConnection")));

Replaced the above code with:

var host = Configuration["DBHOST"] ?? "localhost";
var db = Configuration["DBNAME"] ?? "AspCoreSqlExpress";
var port = Configuration["DBPORT"] ?? "1433";
var username = Configuration["DBUSERNAME"] ?? "sa";
var password = Configuration["DBPASSWORD"] ?? "Sql!Expre55";

string connStr = $"Data Source={host},{port};Integrated Security=False;";
connStr += $"User ID={username};Password={password};Database={db};";
connStr += $"Connect Timeout=30;Encrypt=False;TrustServerCertificate=True;ApplicationIntent=ReadWrite;MultiSubnetFailover=False";

services.AddDbContext<ApplicationDbContext>(options =>
    options.UseSqlServer(connStr));

Five environment variables are used in the database connection string. These are: DBHOST, DBNAME, DBPORT, DBUSERNAME and DBPASSWORD. If these environment variables are not found then they will take up default values: localhost, AspCoreSqlExpress, 1433, sa and Sql!Expre55 respectively.

We need to create a Windows docker image that will contain the .NET Core 2.0 runtime. A suitable image for this purpose is: microsoft/aspnetcore:2.0-nanoserver-sac2016

Create a text file named Dockerfile.windows and add to it the following content:

FROM microsoft/aspnetcore:2.0-nanoserver-sac2016
COPY dist /app
WORKDIR /app
EXPOSE 80/tcp
ENV ASPNETCORE_URLS http://+:80
ENTRYPOINT ["dotnet", "AspCoreSqlExpress.dll"]

Above are instructions to create a Windows Docker image that will contain our ASP.NET Core 2.0 application. I explain each line below:

FROM microsoft/aspnetcore:2.0-nanoserver-sac2016 Base Windows image microsoft/aspnetcore:2.0-nanoserver-sac2016 will be used
COPY dist /app Contents of the dist directory on the host computer will be copied to directory /app in the container
WORKDIR /app The working directory in the container is /app
EXPOSE 80/tcp Port 80 will be exposed in the container
ENV ASPNETCORE_URLS http://+:80 Expose port 80 for the Web API traffic
ENTRYPOINT ["dotnet", "AspCoreSqlExpress.dll"] The main ASP.NET Core 2.0 web application will be launched by executing "dotnet AspCore4Docker.dll"

There is a risk that the web application container (mvc) starts earlier than the SQL Server container. We need to figure out a way to have the web application wait for the database server to be ready. We can use a PowerShell script to accomplish this task. Create a PowerShell file named wait4port1433.ps1 in the root of the ASP.NET Core 2.0 web application. Add to it the following script:

do {
  Write-Host "waiting..."
  sleep 3      
} until(Test-NetConnection db -Port 1433 | ? { $_.TcpTestSucceeded } )

dotnet AspCoreSqlExpress.dll

The above PowerShell script waits until port 1433 is available on the db container. Once the port is available then it will start the web application by running dotnet demo-docker.dll.

Open the .csproj file and add this markup just before the closing </Project> tag:

<ItemGroup>
   <Content Include="wait4port1433.ps1" CopyToOutputDirectory="Always" />
</ItemGroup>

The above markup ensures that the PowerShell script file is published together with all other required files into the dist folder. After saving the .csproj file, remove the dist folder and re-publish your web application by running the following pair of commands from a terminal window:

rmdir dist /S /Q
dotnet publish --framework netcoreapp2.0 --configuration Release --output dist

We will next compose a docker yml file that orchestrates the entire system which involves two Windows containers: a SQL Server Express database container and a container that holds our web application. In the root folder of your application, create a text file named docker-compose.yml and add to it the following content:

version: '3'

services:
  db:
    image: microsoft/mssql-server-windows-express:2016
    volumes:
       - sqldatavol:c:\sqldata
    restart: always
    networks:
      - aspsqlnet
    environment:
      - sa_password=Sql!Expre55
      - ACCEPT_EULA=Y

  mvc:
    build:
      context: .
      dockerfile: Dockerfile.windows
    depends_on:
      - db
    networks:
      - aspsqlnet
    ports:
      - "8888:80"
    #restart: always
    environment:
      - DBHOST=db
      - DBNAME=sql-docker
      - DBPORT=1433
      - DBUSERNAME=sa
      - DBPASSWORD=Sql!Expre55
      - ASPNETCORE_ENVIRONMENT=Development
    entrypoint: powershell "c:\app\wait4port1433.ps1"

volumes:
  sqldatavol:

networks:
  aspsqlnet:

Below is an explanation of what this file does.

We will have two Windows containers. Each container is considered to be a service. The first service is named db and will host SQL Server Express. The second service is named mvc and will host our ASP.NET Core 2.0 web application.

The most current version of docker-compose is version 3. This is the first line in our docker-compose.yml file.

The SQL Server Express Container

image
Image microsoft/mssql-server-windows-express:2016 will be used for the SQL Server Express container.

volumes
A folder on the host machine named sqldatavol is mapped to folder c:\sqldata in the container. This is so that data is persisted on the host machine in case the container is destroyed as we do not want to lose valuable data.

restart
restart: always is so that if the container stops, it is automatically restarted.

networks
The db container will exist in a virtual network named aspsqlnet.

environment
The sa password will be Sql!Expre55 when SQL Server Express is configured. This is set by the sa_password environment variable. Environment variable ACCEPT_EULA pertains to acceptance of the End-User Licensing Agreement, which is a required setting for the SQL Server image.

The ASP.NET Core 2.0 Web Application Container

build
The container will be built using the instructions in the Dockerfile.windows file and the context used is the current directory.

depends_on
depends_on indicates that the web application relies on the SQL Server Express container (db) to properly function.

networks
The mvc container will also exist in a virtual network named aspsqlnet.

ports
Port 80 in the mvc container is mapped to port 8888 on the host computer.

environment
The environment variables needed by the web app are:

DBHOST pointing to the SQL Server Express service
- DBNAME is the name we wish to give to the database
- DBPORT is the port number that SQL Server Express is listening on
- DBUSERNAME is the database server user-name. This is set to the admin user-name 'sa'
- DBPASSWORD is the password for user-name 'sa'.
- ASPNETCORE_ENVIRONMENT is set to Development. In reality, you should change this to Production once you determine that your web application container works as expected.

entrypoint
We override the entry point declared in Dockerfile.windows. This entry point calls the PowerShell script file wait4port1433.ps1 that waits for port 1433 to exist. Once it becomes available, it then starts the web application by running dotnet demo-docker.dll.

Running the yml file

To find out if this all works, go to a terminal window in the root folder of the ASP.NET Core 2.0 application and run the following command:

docker-compose up

Point your browser to http://localhost:8888/ and you should see the main web page. To ensure that the database works properly, register a user by clicking on the Register link in the top right corner.

In my case, I received confirmation that a user was indeed registered:


As you can see in the top-right corner, the user with email a@a.a has been successfully registered.

To shutdown the two containers container, go to a terminal window in the root folder of the ASP.NET Core 2.0 application and run the following command:

docker-compose down

This opens up a whole new world for containerizing your ASP.NET Core 2.0 web applications in Windows Docker containers.

References:


Thursday, March 15, 2018

SQL Server database in a Windows docker container with an ASP.NET Core 2.0 web app on host computer

This article shows how to use SQL Server Express in a Windows Docker container communicating with an ASP.NET Core 2.0 app running on the host computer.

The following is assumed:

1) You have .NET Core 2.0 installed on your computer. Go to https://www.microsoft.com/net to download and install .NET Core 2.0.
2) You have Docker for Windows installed on your computer. Refer to https://docs.docker.com/docker-for-windows/install/ for instructions on how to install "Docker for Windows".

Let's get started.

Right-click on the whale docker icon in the tray and make sure it is in Windows Container mode. This is the case if it displays “Switch to Linux containers…” as shown below:


Create a working directory somewhere on your computer's hard drive. I did so by creating a folder named AspCoreMySQL with the following terminal command:

mkdir AspCoreSqlExpress

Thereafter, go into the new folder with:

cd AspCoreSqlExpress

We will create an ASP.NET Core 2.0 application that uses individual authentication with Sql Server Local DB as follows:

dotnet new mvc --auth individual --use-local-db

To run the web application and see what it looks like, enter the following command:

dotnet run

You will see a message in the terminal window that resembles the following:

Hosting environment: Production
Content root path: E:\_aspnet\_docker\AspCoreSqlExpress
Now listening on: http://localhost:5000
Application started. Press Ctrl+C to shut down.

The above message indicates that the Kestrel web server is running and listening on port 5000. Start your browser and enter URL http://localhost:5000. You should see a page that looks like this:


Close your browser and stop the web server in the terminal window by hitting CTRL + C.

Let's look at the code to determine what database is being used by the application. Suitable IDEs for this tutorial are Visual Studio 2017 or Visual Studio Code. You can use any other editor of your choice. 

Open Startup.cs in an editor and look at the ConfigureServices() method. The following code confirms that SQL Server is being used:

services.AddDbContext<ApplicationDbContext>(options =>
   options.UseSqlServer(Configuration.GetConnectionString("DefaultConnection")));

The connection string is being read from the appsettings.json file, which looks like thois:

{
  "ConnectionStrings": {
    "DefaultConnection": "Server=(localdb)\\mssqllocaldb;Database=aspnet-AspCoreSqlExpress-22CD843B-79FF-412C-8F1D-6D6FE7CCC468;Trusted_Connection=True;MultipleActiveResultSets=true"
  },
  "Logging": {
    "IncludeScopes": false,
    "LogLevel": {
      "Default": "Warning"
    }
  }
}

Add the following code to the Configure() method in the Startup.cs file right before app.UseMvc():

using (var srvc = app.ApplicationServices.GetRequiredService<IServiceScopeFactory>().CreateScope())
{
   var context = srvc.ServiceProvider.GetService<ApplicationDbContext>();
   context.Database.Migrate();
}

The above code will process any outstanding Entity Framework migrations.

We shall now download a suitable Docker image for SQLServer Express. Run the following command from a terminal window:

docker pull microsoft/mssql-server-windows-express:2016 

This image is about 5 GB in size, so it will take some time to download. Once fully downloaded, then  create a container from the Docker image with the following command:

docker run -d -p 7000:1433 --env sa_password=Sql!Expre55 --env ACCEPT_EULA=Y microsoft/mssql-server-windows-express:2016

The above Docker command will create an image with the following parameters:

- inside the container, the SQL Server database will listen on its default port number 1433. This port number is mapped to port 7000 on the host computer
- sa password is Sql!Expre55
- environment variable ACCEPT_EULA is set to Y

Check that the SQL Server container is running by typing the following Docker command in a terminal window:

docker ps -a

This should show a message that looks like this:

CONTAINER ID        IMAGE                                         COMMAND                    CREATED             STATUS              PORTS                    NAMES
327d371b6f39        microsoft/mssql-server-windows-express:2016   "cmd /S /C 'powershe…"     6 minutes ago       Up 3 minutes        0.0.0.0:1433->1433/tcp   musing_hopper

According to the above message, the container status is Up 3 minutes, which means that it is indeed running.

Now let's try to connect to it from our ASP.NET Core 2.0 application. To do this, we will need to get the internal IP address of the container. Identify the first three characters of your Container ID. In the above example it is 327. This will be used to obtain the container IP address by executing the following command in a terminal window:

docker inspect 327

        Note: You will need to replace 327 above with the first three characters of your Container ID.

A JSON formatted listing of container parameters will be shown. Identify the value for Networks >> nat >> IPAddress. In my case, the container IP address is 172.18.211.55:


Edit appsettings.json and change the connection string with key DefaultConnection so that it has a value similar to the following:

Data Source=172.18.211.55;User ID=sa;Password=Sql!Expre55;Connect Timeout=30;Database=AspCoreSqlExpress;

        Note: The IP address should match the one you identified for the container earlier on.

The SQL Server database listens on port 7000 on the host machine. This means that we can have an alternative connection string that looks like this:

Data Source=localhost,7000;User ID=sa;Password=Sql!Expre55;Connect Timeout=30;Database=AspCoreSqlExpress;

After saving the appsettings.json file, you can test your web application. Run the following commands from a terminal window:

dotnet restore
dotnet run

If all goes well, you will see a message that indicates that the web server is listening on port 5000. Point your browser to http://localhost:5000. The same web page will appear as before. Click on the Register link on the top right side.

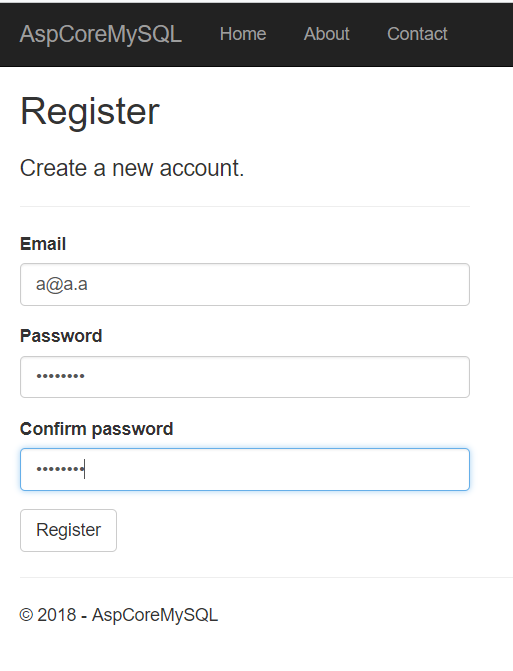
I entered an Email, Password and Confirm password then clicked on the Register button. I was then rewarded with the following confirmation that the credentials were indeed saved in the SQL Server Express database inside the container:


The message on the top right side confirms that a user was saved and that communication between the ASP.NET Core 2.0 application and SQL Server Express inside the container is working properly.

Let us directly access the container and list all the databases that exist. Using the first three characters of the Container ID, run the following Docker command in a separate terminal window:

docker exec -it 327 sqlcmd

        Note: You need to replace 327 above with the first three characters of your Container ID.

The –i switch is for interactive and –t is for pseudo-TTY.

You will see a window that looks like this:


Enter the following pair of commands to display existing databases:

EXEC sp_databases
go

The output will look like this:


Enter these commands to display tables & views in the AspCoreSqlExpress database:

USE AspCoreSqlExpress
EXEC sp_tables
go

You can, alternatively, execute this command to see only base tables:

SELECT  * FROM AspCoreSqlExpress.INFORMATION_SCHEMA.TABLES
WHERE TABLE_TYPE = 'BASE TABLE';
go

Enter these commands to display the content of the AspNetUsers table:

SELECT * FROM AspNetUsers 
go

To exit the sqlcmd terminal window type exit and hit ENTER.

In my next post I will demonstrate how we can also containerize our ASP.NET Core 2.0 web application.

Thursday, December 29, 2016

ASP.NET Core 1.0 SQLite app in Windows Docker container on Windows 10 with yeoman

In a previous post, I showed how you can scaffold an ASP.NET Core 1.0 app that uses SQLite and deploy it into a Linux Docker container on Windows 10. In this post I will show you how to do the same thing, but instead in a Windows container rather than a Linux container.
If you are new to Docker on Windows 10, you can refer to a previous post that will help you install and configure it.
The pre-requisites needed to proceed are:
  1. Windows 10 Anniversary edition or later
  2. Hyper-V enabled on the host Windows 10 Anniversary operating system
  3. Yeoman command line interface
  4. .NET Core 1.0 is installed on your computer
You can get more information on installing the Yeoman command line interface at http://yeoman.io/codelab/setup.html.

Scaffolding an ASP.NET Core SQLite application with Yeoman


1) Open a command-line window in Windows 10.

2) In a suitable working directory on your hard-drive, create a folder named dev with the following command:
mkdir dev

3) Go into the newly created directory with:

cd dev

4) In the dev folder, create a file named global.json with the following content:
{
  "sdk": {
    "version": "1.0.0-preview2-003131"
  }
}
Note that for this example, we will be using ASP.NET Core version 1.0, as specified in the global.json file.

5) You will now use the Yeoman scaffolding tool to create an ASP.NET Core 1.0 application that uses SQLite as its database. Type the following inside the dev folder:

yo aspnet

The following menu will display:

image_thumb1

6) Hit the down-arrow on your keyboard until you get to “Web Application” then hit ENTER.

image_thumb3

7) Hit ENTER again to select Bootstrap.

image

8) When asked for an application name, type-in YoAspnetWin then hit ENTER. The application will get created for you. This is what it should look like when it is done:

image

9) Note these suggested instructions:
cd "YoAspnetWin"
dotnet restore
dotnet build
dotnet ef database update
dotnet run
Execute the above five instructions in sequence. Eventually, your command-line windows will be running the Kestrel web server listening on port 5000:

image

10) View the web application by pointing your browser to http://localhost:5000. This is what the web application, running on your host computer,  looks like:

image

Stop the web application by hitting CTRL + C on your keyboard.

We are now ready to deploy this SQLite database driven application into a Windows Docker container.

Writing code to create the database

We will be publishing a release version of our application and then deploy it into a Windows docker container. One of the instructions that we executed in the command line (dotnet ef database update) is intended to apply migrations and create the database. This cannot be done in production once our app is published. Instead, we will have to execute code in our application that creates the database according to our connection string.

The connection string is specified in appsettings.json file and its content is:
{
  "ConnectionStrings": {
    "DefaultConnection": "Data Source=YoAspnetWin.db"
  },
  "Logging": {
    "IncludeScopes": false,
    "LogLevel": {
      "Default": "Debug",
      "System": "Information",
      "Microsoft": "Information"
    }
  }
}
Open the Startup.cs file in a text editor and find the Configure() method. We will use dependency injection to get an instance of the database ApplicationDbContext context class. To do this, add an additional argument to the Configure() method so that its signature looks like this:
public void Configure(
  IApplicationBuilder app,
  IHostingEnvironment env,
  ILoggerFactory loggerFactory,
  ApplicationDbContext context)
At the bottom end of the Configure() method, add this line of code:

context.Database.EnsureCreated();

EnsureCreated() is new EF core method which ensures that the database for the context exists. If it exists, no action is taken. If it does not exist then the database and all its schema are created and also it ensures it is compatible with the model for the context.

Eventually, the Configure() method will look like this:
public void Configure(
  IApplicationBuilder app,
  IHostingEnvironment env,
  ILoggerFactory loggerFactory,
  ApplicationDbContext context)       
{
  loggerFactory.AddConsole(Configuration.GetSection("Logging"));
  loggerFactory.AddDebug();

  if (env.IsDevelopment()) {
      app.UseDeveloperExceptionPage();
      app.UseDatabaseErrorPage();
      app.UseBrowserLink();
  } else {
      app.UseExceptionHandler("/Home/Error");
  }

  app.UseStaticFiles();
  app.UseIdentity();
  app.UseMvc(routes =>
  {
      routes.MapRoute(
          name: "default",
          template: "{controller=Home}/{action=Index}/{id?}");
  });
 
  context.Database.EnsureCreated();
}
Save your file then execute this statement from the command-line to ensure that your app compiles OK.
dotnet build

Deploying web app into Windows Docker container

We will be deploying our web app into a Windows container. Therefore, right-click on the Docker (whale) icon in your system tray and make sure it displays:

image

If it does not show the above message then you should switch to the Windows container.
We will next publish our application into a directory named out. Therefore, run the following instruction inside of a command-line window in the YoAspnetWin folder:

dotnet publish -c Release -o out

Have a peek at the files in the out folder. You will notice that it contains all the compiled files that make up the release version of our application:
image

Create a text file in the YoAspnetWin folder named Dockerfile.nano and add to it the following content:
FROM microsoft/dotnet:1.0-sdk-projectjson-nanoserver
ENTRYPOINT ["dotnet", "YoAspnetWin.dll"]
WORKDIR /app
ENV ASPNETCORE_URLS
http://+:82
EXPOSE 82
COPY out .
I will explain what each command in Dockerfile.nano does.

FROM microsoft/dotnet:1.0-sdk-projectjson-nanoserver We will be using the official Microsoft docker container named microsoft/dotnet:1.0-sdk-projectjson-nanoserver as our starting image. This is a suitable container because it already has the small Windows Nano server. It also has the .NET Core version 1.0 runtime, which is compatible to our web app. Note that it does not contain the .NET Core SDK, so we cannot run commands like dotnet restore, dotnet build, etc… in the container.
ENTRYPOINT ["dotnet", "YoAspnetWin.dll"] The web application will be started by executing the “dotnet YoAspnetWin.dll”. The name of the DLL file is dictated by the name of the containing folder during execution of the “dotnet publish” step, which we did previously.
WORKDIR /app A directory named /app is created in the Windows container to host our published app.
ENV ASPNETCORE_URLS http://+:82 The environment variable ASPNETCORE_URLS is set so that the listening Kestrel web server port in the container is 82.
EXPOSE 82 Port 82 is the port number that will be exposed by the container.
COPY out . The contents of the out folder is copied into the /app working directory in the container.

Inside a command-prompt in the YoAspnetWin folder, execute the following to build an image named dotnetweb/nano that contains our web app:

docker build -t dotnetweb/nano -f Dockerfile.nano .

This will download the microsoft/dotnet:1.0-sdk-projectjson-nanoserver container from http://hub.docker.com and subsequently build our new image. When it is done, you can type the following command to see all the images you have:

docker images

image

You will find at least these two images.
  1. dotnetweb/nano is the docker image we just built
  2. microsoft/dotnet:1.0-sdk-projectjson-nanoserver is the base image we used
To make a container from the image and run it, type the following command:

docker run -d -p 88:82 dotnetweb/nano

Run the following command to determine which containers are running:

docker ps

It should show the following running images:

image

You would think that we can access the web site using http://localhost:88. If you try that your browser will report back that the site can’t be reached. This is because there is a bug with Windows containers running under Windows 10 that does not allow that. The alternative, is to access the web server directly inside the container, which is being exposed on port 82. But, what is the IP address of the container? This is where the “docker inspect” command comes to the rescue. Grab the first two or three characters of the container-id. Looking as the previous screen-capture, the container-id is c1d. Therefore, then run the following command with your container-id:

docker inspect c1d

image

Grab the container’s IP address and try http://{container-ip-address}:82. In my case, this is http://172.29.131.95:82.

image

Yep. It works.

We must ensure that our database is indeed working. In order to do that, click on Register in the top-right corner of the web app and enter a user email and password:

image

After clicking on the Register button, you should see that the new user is successfully created:

image

Cleanup

To stop the container you can simply use the first two or three character of the container-id as follows:

docker stop c1d

To see which containers are still available, type:

docker ps -a

To delete the container completely, identify the first two to three character of the container-id then use the “docker rm” command similar to the following:

docker rm c1d

I you run “docker ps –a” again you will determine that the container is gone.
Find out what images you have by typing  the following command:

docker images

You can delete the image by id or by name, as follows:

docker rmi ce3
                    OR                           docker rmi dotnetweb/nano

After you remove the image you can again type “docker images” to prove that the image is indeed deleted.