Wednesday, January 18, 2023

Code First Development with Razor Pages

In this tutorial, you will develop a data driven web application using ASP.NET Razor Pages, SQL Server, and Entity Framework. We shall use Visual Studio Code for our editor. The data model will be based on a Team/Player relationship in sports. We will use SQL Server running in a Docker Container.

Companion video: https://youtu.be/5ncM-MYQG24

Source code: https://github.com/medhatelmasry/TeamPlayer

Assumptions

It is assumed that you have the following installed on your computer:

  • Visual Studio Code
  • .NET 7.0 SDK
  • Docker Desktop

Visual Studio Code Extension

Add this Visual Studio Code Extension if you do not have it already:

The Data Model

We will use the following class to represent a Team:

public class Team {
    [Key]
    public string? TeamName { get; set; }
    public string? City { get; set; }
    public string? Province { get; set; }
    public string? Country { get; set; }

    public List<Player>? Players { get; set; }
}

The primary key is the TeamName and a team has many players.

The following class represents a Player:

public class Player {
    public int PlayerId { get; set; }
    public string? FirstName { get; set; }
    public string? LastName { get; set; }
    public string?  Position { get; set; }

    public string? TeamName { get; set; }

    [ForeignKey("TeamName")]
    public Team? Team { get; set; }
}

The primary key is PlayerId and each player must belong to a team.

Getting started

In a working directory, run the following command in a terminal window to create a Razor Pages web application in a folder names TeamPlayers:

dotnet new razor -f net7.0 -o TeamPlayers

Change to the newly created folder with terminal command:

cd TeamPlayers

For the application to work with SQL Server, we will need to add some packages by running the following commands:

dotnet add package Microsoft.EntityFrameworkCore
dotnet add package Microsoft.EntityFrameworkCore.SqlServer
dotnet add package Microsoft.EntityFrameworkCore.Tools
dotnet add package Microsoft.EntityFrameworkCore.Design
 
We will use code generation to scaffold razor pages. For that purpose, you will also need to add this package:

dotnet add package Microsoft.VisualStudio.Web.CodeGeneration.Design

If you have not done so already, you will need to globally install the following tools for Entity Framework and Code Generation respectively:

dotnet tool install -g dotnet-aspnet-codegenerator
dotnet tool install -g dotnet-ef

NOTE: If these tools are already installed, run the above commands while replacing ‘install’ with ‘update’ to get the latest version of the tool.

Creating the model classes

Open your app in Visual Studio Code with this command:

code .

Create a folder named Models and add to it classes Team & Player mentioned under title “The Data Model” above.

The Context Class

We will need to create a database context class to work with relational databases using Entity Framework. To this end, create a Data folder. Inside the Data folder, create a class named ApplicationDbContext with the following code:
public class ApplicationDbContext : DbContext {
    public ApplicationDbContext(DbContextOptions<ApplicationDbContext> options)
        : base(options) {}


    public DbSet<Team>? Teams { get; set; }
    public DbSet<Player>? Players { get; set; }
}

Seeding the database with sample data

It is always useful to have some sample data to visualize what the app does. Therefore, we will create a class dedicated to seeding data. In the Data folder, create a static class named SeedData and add to it the following code that contains sample data for teams and players:

public static class SeedData {
    // this is an extension method to the ModelBuilder class
    public static void Seed(this ModelBuilder modelBuilder) {
        modelBuilder.Entity<Team>().HasData(
            GetTeams()
        );
        modelBuilder.Entity<Player>().HasData(
            GetPlayers()
        );
    }
    public static List<Team> GetTeams() {
        List<Team> teams = new List<Team>() {
            new Team() {    // 1
                TeamName="Canucks",
                City="Vancouver",
                Province="BC",
                Country="Canada",
            },
            new Team() {    //2
                TeamName="Sharks",
                City="San Jose",
                Province="CA",
                Country="USA",
            },
            new Team() {    // 3
                TeamName="Oilers",
                City="Edmonton",
                Province="AB",
                Country="Canada",
            },
            new Team() {    // 4
                TeamName="Flames",
                City="Calgary",
                Province="AB",
                Country="Canada",
            },
            new Team() {    // 5
                TeamName="Leafs",
                City="Toronto",
                Province="ON",
                Country="Canada",
            },
            new Team() {    // 6
                TeamName="Ducks",
                City="Anaheim",
                Province="CA",
                Country="USA",
            },
            new Team() {    // 7
                TeamName="Lightening",
                City="Tampa Bay",
                Province="FL",
                Country="USA",
            },
            new Team() {    // 8
                TeamName="Blackhawks",
                City="Chicago",
                Province="IL",
                Country="USA",
            },
        };

        return teams;
    }

    public static List<Player> GetPlayers() {
        List<Player> players = new List<Player>() {
            new Player {
                PlayerId = 1,
                FirstName = "Sven",
                LastName = "Baertschi",
                TeamName = "Canucks",
                Position = "Forward"
            },
            new Player {
                PlayerId = 2,
                FirstName = "Hendrik",
                LastName = "Sedin",
                TeamName = "Canucks",
                Position = "Left Wing"
            },
            new Player {
                PlayerId = 3,
                FirstName = "John",
                LastName = "Rooster",
                TeamName = "Flames",
                Position = "Right Wing"
            },
            new Player {
                PlayerId = 4,
                FirstName = "Bob",
                LastName = "Plumber",
                TeamName = "Oilers",
                Position = "Defense"
            },
        };

        return players;
    }
}

Note that the SeedData class is static because it contains an extension method named Seed() to ModelBuilder.

The Seed() method needs to be called from somewhere. The most appropriate place is the ApplicationDbContext class. Add the following OnModelCreating() method to the ApplicationDbContext class:

protected override void OnModelCreating(ModelBuilder builder)
{
    base.OnModelCreating(builder);
    builder.Entity<Player>().Property(m => m.TeamName).IsRequired();

    builder.Entity<Team>().Property(p => p.TeamName).HasMaxLength(30);

    builder.Entity<Team>().ToTable("Team");
    builder.Entity<Player>().ToTable("Player");

    builder.Seed();

In addition to seeding data, the above code ensures the following:
  • TeamName is required
  • The maximum length of TeamName is 30 characters
  • The names of the tables that get created in the database are Team & Player. Otherwise, the names get created as Teams & Players.

The database

You can use whatever SQL Server database you wish. In my case, so that this app works on Linux, Windows, Mac Intel, and Mac M1, I will run SQL Server in a Docker container. To run SQL Server in a Docker container, run the following command:

docker run --cap-add SYS_PTRACE -e ACCEPT_EULA=1 -e MSSQL_SA_PASSWORD=SqlPassword! -p 1444:1433 --name azsql -d mcr.microsoft.com/azure-sql-edge

The connection string to the database is setup in the appsettings.json file. Edit this file and make the following highlighted updates to it:

{
  "Logging": {
    "LogLevel": {
      "Default": "Information",
      "Microsoft.AspNetCore": "Warning"
    }
  },
  "AllowedHosts": "*",
  "ConnectionStrings": {
    "DefaultConnection": "Server=tcp:127.0.0.1,1444;Database=TeamPlayersDB;UID=sa;PWD=SqlPassword!;TrustServerCertificate=True;"
  }
}
 

To make our app work with SQL Server, you will need to add the following code to Program.cs just before “var app = builder.Build();”: 

string connStr = builder.Configuration.GetConnectionString("DefaultConnection");
builder.Services.AddDbContext<ApplicationDbContext>(
    options => options.UseSqlServer(connStr)
);

Migrations

We can now create a migration named m1 with:

dotnet ef migrations add M1 -o Data/Migrations

This creates a migrations file in Data/Migrations folder. To execute the migrations and create the database and seed data, run the following command:

dotnet ef database update

If all goes well and no errors are generated, we can assume that a database named TeamPlayersDB was created, and data is seeded into tables Team & Player.

NOTE: If you wish to drop the database for whatever reason, you can run command: dotnet ef database drop
 
This is what the tables in the database look like:

Scaffolding Teams & Players pages

To incorporate pages into our app that allow us to manage Team & Player data, we will scaffold the necessary pages using the aspnet-codegenerator utility. Run the following command from a terminal window in the root of the project to generate files pertaining to teams and players respectively:

dotnet aspnet-codegenerator razorpage -m Team -dc ApplicationDbContext -udl -outDir Pages/TeamPages --referenceScriptLibraries

dotnet aspnet-codegenerator razorpage -m Player -dc ApplicationDbContext -udl -outDir Pages/PlayerPages --referenceScriptLibraries

This produces files in folders Pages/TeamPages & Pages/PlayerPages respectively. To add menu items on the home page that point to Team & Player pages, edit Pages/Shared/_Layout.cshtml and add the following HTML to the <ul> block around line 25:

<li class="nav-item">
    <a class="nav-link text-dark" asp-area="" asp-page="/TeamPages/Index">Teams</a>
</li>
<li class="nav-item">
    <a class="nav-link text-dark" asp-area="" asp-page="/PlayerPages/Index">Players</a>
</li>

The final product

Run the web app and notice the main menu:


Click on Teams:


Click on Players:


Conclusion

You just learned how to use the code-first database approach with ASP.NET Razor pages. The same priciples work with ASP.NET MVC. 

Friday, December 30, 2022

Creating a master/detail web application with ASP.NET Razor Pages

In this tutorial, you will create a master/detail web application using ASP.NET Razor Pages. The data used will be read from your operating system. Specifically, we will query the local operating system with the number of processes that are running and then display details about each process. We shall use Visual Studio Code for our editor.

Source Code: https://github.com/medhatelmasry/OsProcess
Companion video: https://youtu.be/u_CT0aUz4lc

Getting started

Inside a working directory, run the following command in a terminal window to create a Razor Pages web application in a folder names OsProcess:

dotnet new razor -o OsProcess

Change into the newly created directory with:

cd OsProcess

To run the application in watch mode type:

dotnet watch

The following web app will appear in your default browser:


Our objective is to display all the processes that are running in your operating system.

Displaying processes on the home page

Stop the web server by hitting CTRL C in the terminal window. Then, open the project in VS Code by typing the following in the same folder:

code .

Open Pages/Index.cshtml.cs in the editor.  Add the following using statement at the top of the IndexModel class:

using System.Diagnostics;

Find the OnGet() method and add the following code into it:

Process[] processes = Process.GetProcesses();
ViewData["P"] = processes;

The above code uses the Process class’s static method GetProcesses() to read all the processes that are running in your operating system. The next step is to display this information in the view. Open Pages/Index.cshtml in the editor. Replace the contents of Pages/Index.cshtml with the following:

@page
@using System.Diagnostics
@model IndexModel
@{
    ViewData["Title"] = "OS Processes";
    Process[]? processes = ViewData["P"] as Process[];
}

<div class="text-center">
    <h1 class="display-4">@ViewData["Title"]!</h1>
        @foreach (var item in processes!)
        {
            @if (item.ProcessName.Trim().Length > 0)
            {
                <p><a asp-page="./Details" asp-route-id="@item.Id">@item.ProcessName</a></p>
            }
        }
</div>

The above code assigns a ViewData object, passed from the code behind, to an array of Process objects. It then displays the array items in a series of links.

Run the app in watch mode by typing the following command:

dotnet watch

This is what I see on my mac computer. You will experience different data on your computer depending on your operating system and the background applications that are currently running on your computer.


When you click on any of the links, you will notice that it does nothing. Let’s analyze the anchor tag:

<a asp-page="./Details" asp-route-id="@item.Id">@item.ProcessName</a>

This suggests that there is a ./Details page that is missing. Let us add this page by typing the following scaffolding command in the terminal window:

dotnet new page --namespace OsProcess.Pages --name Details --output Pages

The above creates files Pages/Details.cshtml and Pages/Details.cshtml.cs.


Open Pages/Details.cshtml.cs in the editor. Just like we did before, add the following using statement at the top of the DetailsModel class:

using System.Diagnostics;

Also, in Pages/Details.cshtml.cs, replace the OnGet() method with the following:

public void OnGet(int id) {
    ViewData["P"] = Process.GetProcessById(id);
}

The above code retrieves details about a specific process from its ID and feeds the result into the ViewData dictionary with key P.

Open Pages/Details.cshtml in the editor. Replace the contents of this file with the following:

@page
@using System.Diagnostics
@model OsProcess.Pages.DetailsModel
@{
    Process? process = ViewData["P"] as Process;
    ViewData["Title"] = $"Process with ID={process!.Id}";
}

<h1>@ViewData["Title"]</h1>

<div>
    <hr />
    <table class="table table-striped">
        <tr>
            <td>Process Name</td><td>@process.ProcessName</td>
        </tr>
        <tr>
            <td>Number of threads</td><td>@process.Threads.Count</td>
        </tr>
    </table>
</div>
<div>
    <a asp-page="./Index">Back to List</a>
</div>

The above code displays the details of a specific process. These do not, by any means, represent all the properties of a process. In the interest of simplicity, we are only looking at four properties. Run the web app in your browser and you will see the following behavior:


Using property approach

If you do not wish to use ViewData or ViewBag objects, there is another better way of achieving the same outcome. Let’s starts with the master page involving Pages/Index.cshtml and Pages/Index.cshtml.cs. Open Pages/Index.cshtml.cs in the editor and make the following highlighted changes to it:

using Microsoft.AspNetCore.Mvc;
using Microsoft.AspNetCore.Mvc.RazorPages;
using System.Diagnostics;

namespace OsProcess.Pages;

public class IndexModel : PageModel
{
    private readonly ILogger<IndexModel> _logger;

    public IList<Process> Processes { get;set; } = default!;

    public IndexModel(ILogger<IndexModel> logger)
    {
        _logger = logger;
    }

    public void OnGet()
    {
        Processes = Process.GetProcesses().ToList();
    }
}

In the above code, we set the value of the class’s Processes property with the list of processes. This property can get directly accessed from the view file.

Similarly, update Pages/Index.cshtml.cs so it looks like this:

@page
@using System.Diagnostics
@model IndexModel
@{
    ViewData["Title"] = "OS Processes";
}

<div class="text-center">
    <h1 class="display-4">@ViewData["Title"]!</h1>
        @foreach (var item in Model.Processes)
        {
            @if (item.ProcessName.Trim().Length > 0)
            {
                <p><a asp-page="./Details" asp-route-id="@item.Id">@item.ProcessName</a></p>
            }
        }
</div>

Note that processes can be accessed with Model.Processes in the view. The latest solution is much more elegant and avoids the use of ViewData to pass data from the code behind file to the view. If you run the application again, you will notice that it behaves just like before.

One last thing we can do is to use the Property approach also in the Details page. Here is the code for Details.cshtml.cs & Details.cshtml:

Details.cshtml.cs

using Microsoft.AspNetCore.Mvc;
using Microsoft.AspNetCore.Mvc.RazorPages;
using System.Diagnostics;

namespace OsPorocess.Pages
{
    public class DetailsModel : PageModel
    {
        public Process SingleProcess { get; set; } = default!;
        public void OnGet(int id)
        {
            //ViewData["P"] = Process.GetProcessById(id);
            SingleProcess = Process.GetProcessById(id);
        }
    }
}

Details.cshtml

@page
@using System.Diagnostics
@model OsPorocess.Pages.DetailsModel
@{
    //Process? process = ViewData["P"] as Process;
    ViewData["Title"] = $"Process with ID={Model.SingleProcess.Id}";
}

<h1>@ViewData["Title"]</h1>

<div>
    <table class="table table-striped">
        <tr>
            <td>Process Name</td>
            <td>@Model.SingleProcess.ProcessName</td>
        </tr>
        <tr>
            <td>Number of threads</td>
            <td>@Model.SingleProcess.Threads.Count</td>
        </tr>
    </table>
    <div>
        <a asp-page="./index">Back to list</a>
    </div>
</div>

The same approach for master/detail data can be used in a variety of scenarios.

Thursday, December 29, 2022

ASP.NET Razor Pages made simple

Overview

This tutorial will show how easy it is to build web applications using .NET 7.0, C# and ASP.NET Razor Pages. You will develop a web app that calculates the future value on an investment based on a monthly contribution that you can make at a given interest rate for a number of years.

Source Code: https://github.com/medhatelmasry/SuperWeb

Companion Video: https://youtu.be/Zzu-WlkhnH8

Getting Started

To display different types of .NET applications that you can build, execute the following command in a terminal window on mac, Linux, or windows:

dotnet new --list

We want to create an ASP.NET Razor Pages application. Go to a working directory and run the following command from a terminal window to create an app in a folder named SuperWeb.

dotnet new razor -f net7.0 -o SuperWeb

OR

dotnet new webapp -f net7.0 -o SuperWeb

Change directory to the newly created folder with:

cd SuperWeb

To run the application in developer mode, run the following command:

dotnet watch

The web app will open in your default browser.

Open the web project in Visual Studio Code with the following command:

code .

Folders

Open Pages/Index.cshtml.cs in the editor and inspect its content.

using Microsoft.AspNetCore.Mvc;
using Microsoft.AspNetCore.Mvc.RazorPages;

namespace SuperWeb.Pages;

public class IndexModel : PageModel
{
    private readonly ILogger<IndexModel> _logger;

    public IndexModel(ILogger<IndexModel> logger)
    {
        _logger = logger;
    }

    public void OnGet()
    {

    }
}

Add the following line of code inside the OnGet() method:

ViewData["Name"] = "Queen Elizabeth";

The above code adds a string to a ViewData dictionary with key "Name". ViewData dictionaries can be passed from the Index.cdhtml.cs file to the Index.cshtml view file.

Open Pages/Index.cshtml in the editor.

@page
@model IndexModel
@{
    ViewData["Title"] = "Home page";
}

<div class="text-center">
    <h1 class="display-4">Welcome</h1>
    <p>Learn about <a href="https://docs.microsoft.com/aspnet/core">building Web apps with ASP.NET Core</a>.</p>

</div>

Add the following right before </div>:

<h2>@ViewData["Name"]</h2>

Our main page looks like this:

Create a new folder named Models. Inside the Models folder, add a file named FutureValue.cs with this code:

namespace SuperWeb.Models;

public class FutureValue
{
    public decimal MonthlyInvestment { get; set; }
    public decimal YearlyInterestRate { get; set; }
    public int Years { get; set; }
    public decimal CalculateFutureValue()
    {
        int months = Years * 12;
        decimal monthlyInterestRate =
        YearlyInterestRate / 12 / 100;
        decimal futureValue = 0;
        for (int i = 0; i < months; i++)
        {
            futureValue = (futureValue + MonthlyInvestment)
            * (1 + monthlyInterestRate);
        }
        return futureValue;
    }
}

Create a Razor page pair of files named FutureValue.cshtml and FutureValue.cshtml.cs in the Pages folder with:

dotnet new page --namespace SuperWeb.Pages --name FutureValue --output Pages

Add the below highlighted code to Pages/FutureValue.cshtml.cs:

using Microsoft.AspNetCore.Mvc.RazorPages;
using SuperWeb.Models;

namespace SuperWeb.Pages
{
    public class FutureValueModel : PageModel
    {
        public decimal MonthlyInvestment { get; set; }
        public decimal YearlyInterestRate { get; set; }
        public int Years { get; set; }

        public void OnGet()
        {
            ViewData["FV"] = 0;
        }

        public void OnPost(FutureValue model)
        {
            ViewData["FV"] = model.CalculateFutureValue();
        }
    }
}

Replace contents of Pages/FutureValue.cshtml with:

@page
@model SuperWeb.Pages.FutureValueModel
@{
    ViewData["Title"] = "Future Value Page";
}

<div>
    <form method="post">
        <div>
            <label asp-for="MonthlyInvestment">
                Monthly Investment:</label>
            <input asp-for="MonthlyInvestment" />
        </div>
        <div>
            <label asp-for="YearlyInterestRate">
                Yearly Interest Rate:</label>
            <input asp-for="YearlyInterestRate" />
        </div>
        <div>
            <label asp-for="Years">Number of Years:</label>
            <input asp-for="Years" />
        </div>
        <div>
            <label>Future Value:</label>
            <input value='@ViewBag.FV.ToString("C2")' readonly>
        </div>
        <button type="submit">Calculate</button>
        <a asp-action="Index">Clear</a>
    </form>
</div>

Start the app then point your browser to /FutureValue. You will see this page:

The above page calculates the future value of an investment that you make at a specific interest rate based on a monthly fixed contribution for a number of years. Try entering the following values, then click on Calculate:


The result should look like this:

Let us add a link to /FutureValue on the main menu of the application. Open Pages/Shared/_Layout.cshtml. Around line 26, replace (  <a class="nav-link text-dark" asp-area="" asp-page="/Privacy">Privacy</a> ) with:

<a class="nav-link text-dark" asp-area="" asp-page="/FutureValue">Future Value</a>

You will see the Future Value link on the main menu.


Let us modify the “Future Value” form so that it looks more professional using bootstrap. Simply replace the <form> . . . . </form> HTML block in Pages/FutureValue.cshtml with:

<form method="post">
<div class="form-group">
<label asp-for="MonthlyInvestment" class="control-label"></label>
<input asp-for="MonthlyInvestment" class="form-control" />
</div>


<div class="form-group">
<label asp-for="YearlyInterestRate" class="control-label"></label>
<input asp-for="YearlyInterestRate" class="form-control" />
</div>

<div class="form-group">
<label asp-for="Years" class="control-label"></label>
<input asp-for="Years" class="form-control" />
</div>

<div class="form-group">
<label class="control-label">Future Value:</label>
<input value='@ViewBag.FV.ToString("C2")' readonly class="form-control">
</div>

<div class="form-group">
           <br />
<input type="submit" value="Calculate" class="btn btn-primary" />
<a asp-action="Index" class="btn btn-success">Clear</a>
</div>
</form>

If you run the application again, this is what you will see on the “Future Value” page:

Something is wrong. The labels (MonthlyInvestment, YearlyInterestRate, & Years) are not user friendly. They should be “Monthly Investment”, “Yearly Interest Rate” & “Number of years”. This is easily fixed using annotations on the model. Add the following highlighted annotations to Pages/FutureValue.cshtml.cs:

using System.ComponentModel.DataAnnotations;
using Microsoft.AspNetCore.Mvc.RazorPages;
using SuperWeb.Models;

namespace SuperWeb.Pages
{
    public class FutureValueModel : PageModel
    {
        [Display(Name="Monthly Investment")]
        public decimal MonthlyInvestment { get; set; }
         
        [Display(Name="Yearly Interest Rate")]
        public decimal YearlyInterestRate { get; set; }

        [Display(Name="Number of years")]
        public int Years { get; set; }

        public void OnGet()
        {
            ViewData["FV"] = 0;
        }

        public void OnPost(FutureValue model)
        {
            ViewData["FV"] = model.CalculateFutureValue();
        }

    }
}

Note: You will need to import the System.ComponentModel.DataAnnotations namespace.

Now the page has user friendly labels that look like this:


There is much more you can do with razor pages and it is an easier alternative to ASP.NET MVC.

Wednesday, April 27, 2022

Build .NET MAUI apps on Windows with VS Code

.NET Multi-platform App UI (.NET MAUI) is a cross-platform framework for creating native mobile and desktop apps with C# and XAML.It is the evolution of the Xamarin.Forms cross-platform framework. .NET MAUI Release Candidate 2 was made available recently on April 26, 2022. This means that the product is supported by Microsoft for production apps. 

I shall demonstrate how easy it is to get started with.NET MAUI on Windows. In order to follow on, you will need the following pre-requisites:

Getting Started

From within a terminal window, run the following command:

dotnet new --list

This should will show you the available .NET application templates for cross platform applications:

TemplateShort Name
.NET MAUI App (Preview) .NET MAUI App (Preview) maui
.NET MAUI Blazor App (Preview) maui-blazo
.NET MAUI Class Library (Preview) mauilib
.NET MAUI ContentPage (C#) (Preview) maui-page-csharp
.NET MAUI ContentPage (XAML) (Preview) maui-page-xaml
.NET MAUI ContentView (C#) (Preview) maui-view-csharp
.NET MAUI ContentView (XAML) (Preview) maui-view-xaml
Android Activity template android-activity
Android Application (Preview) android
Android Class Library (Preview) androidlib
Android Java Library Binding (Preview) android-bindinglib
Android Layout template android-layout

In today's exercise, we will create an app using the first maui template.

Let us create a new MAUI app on Windows. In a terminal window, navigate to a suitable work directory, then run the following command to create a .NET MAUI app named 'maui2022':

dotnet new maui -o maui2022
cd maui2022

The full set of .NET 6 TFMs (target framework monikers), including operating-specific ones, are:

net6.0
net6.0-android
net6.0-ios
net6.0-maccatalyst
net6.0-macos
net6.0-tvos
net6.0-windows

Run app on Windows

To run the sample app as a Windows application, we need to use the net6.0-windows target framework moniker:

dotnet build -t:run -f net6.0-windows

Currently (April 2022), this command does not work and results in the following error message:

The system cannot find the path specified.
C:\Program Files\dotnet\sdk\6.0.300-preview.22204.3\Sdks\Microsoft.NET.Sdk\targets\Microsoft.NET.Sd
k.targets(901,5): error MSB3073: The command "D:\_playground\maui\maui2022\bin\Debug\net6.0-windows
\win10-x64\maui2022.exe " exited with code 3. [D:\_playground\maui\maui2022\maui2022.csproj]

However, it works from the latest version of Visual Studio 2022 (Preview) for Windows - Version 17.2.0 Preview 5.0.


Run app in Android simulator from Visual Studio 2022 (Preview)

You need to first configure an Android Virtual Device (or emulator) by choosing Tools >> Android >> Android Device Manager...


You can run the Android Device Manager directly from the following location:

C:\Program Files\Microsoft Visual Studio\2022\Preview\Common7\IDE\Extensions\Xamarin\AndroidDeviceManager\AndroidDevices.exe

Configure at least one virtual device by clicking on the “+ New” button.


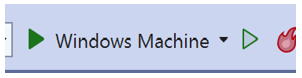
To run your MAUI app from Visual Studio 2022 (Preview), first choose the emulator you want to use:

Then click on the emulator in the toolbar to start your app:

Run app in Android simulator from terminal window

Add the following directories to your path so that you can call android emulator commands from anywhere on your computer:

C:\Program Files (x86)\Android\android-sdk\emulator
C:\Program Files (x86)\Android\android-sdk\platform-tools

To display a list of Android Virtual Devices (or emulators), run the following command:

emulator -list-avds

I got the following output:

pixel_4_-_api_30
pixel_5_-_api_30

To start the first of the above emulators, you must first start the adb.exe (Android Debug Bridge) app with the following command:

adb devices

You can then execute the following to start an Android emulator:

Start emulator pixel_4_-_api_30 emulator -avd pixel_4_-_api_30
Start emulator pixel_4_-_api_30 after wiping all the data in the emulator emulator -avd pixel_4_-_api_30 -wipe-data

Once the emulator starts, open a separate terminal window, and run your app in the emulator with:

dotnet build -t:run -f net6.0-android

Making a tiny change

Open the application workspace in VS Code, then open MainPage.xaml.cs in the editor. Change the statement on line 14 from "count++;" to "count += 10;" such that the count increments by 10 instead of 1. When you run the app in the Android emulator, you will see that it behaves as expected.

Conclusion

In this short journey we have learned how easy it is to run the same .NET MAUI app in Windows and Android. If you are on macOS, you can also run the same app on macOS. Having come this far, try some simple changes to the app, like:
  • change the picture on the main screen
  • change the application icon that appears on the phone
  • change the theme color of your app

Happy .NET MAUI development.

Build .NET MAUI apps on macOS with VS Code

.NET Multi-platform App UI (.NET MAUI) is a cross-platform framework for creating native mobile and desktop apps with C# and XAML.It is the evolution of the Xamarin.Forms cross-platform framework. .NET MAUI Release Candidate 2 was made available on April 26, 2022. This means that it is supported by Microsoft for production apps. 

I shall demonstrate how easy it is to get started with.NET MAUI on macOS. In order to follow on, you will need the following pre-requisites:

Getting Started

From within a terminal window on macOS, run the following command:

dotnet new --list

This should will show you the available .NET application templates for cross platform applications:

TemplateShort Name
.NET MAUI App (Preview) .NET MAUI App (Preview) maui
.NET MAUI Blazor App (Preview) maui-blazor
.NET MAUI Class Library (Preview) mauilib
.NET MAUI ContentPage (C#) (Preview) maui-page-csharp
.NET MAUI ContentPage (XAML) (Preview) maui-page-xaml
.NET MAUI ContentView (C#) (Preview) maui-view-csharp
.NET MAUI ContentView (XAML) (Preview) maui-view-xaml
Android Activity template android-activity
Android Application (Preview) android
Android Class Library (Preview) androidlib
Android Java Library Binding (Preview) android-bindinglib
Android Layout template android-layout

In today's exercise, we will create an app using the first maui template.

On the mac, you will need iOS 15.2 SDK (shipped with Xcode 13.2). If you have multiple versions of Xcode, you can choose a suitable version to be used with MAUI with:

sudo xcode-select -s /Applications/Xcode-beta.app/

Let us create a new MAUI app on macOS. In a terminal window, navigate to a suitable work directory, then run the following command to create a .NET MAUI app named 'maui2022':

dotnet new maui -o maui2022
cd maui2022

The full set of .NET 6 TFMs (target framework monikers), including operating-specific ones, are:

net6.0
net6.0-android
net6.0-ios
net6.0-maccatalyst
net6.0-macos
net6.0-tvos
net6.0-windows

Run app on macOS

To run the sample app as a macOS application, we will use the net6.0-maccatalyst target framework moniker:

dotnet build -t:run -f net6.0-maccatalyst

The actual macOS application resides in the Debug/net6.0-maccatalyst/maccatalyst-x64 directory as shown below:

Run app on iOS simulator

To run the sample app as an iOS application, we will use the net6.0-ios target framework moniker:

dotnet build -t:run -f net6.0-ios

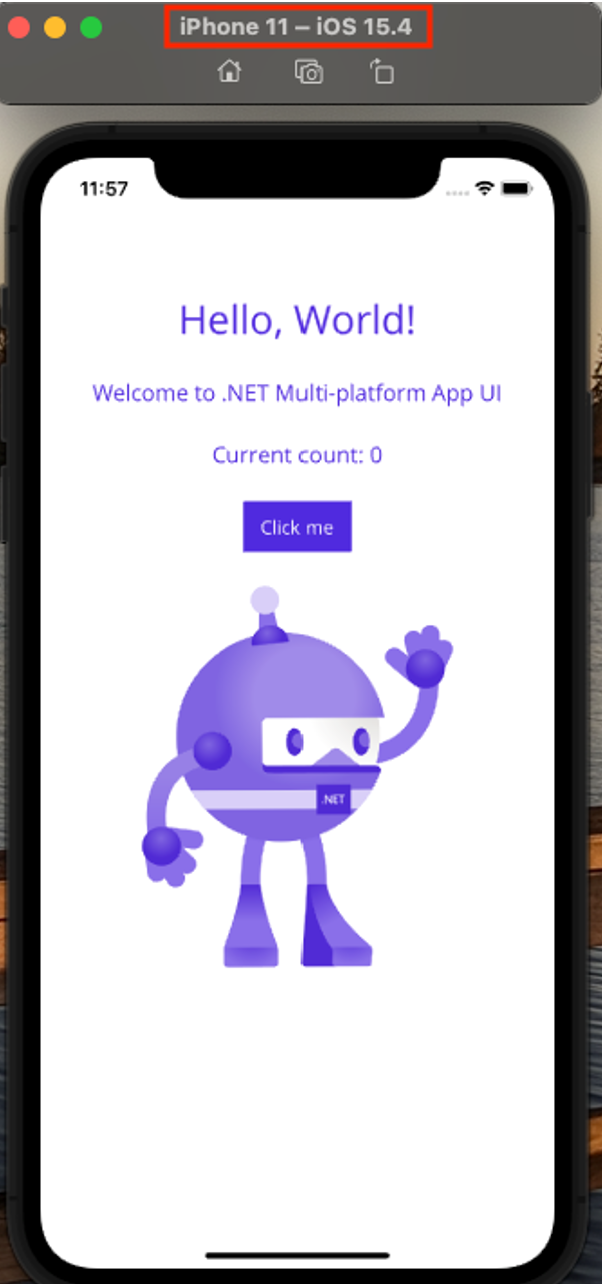
The above opens the app in a default iOS simulator. If you want to target a specific simulator (say iPhone 11), start Xcode, then choose Window >> Devices and Simulators.


Right-click on your device of choice, then select “Copy Identifier”.


Run the following command with the -p switch shown below and replace the highlighted Device ID with the one just copied:

dotnet build -t:Run -f net6.0-ios -p:_DeviceName=:v2:udid=7CD70FD4-BC03-42A9-AAC7-1045F8EB9C32


Run app in Android emulator

To run the sample app as an Android application, it is necessary to open an Android emulator first. The easiest way to do so is to start Android Studio,  then start the AVD Manager.


After you create a virtual device (or emulator), start it by clicking on the green arrow.


Once the emulator starts you can run the sample app in an Android environment.


We will use the net6.0-android target framework moniker to run the sample app in Android:

dotnet build -t:run -f net6.0-android


Making a tiny change

Open the application workspace in VS Code, then open MainPage.xaml.cs in the editor. Change the statement on line 14 from "count++;" to "count += 10;" such that the count increments by 10 instead of 1. When you run the app in the Android emulator, you will see that it behaves as expected.

Conclusion

In this short journey we have learned how easy it is to run the same .NET MAUI app in macOS, iOS and Android. If you are on Windows, you can also run the same app on the Windows Operating System. Having come this far, try some simple changes to the app, like:
  • change the picture on the main screen
  • change the application icon that appears on the phone
  • change the theme color of your app

Happy .NET MAUI development.